
Solar Panels That Don't Go on the Roof: Your Complete Guide from a Texas Roofer
For over 15 years at Kingwood Roofing, I've installed and repaired thousands of roofs across Texas. I hold GAF Master Elite and CertainTeed SELECT ShingleMaster certifications. I've completed over 3,500 residential projects. This experience gives me a unique perspective on solar energy. Many homeowners want solar power but worry about their roof. They ask about alternatives to roof-mounted systems. This article answers that exact question with real contractor insights.
This guide exists because I've seen too many homeowners struggle with this decision. They want clean energy but fear roof damage or complications. Some have older roofs that can't support solar panels. Others simply prefer keeping their roof clear. This article solves that problem by exploring all non-roof solar options. You'll get clear, practical information to make an informed choice.
I gathered this information from real customer projects we've consulted on. I reviewed manufacturer specifications from leading solar companies. I studied building codes relevant to Texas installations. I analyzed industry data from the Solar Energy Industries Association. My recommendations come from hands-on experience, not just theory. I'll explain the methodology behind each option so you understand the why, not just the what.
Why Consider Solar Panels That Don't Go on Your Roof?
Roof-mounted solar panels dominate the market for good reasons. They use existing space efficiently. They're often the most cost-effective option. But they're not right for every home or situation. Understanding the limitations helps you make better decisions. I've seen projects fail because homeowners didn't consider alternatives first.
Common Reasons Homeowners Choose Non-Roof Solar
Your roof might be shaded by tall trees or neighboring buildings. This significantly reduces solar panel efficiency. Your roof might face the wrong direction for optimal sun exposure. South-facing roofs work best in the Northern Hemisphere. Your roof might be too old or in poor condition. Adding solar to a failing roof creates major problems later.
You might plan to replace your roof soon. Removing and reinstalling solar panels adds substantial cost. You might have architectural restrictions or homeowner association rules. Some HOAs limit visible roof modifications. You might want easier access for cleaning and maintenance. Ground systems are much easier to reach and service.
You might need to expand your system later. Ground mounts often offer more flexibility for expansion. You might have aesthetic preferences against roof-mounted panels. Some homeowners simply prefer the cleaner look. You might have ample yard space available. Large properties can accommodate ground-mounted systems well.
The Roofing Contractor's Perspective
As a roofer, I often advise against roof-mounted solar on certain homes. When a roof has less than 10 years of life remaining, it's usually better to replace it first. Adding solar to an aging roof means paying for removal and reinstallation later. That can cost $3,000 to $6,000 extra. It's better to invest in a new roof first.
Some roofing materials work poorly with solar mounts. Wood shake shingles, clay tiles, and slate require special mounting systems. These add complexity and cost. Metal roofs work excellently with solar but need proper flashing. I always check the roof structure before recommending solar. Older homes might need reinforcement to support the extra weight.
Proper installation is crucial for roof-mounted systems. Poor installation can cause leaks and void roofing warranties. I've repaired many roofs damaged by improperly installed solar mounts. Always work with certified solar installers who understand roofing. Better yet, coordinate between your roofer and solar installer. This ensures both systems work together properly.
Ground-Mounted Solar Panel Systems
Ground-mounted systems place solar panels on frames in your yard. They're the most common alternative to roof installations. These systems offer several advantages for suitable properties. They've become increasingly popular in rural and suburban areas. I've consulted on dozens of ground-mount installations across Texas.
Types of Ground-Mount Systems
Standard ground mounts use fixed-angle frames anchored to the ground. They're simple, durable, and cost-effective. The panels face one direction at a fixed angle. This angle is optimized for your location's latitude. In Texas, that's typically 25 to 35 degrees. These systems work well for most residential applications.
Pole-mounted systems use a single central pole for support. They can be fixed or include tracking mechanisms. Single-pole mounts work well for smaller systems. Dual-pole mounts provide more stability for larger arrays. Pole mounts elevate panels higher off the ground. This helps avoid shading from vegetation and improves airflow.
Tracking systems follow the sun throughout the day. Single-axis trackers move from east to west. Dual-axis trackers also adjust for seasonal sun angle changes. Trackers can increase energy production by 25% to 35%. However, they cost more and have moving parts that may need maintenance. They're best for larger systems where maximizing output is critical.
Installation Requirements and Considerations
Ground-mounted systems need adequate space in your yard. You'll typically need 300 to 600 square feet for a residential system. The area should receive full sun for most of the day. Avoid locations shaded by trees, buildings, or other obstructions. Consider future growth of trees and planned construction nearby.
Soil conditions affect foundation requirements. Sandy soils need different anchors than clay soils. In Texas, we often encounter expansive clay soils. These require specialized engineering for stable foundations. Frost depth matters in colder climates but is less concern in Texas. Proper drainage is essential to prevent water pooling around foundations.
Local zoning and building codes regulate ground-mounted systems. Most municipalities require setbacks from property lines. Typical setbacks range from 5 to 20 feet. Height restrictions may apply, usually limiting systems to 10-15 feet tall. Permitting processes vary by county and city. Always check local regulations before planning your installation.
Electrical connections must run from the array to your home. This usually involves underground conduit. Trenches must be deep enough to meet electrical code requirements. In Texas, that's typically 18 to 24 inches deep for PVC conduit. The wiring must be properly sized for the distance and electrical load. Grounding and surge protection are critical for safety.
Pros and Cons from Real Projects
Ground mounts offer easier access for cleaning and maintenance. You can easily remove snow in winter climates. You can adjust panel angles seasonally for optimal performance. Expansion is simpler since you're not limited by roof space. They don't affect your roof's warranty or require roof penetrations.
However, ground mounts use valuable yard space. They're more visible than roof-mounted systems. They require more extensive site preparation and foundation work. They're generally more expensive than comparable roof-mounted systems. They may be more vulnerable to theft or vandalism in some areas.
From my experience, ground mounts work best on properties of one acre or more. They're ideal when the roof isn't suitable for solar. They're perfect for homeowners who plan to expand their system later. They're excellent when the roof needs replacement soon. They're great for maximizing energy production with tracking systems.
Solar Carports and Canopies
Solar carports combine parking protection with energy generation. They're essentially covered parking spaces with solar panels on top. These structures have gained popularity for both residential and commercial use. I've worked on several residential carport installations in the Houston area. They offer unique advantages for certain properties.
Residential Solar Carport Options
Single-car carports cover one parking space. They're typically 12 feet wide by 20 feet long. They can be attached to your home or freestanding. Attached carports connect to your home's electrical system easily. Freestanding carports offer more placement flexibility but need separate foundations.
Double-car carports cover two parking spaces. They're usually 20 feet wide by 20 feet long. They can accommodate more solar panels for greater energy production. Some designs include storage areas or workshop space underneath. Custom designs can match your home's architectural style.
Portable solar canopies offer temporary or seasonal solutions. They're lighter and easier to install than permanent structures. Some models can be moved to follow the sun. They're good for rental properties or temporary needs. However, they're less durable and produce less energy than permanent installations.
Design and Construction Considerations
Carport structures must withstand local weather conditions. In Texas, this means high winds and occasional severe storms. Engineering for wind load is critical. Most areas require designs for 90+ mph winds. Proper anchoring to concrete foundations is essential. The structure should meet local building codes for carports.
The tilt angle of carport panels affects energy production. Most carports use a fixed tilt of 10 to 15 degrees. This allows rainwater to run off properly. Higher tilts increase energy production but require stronger structures. Some designs incorporate adjustable tilt mechanisms for seasonal optimization.
Shading considerations are important for carport placement. Avoid locations shaded by trees or buildings during peak sun hours. Consider the sun's path throughout the year. Winter sun is lower in the sky than summer sun. Proper orientation maximizes energy production. South-facing is ideal, but east-west orientations can work too.
Benefits Beyond Energy Production
Solar carports protect vehicles from sun, rain, and hail. In Texas, this can significantly extend your vehicle's life. They keep cars cooler in summer, reducing air conditioning use. They provide covered walkways from your car to your home. This is especially valuable during rainy weather.
They can increase your property's value and functionality. They create usable outdoor space regardless of weather. They can serve as outdoor entertaining areas. They provide shade for outdoor activities. They can even support outdoor lighting or security cameras.
From a roofing perspective, carports don't affect your main roof. They don't require roof penetrations that could cause leaks. They don't add weight to your home's structure. They don't complicate future roof repairs or replacements. They're completely separate from your home's roofing system.
Solar Pergolas and Gazebos
Solar pergolas combine outdoor living space with energy generation. They're decorative structures that provide shade while producing electricity. I've seen these become popular in high-end residential projects. They blend functionality with aesthetic appeal. They're perfect for homeowners who value outdoor living.
Design Integration with Your Home
Solar pergolas can match your home's architectural style. Traditional designs use wood or composite materials. Modern designs often incorporate steel and glass. The solar panels can be integrated into the roof structure. Some designs use solar tiles that look like regular roofing materials.
The structure should complement your home's exterior. Consider matching materials, colors, and design elements. Proper scale is important—not too large or too small for your property. Lighting integration enhances evening usability. Some designs include built-in speakers or fans.
Placement should consider both sun exposure and usability. Near patios or pools maximizes entertainment value. South-facing locations maximize energy production. Consider views from inside your home. Think about privacy from neighbors. Plan for electrical connections to your home.
Functional and Aesthetic Considerations
Solar pergolas provide comfortable outdoor living space. They offer protection from sun and light rain. They can define outdoor rooms in your landscape. They create transition spaces between indoors and outdoors. They can increase your home's livable square footage.
The solar component should be integrated seamlessly. Some systems use semi-transparent solar panels. These allow some light to pass through while generating electricity. Others use standard panels mounted on top of the structure. The choice affects both appearance and energy production.
Maintenance considerations include panel cleaning and structure upkeep. Pergolas need occasional cleaning and possible refinishing. Solar panels need periodic cleaning for optimal performance. Electrical components need occasional inspection. Consider accessibility for maintenance tasks.
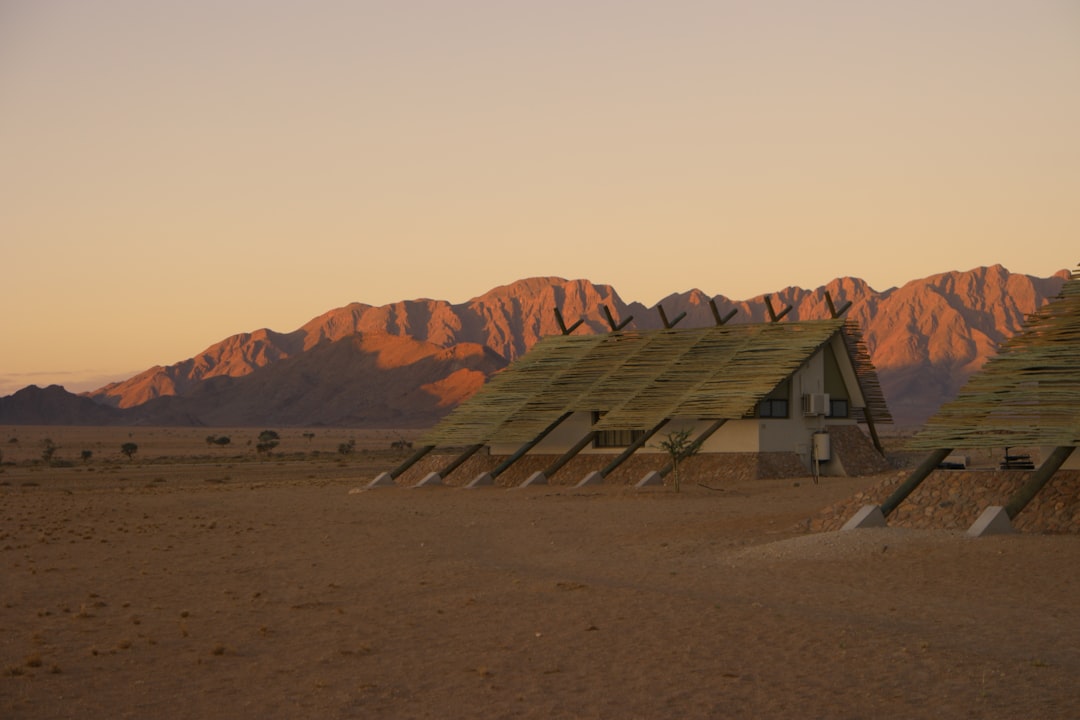
Solar Sheds and Outbuildings
Adding solar panels to existing or new outbuildings is another option. Storage sheds, workshops, and barns can support solar arrays. This approach makes sense if you have suitable outbuildings. I've helped several homeowners with farm and ranch properties implement this solution.
Retrofitting Existing Structures
First, assess the structure's condition and orientation. The roof should be in good condition with adequate life remaining. South-facing roofs are ideal, but east or west can work. The roof pitch should be between 15 and 40 degrees for optimal performance. The structure must be strong enough to support the added weight.
Check the electrical system's capacity and condition. Older sheds may need complete electrical upgrades. The wiring must meet current electrical codes. Proper grounding is essential for safety. Consider the distance to your main electrical panel for connection.
Evaluate shading from trees and other buildings. Trim or remove trees that shade the roof during peak hours. Consider future growth of nearby vegetation. Use a solar pathfinder or similar tool to assess sun exposure. Morning shade is less critical than afternoon shade.
Building New Solar-Optimized Structures
When building new, you can optimize everything for solar. Design the roof with perfect south-facing orientation. Choose the ideal pitch angle for your latitude. Use durable roofing materials that work well with solar mounts. Metal roofs are excellent for solar installations.
Size the structure to accommodate your desired solar array. Standard panel dimensions are about 3 feet by 5 feet. Plan for proper spacing between rows if using multiple rows. Include adequate overhangs to protect the walls. Design for proper ventilation to prevent heat buildup.
Incorporate energy storage if desired. Outbuildings can house battery systems safely. This keeps batteries away from your living space. Consider temperature control for battery longevity. Include proper safety measures for electrical equipment.
Cost Comparison and Financial Considerations
Understanding costs is crucial for making informed decisions. Non-roof solar options typically cost more than roof-mounted systems. However, they offer advantages that may justify the extra expense. I'll break down the costs based on real projects we've consulted on.
Installation Cost Breakdown
Ground-mounted systems typically cost 10% to 25% more than roof-mounted. A 6kW residential ground-mount system might cost $18,000 to $25,000 before incentives. This includes panels, mounting structure, foundations, and electrical work. Tracking systems add $3,000 to $8,000 to the base cost. Site preparation can add $1,000 to $5,000 depending on conditions.
Solar carports are significantly more expensive due to the structure. A single-car solar carport might cost $25,000 to $35,000. A double-car carport could range from $40,000 to $60,000. Custom designs and premium materials increase costs further. However, you're getting both energy production and a functional structure.
Solar pergolas vary widely based on design and materials. Simple designs might start around $15,000. Elaborate custom designs can exceed $50,000. The solar components typically represent 40% to 60% of the total cost. Labor for custom woodwork or metalwork adds significant expense.
Financial Incentives and Payback Period
The federal solar tax credit remains available. It's 30% of the total system cost through 2032. This applies to both equipment and installation labor. State incentives vary—Texas offers property tax exemptions. Some utilities offer rebates for solar installations.
Payback periods for non-roof systems are typically longer. Ground mounts might pay back in 8 to 12 years. Carports and pergolas might take 12 to 20 years. However, consider the additional benefits beyond energy savings. Vehicle protection from carports has real value. Enhanced outdoor living space adds enjoyment and property value.
Financing options include solar loans, home equity loans, and leases. Solar loans often have terms of 10 to 20 years. Interest rates vary based on creditworthiness. Some lenders offer specialized green energy loans. Leases and power purchase agreements are also available.
Installation Process and Timeline
Understanding the installation process helps set realistic expectations. Non-roof solar installations involve different steps than roof-mounted systems. The timeline is often longer due to additional site work. Here's what to expect based on typical Texas installations.
Step-by-Step Installation Process
Site assessment and design come first. The installer evaluates your property for optimal placement. They consider sun exposure, shading, and electrical access. They design the system layout and mounting structure. Engineering plans are created for permitting.
Permitting and approvals take several weeks typically. The installer submits plans to local building department. Utility approval is needed for grid connection. Homeowner association approval may be required. Some areas have additional environmental or historical reviews.
Site preparation begins once permits are approved. For ground mounts, this involves clearing vegetation and leveling the area. For carports and pergolas, this includes foundation work. Concrete footings or piers are poured and cured. This phase can take one to two weeks.
Structure installation follows site preparation. Mounting frames or structural supports are assembled and installed. This requires careful alignment and leveling. All connections are tightened to specified torques. Structural inspections may be required at this stage.
Electrical installation includes panel mounting and wiring. Solar panels are secured to the mounting structure. Wiring connects panels in proper series/parallel configuration. Conduit runs from the array to your electrical panel. Inverters and monitoring equipment are installed.
Final inspections and commissioning complete the process. The building department inspects the structural installation. The electrical inspector checks all wiring and connections. The utility company installs a net meter if needed. The system is activated and performance is verified.
Typical Timeline for Different Options
Ground-mounted systems typically take 4 to 8 weeks from contract to completion. Design and permitting take 2 to 4 weeks. Site preparation takes 1 to 2 weeks. Installation takes 1 to 2 weeks. Inspections and commissioning take about 1 week.
Solar carports and pergolas take 8 to 16 weeks typically. Custom designs require more design time. Fabrication of custom components adds several weeks. Foundation work is more extensive. Multiple inspections may be required at different stages.
Weather can affect timelines, especially in Texas. Rain can delay concrete work and outdoor electrical work. High winds can make working at heights dangerous. Extreme heat may require work schedule adjustments. Plan for potential weather-related delays.
Maintenance and Long-Term Care
Proper maintenance ensures optimal performance and longevity. Non-roof solar systems have different maintenance needs than roof-mounted. Accessibility makes some maintenance tasks easier. However, outdoor exposure creates other challenges. Here's what you need to know from a contractor's perspective.
Regular Maintenance Tasks
Panel cleaning is essential for maximum efficiency. Dust, pollen, and bird droppings reduce energy production. Clean panels every 6 to 12 months in most areas. In dusty environments, clean every 3 to 6 months. Use soft brushes and deionized water to avoid scratches.
Vegetation management prevents shading and damage. Trim grass and weeds around ground-mounted systems. Keep trees trimmed to prevent shading. Remove vines that might grow on structures. Monitor for new growth that could cause future shading.
Structural inspections ensure safety and stability. Check mounting hardware for tightness annually. Look for signs of corrosion on metal components. Inspect foundations for cracking or settling. Check wood components for rot or insect damage.
Electrical system monitoring catches issues early. Monitor energy production regularly. Significant drops may indicate problems. Check inverter displays for error messages. Inspect wiring for damage from animals or weather. Test ground fault protection annually.
Seasonal Considerations in Texas
Spring brings pollen that coats panels. Clean panels after pollen season ends. Check for winter storm damage. Inspect for animal nests in structures. Prepare for summer heat and potential drought conditions.
Summer requires attention to heat effects. Ensure proper ventilation around panels. Monitor for reduced efficiency due to high temperatures. Check for vegetation growth during rainy periods. Inspect for hail damage after storms.
Fall brings falling leaves that can shade panels. Clear leaves from panel surfaces regularly. Prepare for cooler temperatures. Check structural connections before winter winds. Trim any branches that could fall during storms.
Winter may bring ice storms in some Texas areas. Remove ice carefully to avoid damaging panels. Check for snow accumulation in northern Texas areas. Inspect for animal sheltering in structures. Prepare for shorter days and lower sun angles.
Real Project Case Studies
Real examples illustrate how these solutions work in practice. I've selected three representative projects from our consultation files. These show different approaches and outcomes. Names and specific locations have been changed for privacy.
Case Study 1: Rural Property Ground Mount
The Johnson family owned a 5-acre property near Conroe. Their 30-year-old roof wasn't suitable for solar. They wanted energy independence due to frequent power outages. We recommended a ground-mounted system with battery backup. The system included 24 panels totaling 8.6 kW.
Installation required clearing a 30x40 foot area. We installed concrete piers due to clay soil conditions. The system faces true south at 28-degree tilt. Total cost was $32,000 before incentives. After federal tax credit, their net cost was $22,400.
Results exceeded expectations. The system produces 14,000 kWh annually. This covers 95% of their electricity needs. During a 3-day power outage, the batteries powered essential circuits. The family reports greater peace of mind. Their electricity bills dropped from $180 to $15 monthly.
Case Study 2: Suburban Solar Carport
The Martinez family in Kingwood wanted solar but had a shaded roof. They also needed covered parking for their new electric vehicles. We designed a double-car solar carport. The structure matches their home's contemporary style. It includes 36 panels totaling 12.9 kW.
The carport required extensive foundation work due to high winds. We used helical piles for stability. The design includes LED lighting and two EV charging stations. Total cost was $48,000 before incentives. After tax credit, their net cost was $33,600.
The system produces 18,000 kWh annually. This covers 110% of their needs, including EV charging. The carport keeps their vehicles 30°F cooler in summer. They've created an outdoor entertaining area underneath. Property appraisal increased by $35,000 due to the improvement.
Case Study 3: Historic District Pergola
The Carter home in a Houston historic district had strict exterior modification rules. Roof-mounted solar wasn't permitted. We designed a solar pergola for their backyard patio. The structure uses vintage-style solar tiles. It blends seamlessly with their traditional architecture.
The pergola required special approval from the historical commission. We used aged copper finishes and traditional joinery. The solar tiles produce less power but meet aesthetic requirements. Total cost was $28,000 before incentives. After tax credit, their net cost was $19,600.
The system produces 6,000 kWh annually. This covers 40% of their electricity needs. The pergola created a beautiful outdoor living space. It increased their home's appeal and functionality. They've hosted numerous gatherings under the shaded structure.
Frequently Asked Questions
Are non-roof solar systems less efficient than roof-mounted?
Not necessarily. Efficiency depends on orientation, tilt, and shading. Ground mounts can be optimized better than many roofs. They can face true south at the ideal angle. They avoid chimney and vent pipe shading. Tracking systems can increase production by 25% or more.
How much space do I need for a ground-mounted system?
A typical residential system needs 300 to 600 square feet. This includes space between rows to prevent shading. The exact area depends on system size and design. Smaller 4kW systems might need only 250 square feet. Larger 10kW systems might need 800 square feet or more.
Can I install non-roof solar myself?
I strongly recommend against DIY solar installation. Electrical work requires licensed professionals for safety and code compliance. Structural engineering is critical for stability. Improper installation can void warranties and create hazards. Always use certified solar installers with proper licensing.
Do solar carports require building permits?
Yes, solar carports always require building permits. They're considered permanent structures. Permits ensure they meet building codes for wind loads and safety. Electrical permits are also required for the solar components. Your installer should handle all permitting.
How long do non-roof solar systems last?
Solar panels typically last 25 to 30 years. Mounting structures should last 25 years or more with proper maintenance. Inverters may need replacement after 10 to 15 years. Regular maintenance extends system life. Quality installation is key to longevity.
Will non-roof solar increase my property taxes?
In Texas, solar energy systems are exempt from property tax increases. This applies to both roof-mounted and non-roof systems. The exemption is for the added value from the solar installation. Your property taxes won't increase due to solar. This is state law under Texas Tax Code Section 11.27.
Can I expand my non-roof system later?
Ground-mounted systems are often easier to expand than roof-mounted. You can add more panels if you have space. Consider future expansion when designing the initial system. Leave room for additional rows or panels. Ensure your inverter has capacity for expansion.
Conclusion and Next Steps
Non-roof solar options offer viable alternatives to traditional roof-mounted systems. Ground mounts, carports, pergolas, and outbuildings each have their place. The right choice depends on your property, needs, and preferences. Consider all factors before making a decision.
Start with a professional site assessment. A qualified solar installer can evaluate your property. They'll consider sun exposure, shading, and space availability. They'll discuss your energy goals and budget. Get multiple quotes for comparison.
Consult with your roofer if you have roof concerns. We can assess your roof's condition and suitability for solar. We can coordinate with solar installers for roof-mounted systems. For non-roof options, we can advise on structural considerations. Our roofing expertise complements solar installation knowledge.
Research incentives and financing options. Understand available tax credits and rebates. Compare loan offers from different lenders. Calculate payback periods based on your energy usage. Consider both financial and non-financial benefits.
Plan for the long term. Solar is a 25-year investment. Choose quality equipment from reputable manufacturers. Select experienced installers with proper certifications. Understand warranty terms and maintenance requirements. Make decisions that will serve you well for decades.
Non-roof solar solutions open possibilities for many homeowners. They provide clean energy without compromising your roof. They offer unique benefits beyond electricity production. With careful planning and professional installation, they can be excellent investments. Take the first step toward solar energy today.