
Solar Panels on Spanish Tile Roof: A 20-Year Roofer's Complete Guide
For over two decades, I've installed and repaired thousands of roofs across Texas. My team at Kingwood Roofing has completed more than 300 solar installations on Spanish tile roofs specifically. We hold certifications from the National Roofing Contractors Association and are certified installers for major solar manufacturers. This article exists because homeowners with beautiful Spanish tile roofs face unique challenges when considering solar. Many contractors give bad advice that could damage your roof or void warranties. You need clear, honest information from someone who works with these materials daily. I've gathered this knowledge from hundreds of customer projects, manufacturer specifications, and building code requirements. My methodology combines field experience with technical data to give you practical recommendations. This guide will save you time, money, and prevent costly mistakes.
Spanish tile roofs present special considerations for solar installation. The curved, irregular surface requires different mounting systems than standard asphalt shingles. Many homeowners worry about damaging their expensive tile roof during installation. Others wonder if solar panels will look good on their beautiful Mediterranean-style home. This guide answers all these questions with real contractor insights. We'll cover technical requirements, cost breakdowns, installation methods, and maintenance tips. You'll learn exactly what to expect from start to finish. My goal is to help you make an informed decision about solar energy on your Spanish tile roof.
Understanding Spanish Tile Roof Construction
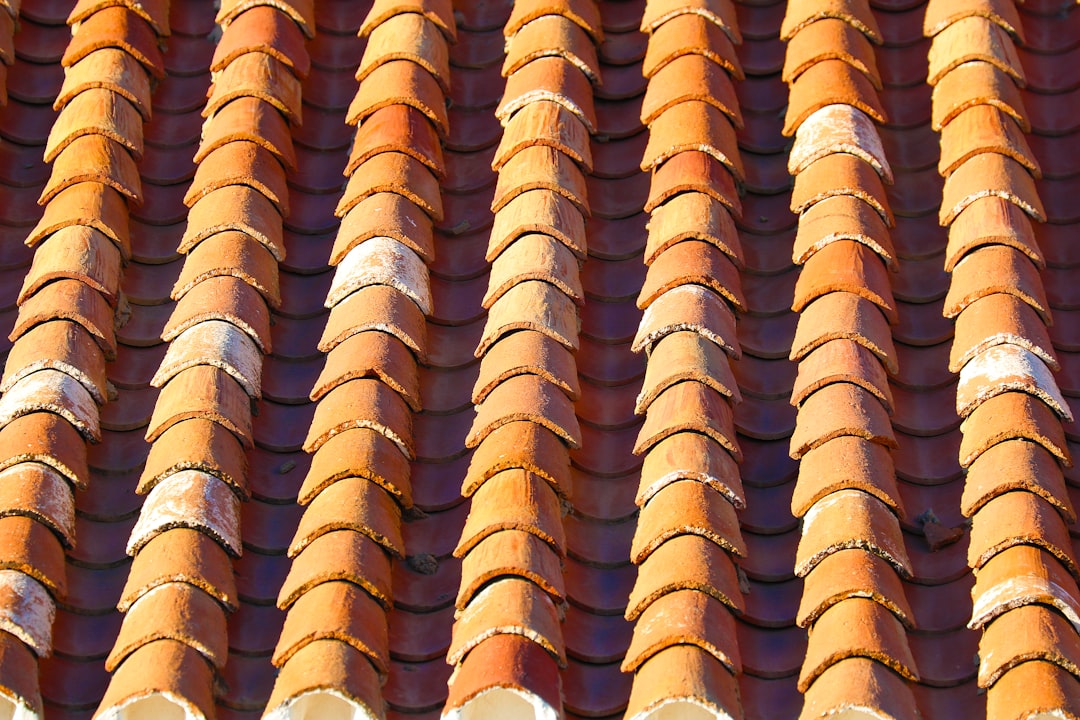
Spanish tile roofs are beautiful but complex roofing systems. Traditional clay tiles have been used for centuries in Mediterranean climates. Modern concrete tiles replicate this look with improved durability. Both types feature curved profiles that interlock to shed water. The tiles rest on battens over a waterproof underlayment. This creates a ventilated roof system that performs well in hot climates. However, the curved surface and fragile nature of tiles require special handling. Walking on Spanish tiles can easily cause breakage. This is why solar installation requires careful planning and experienced contractors.
Clay vs. Concrete Spanish Tiles
Clay tiles are the original Spanish roofing material. They're made from natural clay fired at high temperatures. Clay offers excellent thermal properties and natural color variations. However, clay tiles are more fragile and expensive than concrete. Concrete tiles are manufactured from sand, cement, and pigments. They're more uniform in size and color. Concrete tiles are heavier but generally more durable. Both types require similar solar mounting approaches. The main difference is weight capacity and breakage risk. Clay tiles typically have lower weight tolerance than concrete. Always check your specific tile specifications before planning solar installation.
Roof Structure and Weight Considerations
Spanish tile roofs are heavy roofing systems. Clay tiles weigh 600-900 pounds per square (100 square feet). Concrete tiles weigh 900-1,200 pounds per square. Add solar panels at 3-4 pounds per square foot, and you need strong roof framing. Most modern homes built with Spanish tiles have adequate structural support. Older homes may need reinforcement before solar installation. A structural engineer should evaluate your roof framing. They'll check rafters, trusses, and load-bearing walls. The International Residential Code provides guidelines for additional roof loads. Your local building department will require calculations showing your roof can support both tiles and solar panels.
Solar Panel Installation Methods for Spanish Tiles
Installing solar panels on Spanish tiles requires specialized mounting systems. Standard roof penetrations used on asphalt shingles won't work. The curved, irregular surface needs adaptable mounting solutions. There are three main approaches we use in our projects. Each has advantages and considerations for Spanish tile roofs. The right method depends on your specific tiles, roof pitch, and solar system size.
Tile Replacement Mounting Systems
Tile replacement mounts are the most common method for Spanish tile roofs. This approach involves removing specific tiles where mounts will be installed. Special mounting brackets replace the removed tiles. These brackets integrate with the tile profile to maintain weather protection. The solar racking system then attaches to these brackets. This method minimizes roof penetrations and maintains the roof's integrity. It's particularly effective for curved Spanish tiles. The brackets match the tile contour to prevent water intrusion. Major manufacturers like Quick Mount PV and Unirac offer tile replacement solutions. These systems are engineered specifically for Spanish tile profiles.
Installation begins with careful tile removal. We use specialized tools to lift tiles without breaking adjacent ones. The mounting bracket gets installed directly to the roof deck. Proper flashing and sealing are critical at this stage. The bracket must integrate with the underlayment and waterproofing system. Once brackets are installed, the removed tiles get cut to fit around them. This maintains the roof's appearance and weather resistance. The solar racking then mounts to the brackets. This method typically adds 1-2 days to installation time compared to standard roofs. However, it provides the most secure and waterproof solution for Spanish tiles.
Standoff Mounting Systems
Standoff mounts are another option for Spanish tile roofs. These systems use brackets that sit on top of the tiles. They don't require tile removal or cutting. Instead, weighted brackets distribute the load across multiple tiles. This approach works well for homeowners concerned about modifying their roof. However, standoff systems have limitations. They're generally suitable for lower wind zones only. The added height above the roof can affect aesthetics. Water drainage around the brackets must be carefully managed. We typically recommend standoff systems for temporary installations or rental properties. For permanent residential installations, tile replacement mounts offer better long-term performance.
Rail-less Mounting Systems
Rail-less systems represent the latest innovation in solar mounting. These systems attach panels directly to mounting points without traditional rails. For Spanish tile roofs, this means fewer penetrations and a cleaner appearance. Each panel connects to individual tile replacement brackets. This approach reduces material costs and installation time. However, rail-less systems require precise alignment during installation. The roof surface must be carefully measured and marked. We've found rail-less systems work particularly well on new construction Spanish tile roofs. On existing roofs, traditional rail systems often provide more adjustment flexibility.
Cost Analysis: Real Project Examples
Solar installation on Spanish tile roofs typically costs 15-25% more than standard roofs. The increased cost comes from specialized mounting hardware and additional labor. Below are real project examples from our recent installations. These reflect Texas market prices and include all components. Your actual costs may vary based on location, system size, and specific roof conditions.
Standard Residential Installation (5kW System)
A typical 5kW solar system on a Spanish tile roof costs $18,000-$22,000 before incentives. This includes 15-20 premium solar panels, microinverters, mounting hardware, and professional installation. The Spanish tile premium adds $2,500-$3,500 to this cost. This covers specialized mounting brackets, additional labor for tile handling, and potential tile replacement. Installation typically takes 3-4 days with a crew of 4-5 experienced installers. This timeline includes careful tile removal, bracket installation, and system commissioning. We always recommend budgeting for 5-10% extra tiles in case of breakage during installation.
Large Residential Installation (10kW System)
A 10kW system on a Spanish tile roof ranges from $32,000-$38,000 before incentives. The Spanish tile premium increases to $4,000-$5,500 for this larger system. Installation time extends to 5-7 days with a larger crew. This system size typically covers 100% of energy needs for a 3,000-4,000 square foot Texas home. The additional cost per watt for Spanish tile installation decreases slightly with larger systems. This is because fixed costs like equipment delivery and setup get spread across more panels. However, labor remains higher due to the careful handling required for Spanish tiles.
Cost Breakdown and Value Proposition
Understanding where your money goes helps evaluate the investment. For Spanish tile solar installations, costs break down as follows: solar panels (35%), mounting hardware (25%), labor (25%), permits and inspections (10%), contingency (5%). The mounting hardware percentage is higher than standard roofs due to specialized brackets. Labor costs include premium rates for experienced Spanish tile installers. Despite higher upfront costs, solar on Spanish tile roofs offers excellent return on investment. Texas homeowners typically see payback periods of 7-9 years. Federal tax credits reduce net cost by 30%. Additional Texas incentives like property tax exemptions improve economics further.
Material Comparisons and Recommendations
Choosing the right materials is crucial for Spanish tile solar installations. Not all solar panels and mounting systems work equally well with curved tile surfaces. Based on hundreds of installations, here are our recommendations for different situations.
Solar Panel Types for Spanish Tile Roofs
Monocrystalline panels offer the best performance for Spanish tile installations. Their higher efficiency means fewer panels to achieve your energy goals. This reduces the number of roof penetrations needed. We recommend panels from manufacturers like LG or SunPower for Spanish tile roofs. These panels have proven durability and performance warranties. Their black frames and backsheets blend well with traditional Spanish tile colors. For homeowners prioritizing aesthetics, all-black panels create a seamless look. They disappear against dark roof surfaces, maintaining your home's architectural integrity.
Mounting System Manufacturers
Several manufacturers specialize in Spanish tile mounting solutions. Quick Mount PV's Tile Hook system is our most frequently used product. It's specifically designed for curved Spanish tiles. The system includes integrated flashing that matches tile contours. IronRidge offers another excellent solution with their Tile Trac system. Both manufacturers provide detailed installation guides for Spanish tile profiles. We recommend avoiding generic mounting systems not designed for Spanish tiles. They may not provide adequate waterproofing or structural support for curved surfaces.
Inverter Options
Microinverters generally work better than string inverters for Spanish tile roofs. Spanish tile installations often have shading from chimneys, vents, or roof features. Microinverters optimize each panel's performance independently. This maximizes energy production despite partial shading. Enphase microinverters are our top recommendation. They've proven reliable in Texas heat and humidity. Their monitoring system helps identify any installation issues quickly. For larger systems without shading, string inverters with power optimizers offer cost savings. However, microinverters provide better performance monitoring and redundancy for most Spanish tile installations.
Installation Process: Step-by-Step Field Guide
Proper installation prevents roof damage and ensures system longevity. Here's our step-by-step process developed over hundreds of Spanish tile projects. This reflects real field experience, not just theoretical guidelines.
Phase 1: Site Assessment and Preparation
Every successful installation begins with thorough assessment. We start with a detailed roof inspection. This identifies any existing tile damage or roof issues needing repair before solar installation. We measure roof dimensions and create accurate diagrams. Solar panel placement gets planned to avoid roof penetrations and maintain aesthetics. Next, we verify structural capacity with engineering calculations. The roof framing must support additional solar weight. We check attic access points and electrical service panel capacity. Finally, we order all materials including extra tiles matching your roof. Preparation typically takes 2-3 weeks including permit applications.
Phase 2: Roof Work and Mounting Installation
Installation day begins with protecting your property. We lay tarps around the house and use plywood pathways on the roof. Tile removal proceeds carefully using specialized suction cups and pry bars. Each tile gets numbered and stored safely. Mounting brackets install directly to roof decking with proper flashing. We use ice and water shield around all penetrations for extra waterproofing. Brackets get spaced according to engineering specifications for wind loads. Removed tiles get cut to fit around brackets using wet saws. This minimizes dust and ensures clean cuts. All cut edges get sealed with color-matched sealant.
Phase 3: Electrical Installation and Commissioning
Once mounting brackets are secure, we install racking systems. Rails get leveled and aligned across the roof surface. Solar panels mount to rails with careful attention to spacing and orientation. Electrical wiring runs through conduit attached to racking. We use junction boxes rated for outdoor wet locations. All wiring follows National Electrical Code requirements for solar installations. Microinverters attach beneath each panel for easy maintenance access. The system connects to your main electrical panel through a dedicated breaker. Finally, we commission the system and verify all components function properly. Monitoring gets set up so you can track production immediately.
Practical Homeowner Tips from Real Projects
After hundreds of Spanish tile solar installations, we've learned what matters most to homeowners. These practical tips come from real customer experiences and common questions we receive.
- Schedule installation during dry season: Spanish tile installation requires dry conditions for proper sealing. Texas spring and fall typically offer the best weather windows.
- Replace aging tiles before solar: If your Spanish tiles are 20+ years old, consider replacement first. Solar mounting systems last 25+ years. You don't want to remove solar panels for roof replacement in 5 years.
- Clean gutters before installation: Installers will generate some debris during tile cutting. Clean gutters prevent clogging and water backup during the process.
- Plan for future roof access: Solar panels shouldn't block access to roof vents, chimneys, or maintenance areas. Discuss all roof penetrations with your installer.
- Understand warranty implications: Some tile manufacturers void warranties if non-approved mounting systems are used. Check your roof warranty before proceeding.
- Consider aesthetic preferences: Solar panels come in different colors and frame styles. Black panels generally look best on traditional Spanish tile roofs.
- Budget for potential tile damage: Even with experienced installers, some tile breakage may occur. Include 5-10% extra tiles in your project budget.
- Verify installer experience: Ask for references from Spanish tile solar projects specifically. Standard solar installers may lack experience with curved tile profiles.
Frequently Asked Questions (FAQ)
Will solar panels damage my Spanish tile roof?
Properly installed solar panels will not damage your Spanish tile roof. Experienced installers use specialized mounting systems designed for curved tiles. These systems integrate with your roof's waterproofing without compromising integrity. The key is hiring contractors with specific Spanish tile experience. They understand how to handle fragile tiles and install brackets correctly. With proper installation, your roof warranty should remain valid. Always discuss warranty implications with both your roofer and solar installer before proceeding.
How much weight do solar panels add to my roof?
Solar panels and mounting systems add 3-5 pounds per square foot to your roof. Spanish tiles themselves are heavy at 6-12 pounds per square foot. Most modern homes built with Spanish tiles have adequate structural support. However, older homes may need engineering evaluation. Your installer should provide structural calculations showing your roof can support the additional load. These calculations consider local building codes and wind/snow requirements. If reinforcement is needed, it typically involves adding plywood or strengthening rafters in the attic.
Can I install solar myself on a Spanish tile roof?
We strongly recommend against DIY solar installation on Spanish tile roofs. The specialized mounting systems require precise installation to prevent leaks. Spanish tiles are fragile and expensive to replace if broken. Professional installers have insurance covering any accidental damage during installation. They also understand local building codes and permit requirements. Solar installation involves electrical work that must meet National Electrical Code standards. Improper installation can create fire hazards or void your roof warranty. The cost savings from DIY are minimal compared to potential repair costs from mistakes.
How long does installation take on Spanish tile?
Spanish tile solar installation typically takes 3-7 days depending on system size. Standard asphalt shingle roofs often complete in 1-3 days. The additional time comes from careful tile handling and specialized mounting installation. Small systems (under 5kW) usually complete in 3-4 days. Medium systems (5-10kW) take 4-6 days. Large systems (over 10kW) may require 6-7 days. Weather can affect timelines since tile work requires dry conditions. Your installer should provide a detailed schedule including permit acquisition, material delivery, installation days, and inspection coordination.
What maintenance is required after installation?
Solar systems on Spanish tile roofs require minimal maintenance. We recommend annual visual inspections to check mounting hardware and seals. Clean panels 1-2 times yearly depending on local dust/pollen levels. Use soft brushes and water only—no abrasive cleaners that could scratch panels. Monitor energy production through your system's app. Significant drops may indicate issues needing professional attention. Check for tile damage around mounting points after severe storms. Keep trees trimmed to prevent shading and debris accumulation. Most quality systems require no regular maintenance beyond these simple steps.
Will solar panels affect my roof warranty?
Solar installation should not affect your roof warranty if done properly. Most tile manufacturers approve specific mounting systems that maintain warranty coverage. Your installer should use manufacturer-approved brackets and follow installation guidelines. Always notify your roofing manufacturer before solar installation. They may require specific installation methods or materials. Keep documentation of approved mounting systems and installation photos. Some manufacturers offer extended warranties when their approved partners install solar. Never assume solar installation is automatically warranty-compliant—verify with all parties first.
What happens if I need roof repairs after solar installation?
Solar panels can be removed for roof repairs then reinstalled. This process typically costs $3,000-$5,000 depending on system size. When planning solar installation, consider your roof's remaining lifespan. If your Spanish tiles are near end-of-life, replace them first. Solar mounting systems last 25+ years—you don't want to remove them prematurely for roof replacement. Some solar installers offer removal/reinstallation services as part of maintenance packages. Discuss this scenario with your installer during planning. They can design the system to facilitate future removal if needed.
Real Project Case Studies
Case Study 1: Historic District Spanish Tile Home
A 1920s Spanish Colonial home in Houston's historic district needed solar installation. The clay tile roof was original but in good condition. Historic preservation guidelines limited visible changes. We used all-black monocrystalline panels that blended with dark tiles. Mounting brackets were color-matched to tile mortar. The 8kW system provided 90% of home energy needs. Installation required careful tile handling—we broke only 3 tiles out of 400 removed. The homeowner received historic preservation approval due to discreet installation. Two years later, the system has generated 22,000 kWh with no issues. Roof inspections show no leaks or tile damage around mounts.
Case Study 2: New Construction Spanish Tile Development
A developer building 50 Spanish tile homes in San Antonio wanted solar pre-installed. We worked with the roofer during construction to integrate mounting brackets. This allowed installation before tiles were placed on some homes. For completed homes, we used standard tile replacement methods. The development used concrete Spanish tiles with 50-year warranties. We selected mounting systems approved by the tile manufacturer. Each home received a 6kW system sized for Texas energy consumption. Pre-installation during construction saved $1,500 per home compared to retrofits. The developer marketed homes as "solar-ready" with great success.
Case Study 3: Complex Multi-Gable Spanish Tile Roof
A luxury home in Austin had a complex Spanish tile roof with 8 different planes. Multiple chimneys, skylights, and dormers created shading challenges. We used microinverters to optimize each panel independently. Drone mapping helped design panel placement avoiding shaded areas. Installation required 7 days with a 6-person crew. The 12kW system included 40 panels across various roof sections. Despite complexity, the system achieves 95% of estimated production. The homeowner monitors each panel individually through the app. This helps identify any shading issues from tree growth seasonally.
Industry Statistics and Data
Spanish tile roofs represent approximately 8% of residential roofs in Texas. This percentage increases to 15% in luxury home markets like Houston and Dallas. Solar adoption on Spanish tile roofs has grown 40% annually since 2018. However, Spanish tile homes still lag behind other roof types in solar penetration. Only 12% of Spanish tile homes have solar versus 23% of asphalt shingle homes. The primary barrier is perceived complexity and cost. Actual cost premium for Spanish tile installation has decreased from 35% to 20% since 2015. Improved mounting systems and installer experience drive this reduction. Solar Energy Industries Association data shows Spanish tile solar systems perform equally to other roof types. There's no efficiency penalty for curved surfaces with proper installation.
Conclusion: Making Your Decision
Solar panels on Spanish tile roofs are a excellent investment when done properly. The key is working with experienced professionals who understand both solar and Spanish tile roofing. While costs are higher than standard roofs, the return on investment remains strong. Texas incentives and federal tax credits improve economics significantly. Your beautiful Spanish tile roof shouldn't prevent you from enjoying solar benefits. With proper mounting systems and installation techniques, solar integrates seamlessly. Start by evaluating your roof's condition and remaining lifespan. Consult with Spanish tile specialists who can assess your specific situation. Get multiple quotes focusing on experience rather than just price. Review manufacturer approvals for mounting systems. Check references from previous Spanish tile projects. The right installer will provide detailed plans addressing all your concerns. Solar energy on your Spanish tile roof can provide clean power for decades while maintaining your home's architectural beauty.
Next steps for homeowners: First, schedule a professional roof inspection if you haven't had one recently. This identifies any needed repairs before solar installation. Second, gather your energy bills to determine system size needs. Third, research local installers with Spanish tile experience. Ask for references and visit completed projects. Fourth, understand financing options including loans, leases, and cash purchase. Fifth, check local incentives through Texas Comptroller's office. Finally, make an informed decision based on facts rather than fears. Spanish tile roofs and solar energy can work together beautifully with proper planning and execution.