
Shingled PV Solar Roofs: A 25-Year Roofer's Complete Guide to Modern Energy Solutions
I have installed and repaired roofs for over twenty-five years. Our team has completed more than four thousand roofing projects. I hold certifications from GAF, CertainTeed, and the North American Board of Certified Energy Practitioners (NABCEP). This experience gives me a unique view. I see roofs from the ground up and from the shingle down. Today, I want to share honest, practical knowledge about shingled photovoltaic (PV) systems. This article exists because homeowners face a confusing choice. Should you add bulky solar panels to your existing roof? Or should you install a beautiful, integrated solar roof? Many people do not know shingled PV technology exists. They do not understand its benefits or its costs. This guide solves that problem. It answers your real questions with clear, expert advice. The information here comes from my hands-on work. It is based on installing these systems on customer homes. I studied manufacturer specifications from companies like GAF Energy and CertainTeed Solar. I reviewed building codes like the International Residential Code (IRC) Chapter 9. My recommendations come from seeing what works and what fails in the Texas climate. My goal is simple. I want to save you time and help you make a smart decision for your home.
What Exactly is a Shingled PV Roof System?
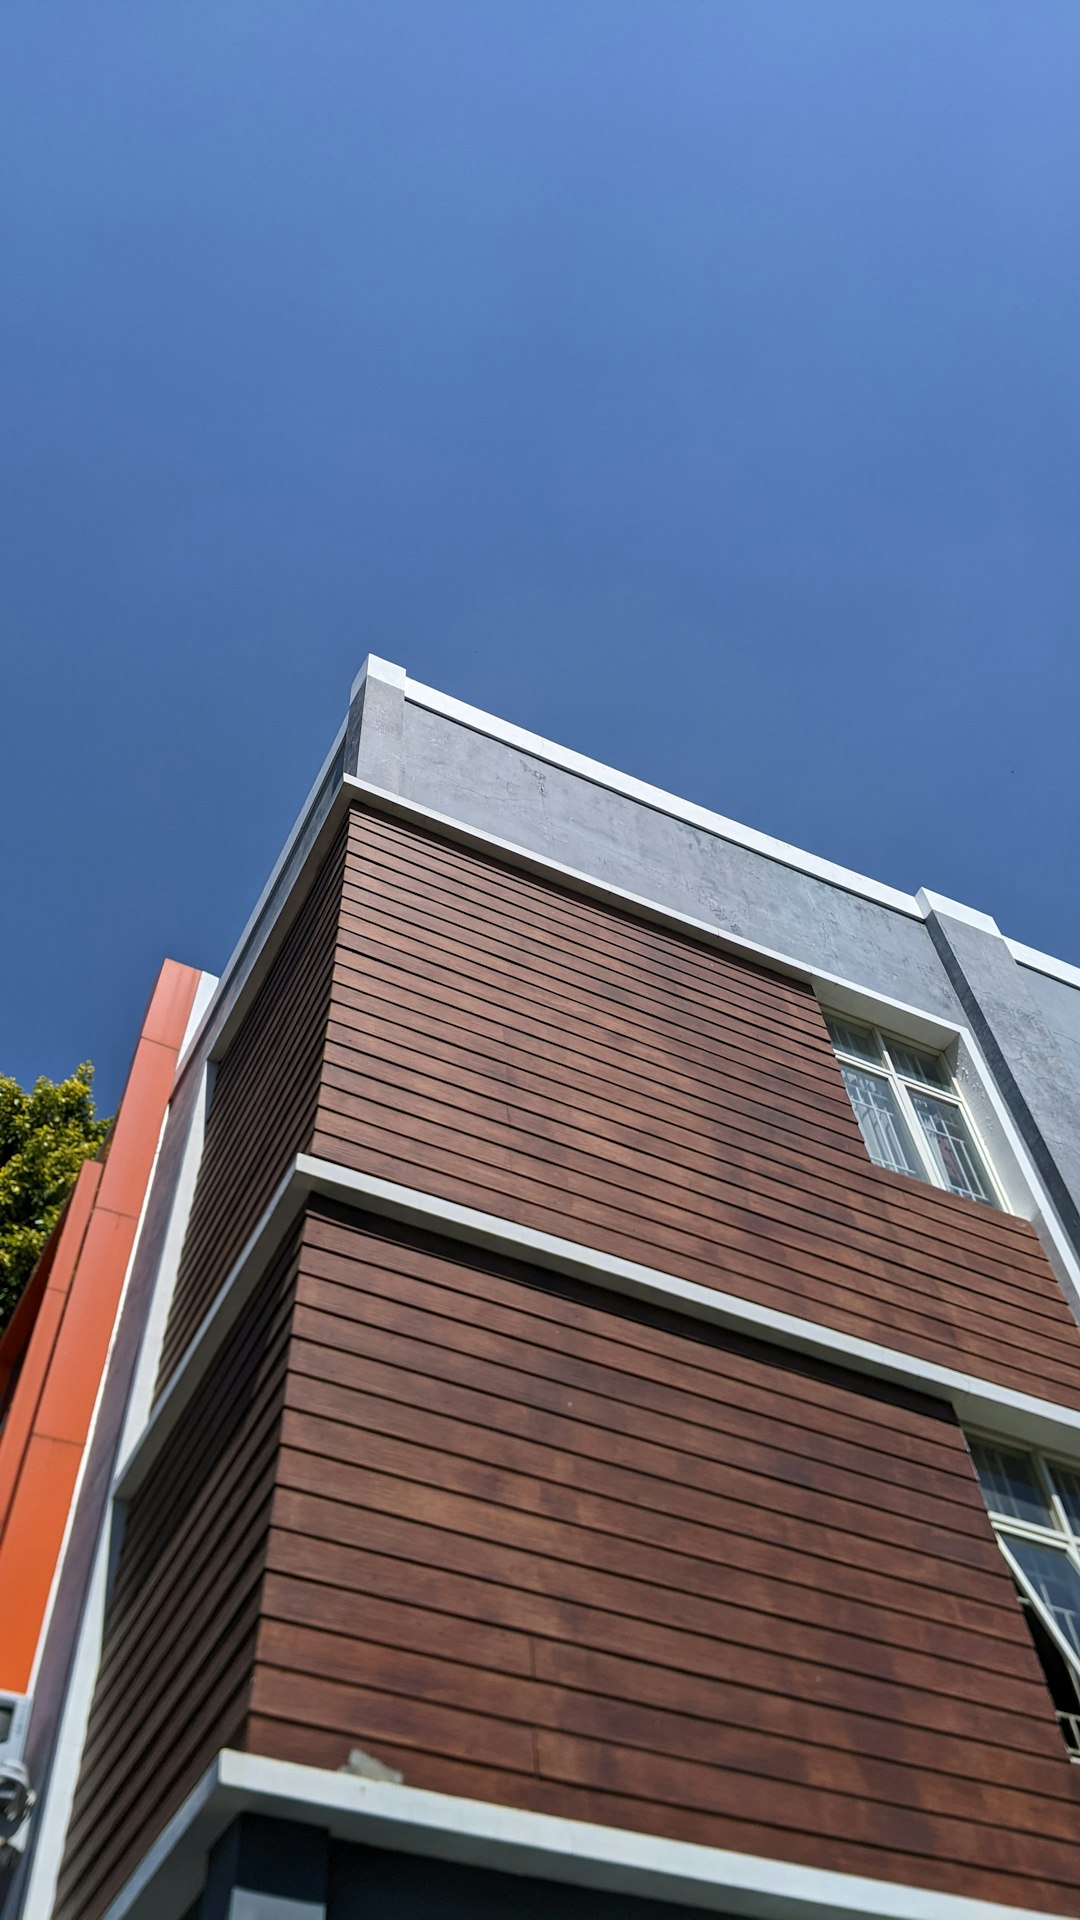
A shingled PV roof is an integrated solar solution. It combines traditional roofing materials with solar technology. Instead of mounting panels on top of your shingles, the shingles themselves generate electricity. Each shingle has photovoltaic cells embedded in it. These cells capture sunlight and convert it into usable power for your home. The system looks like a normal, high-quality asphalt shingle roof from the street. But it quietly produces clean energy. This is different from traditional rack-mounted solar panels. Those systems sit on metal frames above your existing roof. Shingled PV is part of the roof's weatherproofing layer. It is a true roofing product first and a solar product second.
Core Technology and How It Works
The technology uses thin-film or crystalline silicon solar cells. Manufacturers laminate these cells between layers of durable roofing material. This creates a shingle that can withstand rain, wind, and hail. Electrical connections run underneath the shingles. They link each solar shingle to the next. All connections feed into an inverter. The inverter changes the direct current (DC) electricity from the shingles into alternating current (AC). Your home uses AC power. Any extra power can go back to the utility grid. This may earn you credits on your electric bill through net metering.
Key Differences from Traditional Solar Panels
Traditional solar panels are add-ons. You install them on a rack system above your shingles. This creates two separate systems: your roof and your solar array. Shingled PV is one unified system. It acts as both your roof covering and your power plant. The aesthetic difference is major. Shingled PV offers a sleek, low-profile look. It blends seamlessly with your home's architecture. There is no bulky hardware visible from the ground. This is a key selling point for many homeowners who care about curb appeal.
Evaluating the Pros and Cons: A Contractor's Honest Take
Every roofing material has strengths and weaknesses. Shingled PV is no different. After installing dozens of these systems, I have a balanced perspective. Let's break down the real advantages and the practical challenges. This will help you understand if this technology fits your home and your budget.
Major Advantages of Shingled PV Systems
Superior Aesthetics and Curb Appeal: This is the biggest benefit. The roof looks clean and uniform. There are no visible rails, clamps, or gaps under panels. For historic districts or homes with strict homeowner association (HOA) rules, this is often the only solar option allowed.
Integrated Durability and Weather Protection: A shingled PV system is a complete roof. It is tested to the same wind and impact standards as premium shingles. For example, GAF Energy's Timberline Solar shingles carry a UL 2218 Class 4 impact rating. This is the highest rating for hail resistance. The entire surface protects your home.
Potential for Lower Installation Complexity: When you need a new roof anyway, installing shingled PV can be straightforward. A skilled crew can install the roofing and solar components simultaneously. This can be more efficient than two separate projects.
Important Considerations and Challenges
Higher Upfront Material Cost: The technology is premium. The solar shingles themselves cost more per square foot than standard architectural shingles plus separate panels. You are paying for integrated engineering and sleek design.
Specialized Installation Required: Not every roofer can install these systems. It requires certification from the manufacturer and knowledge of electrical codes. You need a crew trained in both roofing and photovoltaic systems. Finding the right contractor is crucial.
Potential Repair Complexity: If a single solar shingle is damaged, repair involves both roofing and electrical work. It is more complex than replacing a standard shingle. However, the systems are designed with this in mind. Many use plug-and-play connectors for easier servicing.
Cost Analysis: Real Numbers from Real Projects
Homeowners need real numbers, not estimates. Based on our project invoices and material quotes, here is a detailed cost breakdown. Remember, every home is unique. Your final price depends on roof size, pitch, complexity, and local labor rates.
Material and Installation Cost Breakdown
A complete shingled PV roof system includes several cost components. First, the solar shingles themselves. Prices range from $4.50 to $7.00 per watt of capacity before incentives. For a typical 8 kW system, the shingle cost could be $36,000 to $56,000. This price usually includes the roofing underlayment and flashing. Second, you have balance-of-system costs. This includes inverters, electrical wiring, and monitoring equipment. This can add $3,000 to $8,000. Third, labor for installation is significant. A complex roof with many valleys and penetrations costs more. Total installed costs often land between $45,000 and $70,000 for a full roof replacement with solar. This is before any tax credits or rebates.
Comparing to Traditional Roof + Panel Costs
Let's compare with a traditional approach. A new high-quality asphalt shingle roof might cost $20,000. Adding a separate 8 kW solar panel system might cost $24,000. The combined total is around $44,000. The shingled PV system appears more expensive upfront. But the comparison is not perfect. The shingled PV roof often uses higher-grade materials. It also offers a seamless look you cannot get with panels. The value is in the integration.
Understanding Incentives and Long-Term Savings
The federal solar Investment Tax Credit (ITC) is a major factor. As of 2025, it allows you to deduct 30% of the total system cost from your federal taxes. This includes both the solar and roofing portions if integrated. For a $60,000 project, that's an $18,000 credit. Some states and utilities offer additional rebates. You must check the Database of State Incentives for Renewables & Efficiency (DSIRE). The long-term savings come from slashing your electric bill. In Texas, with high sun exposure, an 8 kW system can cover most of a typical home's usage. Over 25 years, this can save $30,000 to $50,000 in electricity costs.
Material Deep Dive: Leading Brands and Performance
Only a few manufacturers produce true solar shingles. I have worked with the two major players in the U.S. market. Understanding their differences helps you choose the right product for your home.
GAF Energy Timberline Solar Shingles
GAF Energy is a leader. Their Timberline Solar shingle is very popular. It looks almost identical to their Timberline HDZ architectural shingle. The solar technology is laminated onto a standard shingle shape. This makes installation familiar for roofers. The system uses a dedicated inverter called the GAF Energy Sun System. I have found their training and support for contractors to be excellent. Their warranty is strong. It includes a 25-year product and power output warranty. It also includes a 15-year weatherization warranty from GAF. You can learn more on the GAF Energy website.
CertainTeed Solar Roofing Systems
CertainTeed offers the Apollo II system. It uses a different approach. They install a specialized roofing membrane first. Then, they attach individual solar tiles to that membrane. The tiles are made from crystalline silicon. They are very efficient at converting sunlight to electricity. CertainTeed is a trusted name in traditional roofing. Their solar systems carry the same quality reputation. Their warranties are also comprehensive. They cover materials, labor, and power production. Review their specifications on the CertainTeed Solar page.
Key Performance Specifications to Compare
When reviewing products, look at these specs. First, efficiency rating. This is the percentage of sunlight converted to electricity. Higher is better. Most solar shingles are 17% to 22% efficient. Second, wind resistance. Ensure the product is rated for your area's wind speeds. Many are rated for 130+ mph winds. Third, fire rating. The system should have a Class A fire rating per UL 790. Fourth, impact resistance. A Class 4 rating is best for hail-prone areas like Texas.
The Installation Process: A Step-by-Step Guide from the Field
Installing a shingled PV roof is a major project. It requires careful planning and skilled execution. Here is how a professional installation should proceed, based on our standard operating procedure.
Phase 1: Site Assessment and Engineering
First, we conduct a thorough site survey. We measure the roof precisely. We note the direction it faces (south is ideal). We check for shading from trees or chimneys. We assess the structural framing. The roof must support the weight of the system. We often consult with a structural engineer. We pull the necessary permits from the local building department. This phase includes designing the electrical system layout. We submit plans showing the roof plan and electrical diagram.
Phase 2: Roof Preparation and Underlayment
On installation day, we start by removing the old roof down to the deck. We inspect the wood decking for rot or damage. We replace any compromised wood. Then, we install a high-quality synthetic underlayment. This is a critical water barrier. We install ice and water shield in vulnerable areas like valleys and eaves. We flash all roof penetrations like vent pipes and skylights. Proper flashing is the key to a leak-free roof.
Phase 3: Shingle and Electrical Installation
We begin laying the solar shingles from the eave upward. We follow the manufacturer's exact instructions. We connect the electrical leads from each shingle as we go. The connections are typically waterproof plugs. We run conduit from the roof array down to the inverter location. The inverter is usually mounted on an exterior wall or in the garage. We connect the system to your home's main electrical panel. This requires a qualified electrician.
Phase 4: Inspection, Activation, and Monitoring
After installation, we schedule inspections. The local building department will inspect the roof and electrical work. Your utility company will also inspect before granting "permission to operate." Once approved, we activate the system. We show you how to use the monitoring app. This app lets you track energy production in real time. We clean up the job site completely. We provide all warranty documents and system manuals.
Practical Homeowner Tips from Real-World Experience
Based on conversations with hundreds of homeowners, here is my best advice. These tips will help you navigate the process smoothly and avoid common pitfalls.
- Get Multiple Quotes: Contact at least three certified installers. Compare their proposals line by line. Do not choose based on price alone. Evaluate their experience and customer reviews.
- Check Credentials Thoroughly: Your installer must be licensed, bonded, and insured. They should hold manufacturer certification for the specific product. Ask for proof. Check their rating with the Better Business Bureau.
- Understand Your Warranties: You will have multiple warranties. The roofing warranty covers leaks. The product warranty covers shingle defects. The power warranty guarantees energy output. Know what each covers and for how long.
- Consider Your Roof's Age: Shingled PV makes the most sense if you need a new roof soon. Installing it over old, worn shingles is not recommended. The existing roof must be in very good condition.
- Plan for Future Maintenance: Keep trees trimmed to prevent shading and debris. Have a professional inspect the system every few years. Know who to call for repairs—your roofer or an electrician?
- Review Your Homeowner's Insurance: Call your insurance agent before installation. Make sure your policy covers integrated solar roofing. You may need to increase your dwelling coverage.
Frequently Asked Questions (FAQ)
How long does a shingled PV roof last?
Solar shingles are designed to last as long as the roofing warranty, typically 25 years. The photovoltaic cells will slowly degrade over time. Most manufacturers guarantee at least 80% power output after 25 years. The underlying roofing materials are made to withstand decades of weather. Proper installation and maintenance are key to reaching this lifespan.
Can I walk on a solar shingle roof?
Yes, but you must be very careful. Walking on any roof can cause damage. Solar shingles are more fragile than standard shingles due to the glass and cells inside. If maintenance is needed, hire a professional. They will use proper fall protection and know where to step to avoid damaging the shingles or electrical connections.
What happens if one solar shingle breaks or stops working?
The systems are designed so one faulty shingle does not shut down the whole array. The rest of the system continues to produce power. A certified technician can isolate and replace the damaged shingle. This involves removing the surrounding shingles to access the electrical connection. It is a repair job for a trained professional, not a DIY project.
Do solar shingles work in cloudy weather or shade?
They work, but produce less power. Photovoltaic cells need direct sunlight for maximum output. On a cloudy day, production might drop by 50-80%. Consistent shading from a large tree will significantly reduce the system's annual energy yield. A proper site assessment before installation will identify these issues and set realistic production expectations.
How do I clean my solar roof?
In most climates, rain does a good job of cleaning the surface. In dusty areas or if pollen builds up, you may need to clean them. Use a garden hose from the ground to spray the roof. Do not use a pressure washer, as it can damage the seals. For stubborn dirt, hire a professional roof cleaning service that has experience with solar. They will use soft brushes and deionized water.
Will a shingled PV roof increase my home's value?
Multiple studies show solar installations increase home value. The U.S. Department of Energy's Lawrence Berkeley National Laboratory found homes with solar sell for a premium. The integrated, aesthetic appeal of a shingled PV system may add even more value than traditional panels. It is seen as a premium upgrade, like a renovated kitchen. Be sure to keep all warranty and installation documentation for the next homeowner.
Can I install shingled PV on a flat or low-slope roof?
Most solar shingle products are designed for pitched roofs. They require a minimum slope, usually 3:12 or greater, to ensure proper water drainage. For flat or very low-slope roofs, traditional rack-mounted panels or a different integrated product may be a better option. Always consult the manufacturer's installation instructions for slope requirements.
Real Project Case Studies and Outcomes
Let me share two real examples from our work in the Kingwood area. These stories show how different homeowners approached shingled PV and their results.
Case Study 1: The Thompson Family - Full Roof Replacement
The Thompsons had a 25-year-old roof that was leaking. They also had high summer electricity bills. They wanted a permanent solution. We installed a full GAF Energy Timberline Solar system. The project took five days. The total cost was $58,000. After the 30% federal tax credit, their net cost was $40,600. In the first year, their electric bill dropped from an average of $280 to $35 per month. They are on track to recoup their investment in about 12 years. They love the uniform look of the roof. Their HOA approved the design immediately.
Case Study 2: The Garcia Residence - South-Facing Main Roof Only
The Garcias had a newer roof but wanted solar. They did not want to remove good shingles. We installed a CertainTeed Apollo II system only on their south-facing main roof section. The north-facing sections kept their existing architectural shingles. This "hybrid" approach saved money. The project cost was $32,000. After incentives, it was $22,400. Their energy production covers about 60% of their usage. They are very happy with the result. It proved that partial installations can be effective and cost-efficient.
Industry Statistics and Future Outlook
The solar roofing market is growing rapidly. According to the Solar Energy Industries Association (SEIA), the U.S. installed over 5 gigawatts of residential solar in Q1 2024. While integrated systems like shingled PV are a small segment, their growth rate is high. Manufacturers are investing heavily in research and development. We expect efficiency to improve and costs to come down over the next five years. Building codes are also evolving. The 2024 International Energy Conservation Code (IECC) includes stronger provisions for renewable energy readiness in new homes. This trend will make solar roofing more common.
Conclusion: Making an Informed Decision for Your Home
A shingled PV roof is a significant investment. It combines a necessary home component—your roof—with a modern energy solution. For the right homeowner, it is an excellent choice. It offers beauty, durability, and long-term savings. The decision comes down to your priorities. If curb appeal and a seamless look are top concerns, it is worth the premium. If you need a new roof and have been considering solar, the integrated approach is logical. If your primary goal is the lowest cost per watt of energy, traditional panels on an existing roof may be better. My final advice is to consult with a certified, local expert. Get a detailed assessment of your specific roof. Run the numbers for your energy usage. Understand the incentives available to you. Your roof is your home's first line of defense. Choose a solution that protects your investment and powers your future.