
Tin Roof Repair Near Me: 25 Years of Texas Roofing Experience
My name is James, and I have been repairing and installing metal roofs across Texas for over twenty-five years. I have personally worked on more than two thousand roofing projects. I hold certifications from major manufacturers like MBCI and Ascend Performance Materials. This article exists because I have seen too many homeowners struggle with finding honest information about tin roof repair. They often face confusing estimates, unclear repair processes, and uncertainty about costs. My goal is to give you the same knowledge I would share with a neighbor. I want you to understand your roof, recognize problems, and make confident decisions about repairs. This guide combines my hands-on field experience with manufacturer specifications and building code requirements. I will explain the methodology behind every recommendation. You will get clear, direct answers without any fluff to waste your time.
The information here comes from solving real problems on customer homes. I have gathered data from hundreds of repair jobs after Texas storms. I reference technical manuals from companies like ATAS International and local building codes. My recommendations are based on what has proven to work reliably for decades, not just theory. This is a practical guide written for Texas homeowners by someone who has been on your roof. You will learn how to identify issues, understand repair options, and communicate effectively with contractors. Let's get started with a deep dive into the world of tin and metal roofing repair.
Understanding Your Tin or Metal Roof
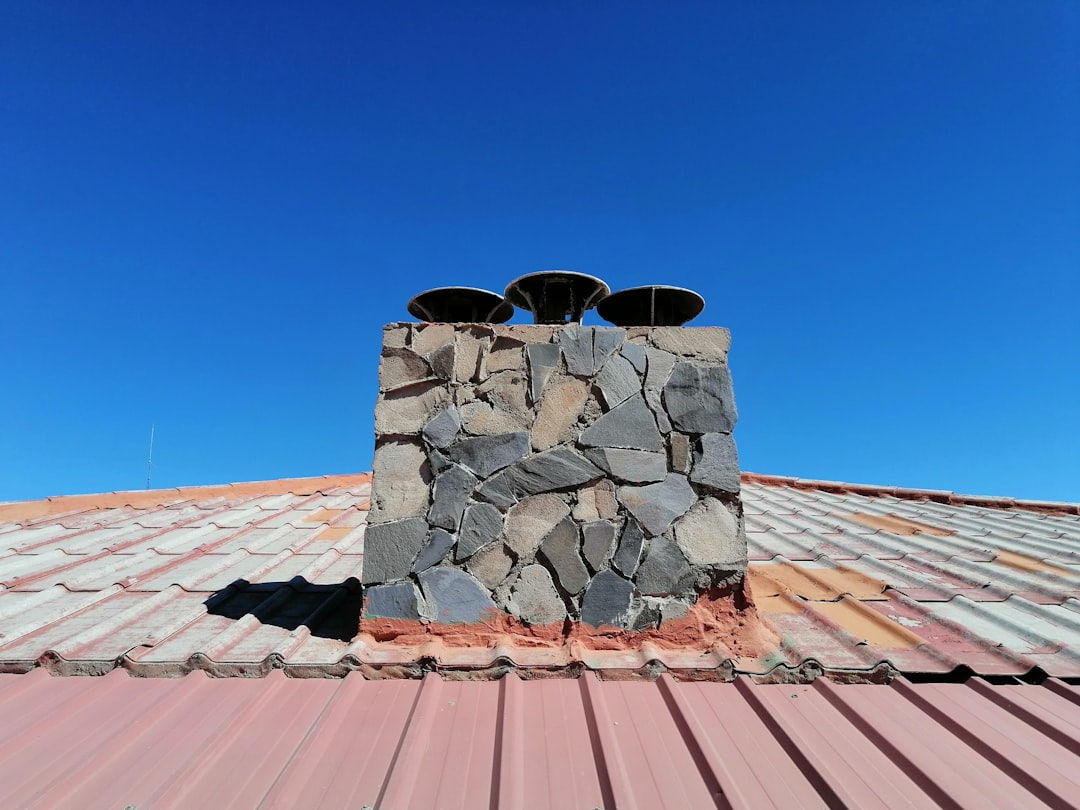
First, let's clarify a common term. What most people call a "tin roof" is actually a metal roof. True tin roofs are very rare today. Modern metal roofs are typically made from steel or aluminum coated with protective layers. They are designed to last for decades with proper care. Knowing what type of metal you have is crucial for proper repair. The most common types are galvanized steel, galvalume steel, and aluminum. Each material has different properties and repair requirements. Galvalume, for example, combines aluminum and zinc for superior rust resistance. Aluminum is lightweight and excellent for coastal areas. Identifying your panel profile is also important. You might have standing seam panels, corrugated panels, or ribbed panels. The repair approach changes for each style.
Common Metal Roofing Materials
Galvanized steel has a zinc coating to fight rust. It is strong and cost-effective. Galvalume steel offers better corrosion protection than standard galvanized. It is the most common material for agricultural and residential buildings. Aluminum is naturally corrosion-resistant, making it perfect for humid climates. It does not rust, but it can oxidize and develop a chalky film. Knowing your material helps you understand its vulnerabilities. For instance, steel can rust if the coating is damaged. Aluminum can be dented more easily. Always check your original paperwork or ask a professional to identify the material. This knowledge prevents using incompatible repair products that can cause more harm.
Standard Roof Panel Profiles
Standing seam roofs have raised seams that interlock. The fasteners are hidden under the seams. This design is excellent for weather resistance. Corrugated panels have a wavy, repeating pattern. They are very strong and often used on sheds and barns. R-panel or ribbed panels have taller, wider ribs. They are common on commercial and residential buildings. Each profile requires specific repair techniques and matching replacement panels. Using the wrong panel profile during a repair will look bad and may not seal properly. A qualified roofer will measure the panel width, rib height, and fastener type. They will then source an exact match from a supplier like Metal Roofing Alliance.
Identifying Common Tin Roof Problems
Metal roofs are durable, but they are not indestructible. Texas weather with its hail, high winds, and sun takes a toll. The key to cost-effective repair is early problem identification. Small issues can become major leaks if ignored. Let's walk through the most common problems I encounter on service calls. Look for these signs during your own visual inspection from the ground. Use binoculars for a safer, closer look. Never climb onto a steep roof without proper safety equipment. Pay special attention after major storms or seasonal changes. Regular inspection can save you thousands of dollars in preventable damage.
Leaks and Water Intrusion
Leaks are the most common reason homeowners call for repair. Water stains on your ceiling or walls are a clear sign. The leak's origin on the interior may not be directly below the roof breach. Water can travel along rafters or sheathing before dripping. On the roof, leaks often start at penetrations. Check around vents, chimneys, skylights, and pipe flashings. The sealant or flashing metal here can fail over time. Another common leak source is at panel end laps or side laps. These are where two panels overlap. If the sealant tape fails or fasteners loosen, water gets in. Inspect the roof valleys where two slopes meet. Debris buildup here can force water under the panels.
Rust and Corrosion
Rust is the enemy of steel roofs. It starts as small reddish-brown spots. These spots can grow and eat through the metal, creating holes. Rust often begins where the protective coating is scratched or worn. Check areas where tree branches rub the roof. Look at places where debris like leaves piles up and holds moisture. Galvalume steel develops white rust (zinc oxide) as a protective layer. This is normal and not a structural concern. Red rust on galvalume means the coating is compromised. On aluminum roofs, look for pitting or chalky white oxidation. While aluminum doesn't rust, heavy oxidation can signal other issues. Treating rust early is critical to extend your roof's life.
Loose, Missing, or Damaged Fasteners
Metal roofs expand and contract with temperature changes. This movement can loosen the screws or nails that hold panels down. A loose fastener creates a small hole for water entry. The rubber washer on the screw can also dry out and crack. Walk around your property and look for screws with missing washers. Look for screws that are raised above the panel surface. High winds can sometimes pull fasteners completely out. Hail can dent panels around fasteners, breaking the seal. Re-securing or replacing fasteners is a common repair. It is vital to use the exact same type and size of fastener. Using a different screw can cause galvanic corrosion between dissimilar metals.
Panel Damage from Storms and Impact
Hail is a major cause of panel damage in Texas. It creates dents and dimples in the metal. Severe hail can even puncture thinner gauge metal. These dents may not cause an immediate leak. However, they can compromise the paint and coating, leading to future rust. High winds can lift and tear panels, especially at the edges. Flying debris from storms can scratch or puncture the roof. Tree limbs falling on the roof cause obvious, severe damage. Always document storm damage with photos and videos immediately. This evidence is crucial for filing an insurance claim. Contact a reputable roofer for a professional damage assessment. They can provide a detailed report for your insurance company.
The Tin Roof Repair Process: A Contractor's Perspective
Now, let's discuss what actually happens during a professional repair. A quality repair follows a systematic process to ensure longevity. As a contractor, my first step is always a thorough inspection. I look at the entire roof, not just the obvious problem area. I check the attic for signs of moisture, mold, or wood rot. I examine the roof decking from below if possible. Then, I create a detailed repair plan. This plan includes the exact materials needed, the labor steps, and the safety protocols. Clear communication with the homeowner is essential. I explain what we will do, why, and how long it will take. Transparency builds trust and ensures everyone has the same expectations.
Step 1: Safety and Site Preparation
Safety is the non-negotiable first step. We set up ladders correctly using stabilizers. We use OSHA-compliant fall protection harnesses and anchor points. We lay protective coverings over landscaping and walkways. We mark the work area to keep family and pets safe. All tools and materials are organized before climbing onto the roof. This preparation prevents accidents and protects your property. It also makes the repair work more efficient. A professional crew will never skip these steps. Ask any contractor you hire about their safety procedures. A reputable company will have a written safety plan and trained crew members.
Step 2: Cleaning and Surface Preparation
A proper repair starts with a clean surface. We sweep away all debris, leaves, and dirt from the repair area. We wash the metal with a mild detergent to remove grime and oxidation. For rust repair, we use a wire brush or sanding tool to remove all loose rust down to bare, solid metal. This is called "feathering" the edges. It creates a smooth transition between the old coating and the new repair material. We then wipe the area with a metal cleaner or degreaser. This step removes oils that could prevent paint or sealant from sticking. Skipping proper cleaning is the number one reason DIY repairs fail. The new material simply will not adhere correctly.
Step 3: The Actual Repair Techniques
The repair method depends on the specific problem. For small holes or punctures, we use a two-part epoxy metal filler. We apply it smoothly and let it cure completely. For rust spots, after cleaning, we apply a rust-inhibiting primer. Then we top it with a color-matched acrylic or polyurethane roof coating. For loose fasteners, we replace them with new ones of the same type. We add a dab of high-quality sealant like Geocel 3500 under the washer. For damaged panels, we carefully remove the fasteners and lift the adjacent panels. We slide in a new, matching panel section. We re-secure everything with new fasteners and seal the laps with butyl tape.
Step 4: Sealing and Weatherproofing
The final step is ensuring a watertight seal. All seams, laps, and penetrations get fresh sealant. We use professional-grade products designed for metal roofing. Cheap caulk from a hardware store will dry out and crack in a year. We prefer high-performance sealants like polyurethane or silicone. They remain flexible for years through expansion and contraction. We also check and repair all flashings. Flashing is the metal that seals joints at walls, chimneys, and valleys. Proper flashing is critical for directing water away from vulnerable areas. Finally, we do a water test if possible. We gently spray the repaired area with a hose to check for leaks before packing up.
Tin Roof Repair Costs: Real Project Examples
Cost is a major concern for every homeowner. I believe in complete transparency. The price depends on the repair type, roof height, material accessibility, and your location. Labor is a significant part of the cost due to the skill and safety equipment required. Below are real examples from recent projects in the Kingwood area. These are average costs and your specific job may vary. Always get a written, detailed estimate before work begins. The estimate should break down material costs, labor costs, and any waste disposal fees. Be wary of quotes that seem too good to be true. Extremely low prices often mean low-quality materials or uninsured labor.
- Minor Fastener Replacement: A homeowner had several loose screws along a ridge. The crew replaced 50 screws with new neoprene-washered screws and applied sealant. The roof was a single-story, easy-access home. Total cost: $350 - $500. This is a common preventive maintenance repair.
- Rust Spot Repair: A garage roof had five small rust spots about the size of a quarter each. We sanded, primed, and coated the spots with a matched paint system. Total cost: $450 - $700. The key was using the exact paint code from the original manufacturer.
- Leaking Pipe Flashing: A plumbing vent boot was leaking, causing a ceiling stain. We removed the old flashing, installed a new metal boot with a proper seal, and resealed the surrounding panels. Total cost: $300 - $600. Most of the cost was labor for careful disassembly and reassembly.
- Panel Replacement (Storm Damage): After a hailstorm, a homeowner needed two corrugated panels replaced. The panels were on a high, steep section of roof. We sourced matching 26-gauge panels, removed the damaged ones, and installed the new ones. Total cost: $900 - $1,500. The height and difficulty added to the labor cost.
- Major Leak at Valley: A complex leak where two roof valleys met required extensive troubleshooting. We had to remove multiple panels to find the source, replace rotten decking, and re-install everything with new sealant tape. Total cost: $1,800 - $3,000. This shows how a seemingly small leak can involve hidden damage.
According to industry data from HomeAdvisor, the national average for metal roof repair is between $300 and $1,500. In Texas, with our specific weather challenges, costs often fall in the middle to upper end of that range. Always factor in the cost of a professional inspection, which typically ranges from $150 to $400. This inspection fee is worth it to get an accurate diagnosis and scope of work.
Choosing the Right "Tin Roof Repair Near Me" Contractor
Finding a trustworthy contractor is perhaps the most important step. A poor repair can cause more damage than the original problem. Look for a local company with a solid reputation in your community. Check their physical business address. A P.O. box can be a red flag. Verify their license and insurance. In Texas, roofing contractors must be licensed. Ask for their license number and check it with the Texas Department of Licensing and Regulation. They must carry both liability insurance and workers' compensation insurance. This protects you if someone is injured on your property. Ask for certificates of insurance and call the provider to verify they are current.
Key Questions to Ask a Roofer
- How long have you been in business, and how many metal roofs have you repaired?
- Can you provide local references from recent metal roof repair jobs?
- What specific manufacturer training or certifications do you have for metal roofing?
- Will you provide a detailed, written estimate that includes all labor and material costs?
- Who will be the foreman on my job, and what is his experience?
- What is your process for protecting my landscaping and cleaning up after the job?
- Do you offer any warranty on your repair workmanship, and what does it cover?
Get at least three written estimates. Do not automatically choose the lowest bid. Compare the scope of work, materials proposed, and timeline. A good contractor will take time to explain the problem and the solution. They will not pressure you to sign a contract immediately. Trust your instincts. If something feels off, keep looking. Your roof is a major investment, and its repair should be handled by a true professional.
DIY vs. Professional Repair: When to Call an Expert
Some minor maintenance tasks are safe for a capable homeowner. Cleaning gutters and downspouts is one. Visually inspecting the roof from the ground with binoculars is another. Replacing a single missing screw on a low, flat porch roof might be okay if you are comfortable on a ladder. However, most metal roof repairs require professional skills and tools. Working on a steep, high roof is extremely dangerous without proper training and equipment. Applying sealants incorrectly can trap moisture and accelerate rust. Using the wrong fastener can cause galvanic corrosion. Mis-matching a panel can affect the roof's structural integrity and appearance.
You should always call a professional for the following situations: any leak that is actively dripping into your home, damage covering more than a few square feet, repairs near the roof ridge or on a steep slope, any electrical components like solar panels nearby, or any repair that requires walking on the roof panels (this can dent them). The risk of personal injury or causing costly additional damage is too high. A professional repair also often comes with a workmanship warranty. This gives you peace of mind that the job is done right. Investing in professional repair protects your home's value and your family's safety.
Tin Roof Maintenance Tips to Avoid Future Repairs
Proactive maintenance is the best way to avoid major repairs. A little care goes a long way in extending your roof's life. Perform a visual inspection twice a year, in spring and fall. Look for the problems we discussed earlier. Keep your roof clean. Remove leaves, pine needles, and branches promptly. Debris holds moisture against the metal and can scratch the coating. Trim tree branches that hang over or touch the roof. This prevents damage from falling limbs and reduces debris. Ensure your gutters and downspouts are clear and flowing away from your foundation. Clogged gutters cause water to back up under the roof edge. After any major storm, do a quick ground-level inspection for obvious damage.
Be careful with pressure washers. Never use a high-pressure setting on a metal roof. It can force water under the panels and damage the coating. Use a garden hose with a spray nozzle on a gentle setting. If you notice minor issues like a single loose screw, address it quickly before it leads to a leak. Consider having a professional inspection every 3-5 years. A trained eye can spot potential problems you might miss. This small investment can prevent a very expensive emergency repair later. Good maintenance is the key to getting the full lifespan from your metal roof, which can be 40-70 years.
Frequently Asked Questions (FAQ)
How long does a tin roof repair take?
Most minor to moderate repairs can be completed in one day. A crew can often handle fastener replacement or small patch jobs in a few hours. More complex repairs involving panel replacement or leak diagnosis may take 1-2 full days. The time depends on the problem's complexity, weather conditions, and material availability. A good contractor will give you a realistic timeline during the estimate.
Can you patch a hole in a metal roof?
Yes, small holes can be patched effectively. The process involves cleaning the area, applying a metal-specific epoxy or filler, and then coating it with a protective, color-matched paint. For holes larger than an inch, it is often better to cut out the damaged section and install a metal patch panel. The patch is sealed underneath with butyl tape and fastened around the edges.
Does homeowners insurance cover metal roof repair?
It often does if the damage is caused by a covered peril. This typically includes storm damage from hail, wind, or falling objects. Damage from normal wear and tear, rust, or lack of maintenance is usually not covered. The key is documentation. Take photos and videos immediately after a storm. File a claim promptly and have a professional roofer provide a detailed damage report to your insurance adjuster.
How much does it cost to reseal a metal roof?
Resealing specific areas (like flashings and seams) is part of a standard repair. The cost is included in the overall repair price. Completely resealing an entire roof with a reflective coating is a different, larger project. That can cost $1.50 to $3.50 per square foot, depending on the coating type and roof complexity. This is usually done for older roofs to extend their life and improve energy efficiency.
What is the lifespan of a repaired metal roof?
A professionally repaired metal roof should last for the remaining lifespan of the surrounding original roof. If the rest of your roof is in good condition, a proper repair can add 15-20 years or more of service. The longevity depends on the quality of the repair, the materials used, and ongoing maintenance. Always ask your contractor for a warranty on their workmanship.
How do I find matching panels for my old roof?
A professional roofer will measure your existing panel's profile, width, rib height, and thickness (gauge). They will then contact metal roofing suppliers or manufacturers with these specifications. Companies like Metal Roofing Source specialize in matching older profiles. It can sometimes take a few weeks to source exact matches, especially for discontinued patterns.
Can a metal roof be repaired in the winter?
Yes, but with caveats. Sealants and coatings have minimum application temperatures, usually around 40°F (4°C). The metal surface must be clean and dry, not icy or frosty. Repairs can be done in colder weather if the crew uses products formulated for lower temperatures and ensures proper surface preparation. It's always best to schedule repairs in mild, dry weather when possible.
Real Project Case Studies
Case Study 1: The Hail-Damaged Barn
A family in Conroe had a large barn with a corrugated galvalume roof. A severe hailstorm dented about 20% of the panels and loosened many fasteners. The owner initially thought the whole roof needed replacement. Our inspection found the panels were structurally sound but cosmetically damaged. We replaced all the damaged fasteners with new ones. We then applied a high-build, elastomeric roof coating over the entire roof. This coating filled the minor dents, restored weatherproofing, and provided a fresh, white reflective surface. The cost was $4,200. A full roof replacement would have exceeded $15,000. The repaired roof has performed perfectly for five years and counting.
Case Study 2: The Persistent Leak
A homeowner in Kingwood had a leak over their garage that three different handymen could not fix. Each one applied more sealant to the obvious spots, but the leak returned every rain. We performed a systematic water test. We had one crew member inside the attic with a flashlight while another sprayed water on the roof section by section. We discovered the water was entering at a sidewall flashing 15 feet away from the drip point inside. It was traveling along a roof purlin. We replaced the deteriorated flashing and sealed the joint properly. The total repair cost was $850. The leak has never returned. The lesson: proper diagnosis is more important than quick fixes.
Conclusion and Your Next Steps
Your metal roof is a valuable asset that protects your home. Understanding common problems and repair processes empowers you as a homeowner. You now know how to identify issues like leaks, rust, and loose fasteners. You understand the realistic costs involved based on actual project examples. Most importantly, you know how to find and vet a qualified "tin roof repair near me" contractor. The next step is action. If you suspect a problem, do not ignore it. Start with a visual inspection from the ground. Document any issues with photos. Then, contact two or three licensed, insured, and experienced metal roofing contractors in your area. Get detailed written estimates. Ask the questions outlined in this guide. Choose the contractor who demonstrates knowledge, transparency, and a commitment to quality workmanship. A proper repair will secure your home, protect your investment, and give you peace of mind for years to come. Your roof has served you well; now you have the knowledge to ensure it continues to do so.