
Shingle Repair Cost Guide: Real Contractor Pricing & Storm Damage Solutions from 20+ Years of Roofing Experience
I've been installing and repairing roofs across Texas for over two decades. My team at Kingwood Roofing has completed more than 3,500 residential projects. We hold GAF Master Elite certification, the highest credential in our industry. This experience gives me a unique perspective on what homeowners truly need to know about shingle repair costs. I've seen too many people overpay for simple fixes or underestimate serious damage. This article exists to solve that exact problem. You're probably wondering how much you should actually pay for shingle repair. You might be worried about storm damage or insurance claims. Perhaps you're trying to decide between a quick fix and a full replacement. I wrote this guide to give you clear, honest answers based on real projects, not theoretical numbers. I'll share exactly how we calculate costs, what factors drive prices up or down, and how to avoid common pitfalls. This information comes directly from our project records, manufacturer specifications, and building code requirements. We track every repair job to understand true costs. I'll explain our methodology so you can make informed decisions. My goal is simple: give you the knowledge to protect your home and your wallet.
Understanding Shingle Repair: More Than Just Nails and Tar
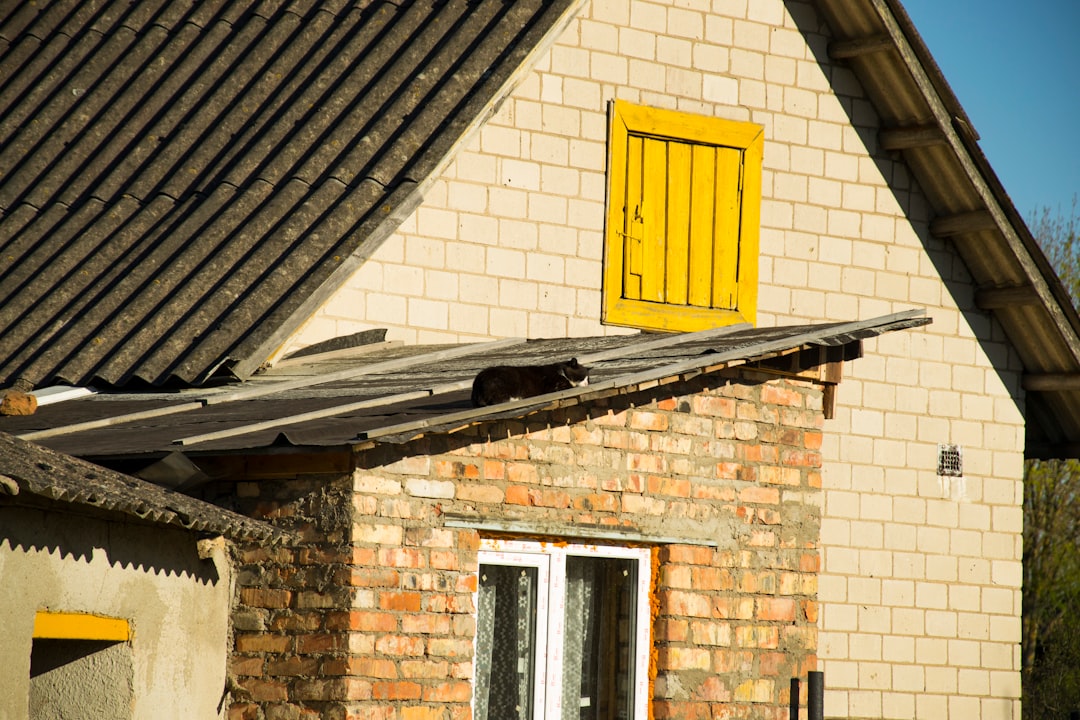
Shingle repair seems simple from the ground. You see missing or damaged shingles and think it's a quick fix. The reality involves multiple layers of protection working together. Your roof system includes decking, underlayment, flashing, and shingles. Each component must function properly to prevent leaks. A proper repair addresses all affected layers, not just the visible shingles. We often find hidden water damage during inspections. This damage can spread far from the original leak point. Understanding this system helps explain why costs vary so much between projects.
Common Shingle Damage Types and Their Implications
Different damage types require different repair approaches. Missing shingles are the most obvious issue. High winds can tear shingles completely off the roof. Creased or cracked shingles indicate hail impact. Granule loss shows aging or storm wear. Curling edges signal poor ventilation or installation errors. Each problem has specific repair requirements. Missing shingles need replacement with matching materials. Cracked shingles might require surrounding shingle removal. Curling often points to larger ventilation issues needing correction. Proper diagnosis prevents recurring problems.
The Roofing System: How All Components Work Together
Your roof functions as an integrated system. The decking provides structural support. Underlayment acts as a secondary water barrier. Flashing directs water away from vulnerable areas. Shingles provide the primary weatherproof layer. Ventilation regulates temperature and moisture. All components must work in harmony. A repair that only addresses shingles might miss underlying issues. We always inspect the complete system during assessments. This comprehensive approach prevents future leaks and extends roof life.
Real Shingle Repair Cost Breakdown: 2024 Texas Pricing
Shingle repair costs in Texas range from $150 to $1,500 for most projects. The national average is $350 to $1,000 according to HomeAdvisor data. Our local Texas pricing reflects material availability and weather conditions. Simple repairs with accessible damage cost less. Complex repairs with multiple issues cost more. We'll break down actual project costs from our records. These numbers come from completed jobs in the Kingwood area. They include materials, labor, and overhead. Remember that every roof is unique. Your actual cost may differ based on specific conditions.
Basic Repair Costs: Small, Accessible Damage
Basic repairs address isolated damage in easy-to-reach areas. Replacing 1-3 damaged shingles typically costs $150-$350. This assumes matching shingles are available. The roof pitch must be walkable for safety. No underlying damage should be present. Basic repairs take 1-2 hours including setup and cleanup. Materials cost $50-$100 for shingles, nails, and sealant. Labor accounts for the remaining cost. These repairs work well for minor wind damage or accidental impact. They're not suitable for widespread or recurring issues.
Moderate Repair Costs: Multiple Shingles and Flashing
Moderate repairs address several damaged areas or include flashing work. Replacing 5-10 shingles with flashing repair costs $400-$800. This range includes chimney or vent flashing replacement. The roof might have moderate pitch requiring additional safety measures. Some underlying deck inspection is necessary. These repairs take 3-5 hours with multiple technicians. Materials cost $150-$300 including specialized flashing. Labor intensity increases with complexity. Moderate repairs often follow storm events with scattered damage. They require careful color matching for aesthetic consistency.
Complex Repair Costs: Storm Damage and Structural Issues
Complex repairs involve extensive damage or structural concerns. Replacing entire sections with deck repair costs $800-$1,500+. This includes water-damaged decking replacement. The roof likely has steep pitch or multiple layers. Flashing systems need complete evaluation. These repairs take 6-10 hours with specialized equipment. Materials cost $300-$600 including plywood and ice/water shield. Labor requires advanced skills and coordination. Complex repairs often involve insurance claims for storm damage. They demand thorough documentation and proper permitting.
Key Factors That Determine Your Actual Repair Cost
Multiple factors influence your final repair cost. Understanding these variables helps you budget accurately. The most significant factors are roof accessibility, material matching, and underlying damage. Local building codes and permit requirements also affect pricing. We evaluate all factors during our free inspections. This comprehensive assessment prevents surprise costs later. Homeowners should consider these elements when comparing estimates. Quality contractors will explain each factor clearly.
Roof Accessibility and Safety Considerations
Roof accessibility dramatically impacts labor costs. Single-story homes with low pitch are easiest to access. Multi-story homes require more equipment and time. Steep roofs over 6:12 pitch need special safety systems. Complex roof designs with multiple valleys increase difficulty. Obstacles like skylights or solar panels complicate repairs. Proper safety equipment adds to project costs but is non-negotiable. OSHA regulations require fall protection on residential roofs. We invest in premium safety gear for every technician. This protects our team and your property.
Material Availability and Matching Challenges
Material matching presents significant challenges in repairs. Shingle manufacturers discontinue colors regularly. Sun exposure changes shingle appearance over time. Finding exact matches for older roofs can be difficult. We maintain an inventory of common shingle types for this reason. When exact matches aren't available, we blend similar colors strategically. This maintains aesthetic continuity across the roof. Premium architectural shingles cost more than basic 3-tab shingles. Specialty materials like slate or tile require specialized skills. Always verify material availability before scheduling repairs.
Underlying Damage: The Hidden Cost Factor
Underlying damage represents the most unpredictable cost factor. Water can travel far from the original leak point. Decking rot might not be visible until shingles are removed. Mold remediation adds significant expense if moisture persists. Proper inspection includes moisture meter readings and deck probing. We document all findings with photographs for transparency. Insurance companies require this documentation for claims. Addressing underlying damage prevents recurring problems. Ignoring hidden issues leads to more expensive repairs later. Quality contractors invest time in thorough inspection.
Material Costs: Asphalt Shingles vs. Premium Options
Material selection significantly impacts repair costs. Asphalt shingles dominate the residential market. Premium materials offer different benefits and costs. We'll compare common options with real pricing. All prices reflect current Texas market conditions. Material costs have increased 15-20% since 2020 due to supply chain issues. Choosing the right material depends on your budget and goals. Consider longevity, appearance, and compatibility with existing materials.
Standard 3-Tab Asphalt Shingles
Standard 3-tab shingles are the most economical option. They cost $80-$120 per square (100 square feet). These shingles have a flat appearance with cutouts. They typically last 15-20 years with proper installation. Color matching is easier due to widespread availability. Repair costs are lowest with these materials. However, they offer minimal wind resistance compared to premium options. Many insurance companies recognize their limitations. We recommend them for budget-conscious repairs on older roofs.
Architectural/Dimensional Shingles
Architectural shingles provide enhanced durability and appearance. They cost $120-$180 per square. These shingles have multiple layers for dimensional look. They typically last 25-30 years with proper installation. Most carry enhanced wind warranties up to 130 mph. Color matching can be challenging with discontinued lines. Repair costs are moderate with these materials. They represent the best value for most homeowners. Major manufacturers like GAF and CertainTeed offer extensive color options.
Premium Materials: Slate, Tile, and Metal
Premium materials offer exceptional longevity but higher costs. Slate tiles cost $800-$1,500 per square installed. Clay/concrete tiles cost $400-$800 per square. Metal roofing panels cost $300-$600 per square. These materials can last 50+ years with proper maintenance. Repair requires specialized skills and tools. Material matching is extremely difficult with natural products. Repair costs are highest with these materials. We recommend consulting specialists for premium material repairs. Always verify contractor experience with specific materials.
The Professional Repair Process: What to Expect
Professional shingle repair follows a systematic process. Understanding this process helps you evaluate contractor quality. Proper repairs require multiple steps for lasting results. We follow manufacturer specifications and building codes precisely. Texas follows the International Residential Code (IRC) for roofing requirements. Our process ensures compliance and quality. Homeowners should expect similar thoroughness from any contractor. Rushed repairs often fail prematurely.
Step 1: Comprehensive Inspection and Documentation
Every proper repair begins with thorough inspection. We examine the entire roof, not just the obvious damage. Moisture meters detect hidden water intrusion. Decking gets probed for soft spots. Flashing systems receive detailed evaluation. We photograph all findings for documentation. This inspection takes 30-60 minutes depending on roof size. Homeowners receive a detailed written report. Insurance companies require this documentation for claims. Never hire a contractor who skips comprehensive inspection.
Step 2: Material Selection and Color Matching
Material selection follows inspection completion. We identify existing shingle type, color, and manufacturer. Our inventory gets checked for matching materials. If matches aren't available, we source from suppliers. For discontinued colors, we create blending strategies. Homeowners approve materials before work begins. We provide samples for visual confirmation. This step prevents aesthetic disappointment later. Proper material preparation ensures efficient installation.
Step 3: Professional Installation Techniques
Professional installation follows manufacturer guidelines precisely. Damaged shingles get carefully removed without disturbing neighbors. Underlying decking gets inspected and repaired if needed. New underlayment gets installed where necessary. Flashing gets integrated properly with existing systems. Shingles get nailed with proper placement and quantity. Sealant gets applied at critical points. Cleanup removes all debris from the property. Final inspection verifies quality before customer review.
Insurance Claims for Shingle Repair: Navigating the Process
Insurance claims can cover shingle repair costs under specific circumstances. Storm damage from hail or wind often qualifies. Normal wear and tear typically doesn't qualify. Understanding the claims process prevents frustration. We've helped hundreds of homeowners navigate insurance claims. Proper documentation makes the difference between approval and denial. We'll share our proven approach for successful claims.
When Insurance Covers Shingle Repair
Insurance covers sudden, accidental damage from external forces. Hail storms causing granule loss and cracking qualify. Wind events removing shingles qualify. Fallen tree limbs causing damage qualify. Ice dam water intrusion might qualify. The damage must be documented immediately after the event. Policies have specific deductibles and coverage limits. Review your policy details before filing claims. The Insurance Information Institute provides helpful guidance on standard coverage.
The Claims Process: Step-by-Step Guidance
The claims process involves multiple steps for success. First, document damage with photographs immediately after the event. Contact your insurance company to initiate the claim. Schedule inspections with both your adjuster and contractor. Provide complete documentation including date-stamped photos. Obtain multiple repair estimates from licensed contractors. Review the adjuster's estimate for completeness. Negotiate respectfully if estimates differ significantly. Once approved, schedule repairs with your chosen contractor. Keep all receipts and documentation for your records.
DIY vs. Professional Repair: Safety and Cost Analysis
Homeowners often consider DIY shingle repair to save money. This approach carries significant risks and limitations. We'll compare DIY and professional options objectively. Safety should always be the primary consideration. Roof work causes thousands of injuries annually according to CDC data. Quality and warranty implications also matter. Make informed decisions based on complete information.
DIY Repair Risks and Limitations
DIY repair presents multiple risks beyond falling. Improper installation voids manufacturer warranties. Hidden damage might get missed without professional inspection. Material matching often proves challenging for homeowners. Building code violations can create liability issues. Future home sales might require disclosure of unpermitted work. The time investment often exceeds expectations. Material costs for small quantities can be surprisingly high. Most homeowners lack proper safety equipment and training.
Professional Repair Benefits and Value
Professional repair offers multiple benefits beyond labor. Proper inspection identifies hidden issues early. Manufacturer specifications get followed precisely. Building code compliance gets documented. Warranties cover both materials and workmanship. Safety protocols protect people and property. Insurance claims get handled efficiently. Time savings allow homeowners to focus on other priorities. Long-term reliability prevents recurring problems. The value extends beyond immediate cost savings.
Preventive Maintenance: Reducing Future Repair Costs
Preventive maintenance significantly reduces shingle repair frequency and costs. Regular care extends roof life and prevents minor issues from becoming major problems. We recommend twice-yearly inspections and simple maintenance tasks. These practices protect your investment and maintain warranty validity. Most manufacturers require regular maintenance for warranty coverage. We'll share our maintenance checklist developed over thousands of inspections.
Seasonal Maintenance Checklist
Spring and fall maintenance addresses seasonal challenges. Inspect shingles for damage after winter storms. Clean gutters and downspouts thoroughly. Trim overhanging tree branches. Check flashing around chimneys and vents. Examine attic ventilation for proper function. Remove debris from roof surfaces. Document any concerns with photographs. Schedule professional inspections every 2-3 years. Address minor issues before they escalate.
Early Warning Signs of Shingle Problems
Recognizing early warning signs prevents major damage. Granules in gutters indicate shingle wear. Curling or buckling shingles signal ventilation issues. Dark streaks suggest algae growth needing treatment. Missing shingles require immediate attention. Sagging areas indicate structural concerns. Interior water stains point to active leaks. Increased energy bills might reflect insulation damage. Regular observation helps catch problems early.
Frequently Asked Questions: Real Homeowner Concerns
How long does shingle repair typically take?
Most shingle repairs take 2-6 hours from arrival to cleanup. Simple repairs with accessible damage finish quickly. Complex repairs with multiple issues take longer. Weather conditions affect timing significantly. We schedule repairs during dry conditions for safety and quality. Preparation and cleanup add to total time on site. Efficient contractors minimize disruption to your daily routine.
Will repaired areas be noticeable on my roof?
Properly repaired areas should blend seamlessly with existing shingles. Color matching techniques minimize visual differences. Strategic placement of new shingles enhances blending. Sun exposure gradually equalizes slight color variations. Premium contractors take extra steps for aesthetic consistency. Discuss appearance concerns with your contractor before work begins.
How do I know if I need repair or full replacement?
Multiple factors determine repair versus replacement needs. Age is the primary consideration—roofs over 20 years often need replacement. Damage extent matters—if over 30% of shingles need repair, replacement usually makes more sense. Multiple leak points suggest systemic failure. Your contractor should provide clear recommendations with cost comparisons.
What warranties cover shingle repairs?
Warranties vary by contractor and materials. Manufacturer warranties cover material defects. Contractor workmanship warranties cover installation quality. These typically range from 1-10 years depending on contractor confidence. Always get warranties in writing with clear terms. Understand what voids warranty coverage before proceeding.
How soon should I repair damaged shingles?
Repair damaged shingles immediately upon discovery. Even minor damage allows water intrusion. Water causes progressive damage to underlying materials. Delayed repairs increase costs significantly. Temporary measures like tarps provide short-term protection. Schedule professional assessment within days of noticing damage.
Can I repair shingles during rainy season?
Professional repairs require dry conditions for proper installation. Adhesives need time to cure without moisture interference. Safety concerns increase on wet roofs. We schedule repairs during forecasted dry periods. Temporary protection gets installed if unexpected rain occurs. Discuss timing options with your contractor based on local weather patterns.
How do I choose a reliable shingle repair contractor?
Choose contractors with proper licensing and insurance. Verify manufacturer certifications like GAF Master Elite. Check online reviews and ask for references. Request detailed written estimates. Avoid pressure tactics or unusually low bids. Trust contractors who educate rather than just sell. Your local National Roofing Contractors Association member demonstrates professional commitment.
Real Project Case Studies: Costs and Outcomes
Case Study 1: Minor Wind Damage Repair
A Kingwood homeowner lost three shingles during spring storms. The roof was 8 years old with architectural shingles. Damage was isolated to one section. No underlying issues were detected. We matched existing GAF Timberline HD shingles from inventory. Total repair cost was $285 including materials and labor. The project took 2.5 hours with two technicians. The homeowner avoided insurance claim due to deductible amount. Repairs blended perfectly with existing roof. No further issues have occurred in two years of follow-up.
Case Study 2: Hail Damage Insurance Claim
A Porter homeowner experienced significant hail damage across roof surfaces. The roof was 12 years old with 3-tab shingles. Hail created multiple impact points with granule loss. We documented damage with photographs and moisture readings. The insurance adjuster approved full roof replacement. Total project cost was $8,500 with $1,000 deductible. We upgraded to architectural shingles for enhanced protection. The project took three days with five technicians. The homeowner received improved wind warranty and energy efficiency.
Case Study 3: Aging Roof with Multiple Leaks
A Humble homeowner had persistent leaks in multiple locations. The roof was 22 years old with original shingles. Repairs had been attempted multiple times previously. We recommended complete replacement based on age and condition. The homeowner chose GAF Timberline HD shingles with 50-year warranty. Total project cost was $12,000 including deck repairs. Financing made the project affordable through manageable payments. The project took four days with careful attention to ventilation. Leaks stopped completely with proper installation.
Industry Statistics and Data: Understanding the Big Picture
The roofing industry provides valuable data for homeowners. According to Fixr.com's 2024 Cost Guide, the average roof repair costs $950 nationally. Texas averages run 10-15% lower due to material availability. Hail damage claims average $10,000 according to insurance data. Proper maintenance extends roof life by 5-10 years based on NRCA studies. Architectural shingles represent 70% of current installations. Understanding these trends helps homeowners make informed decisions.
Conclusion: Making Smart Decisions About Shingle Repair
Shingle repair costs depend on multiple factors we've explored thoroughly. Your specific situation determines the appropriate approach. Professional assessment provides the foundation for good decisions. Consider long-term value rather than just immediate cost. Quality repairs protect your home's structural integrity and value. Regular maintenance reduces future repair frequency and expense. Insurance claims require proper documentation for success. Choose contractors who demonstrate expertise and transparency. Your roof represents a significant investment worth protecting properly. We hope this guide empowers you to make confident decisions. Contact us if you need personalized assessment of your roofing situation. We're here to help you protect what matters most.