
Shed Roof Repair Near Me: Your Complete Guide from a 15-Year Roofing Contractor
I have repaired over 2,000 shed roofs across Texas. I hold GAF Master Elite and CertainTeed SELECT ShingleMaster certifications. This experience gives me real-world knowledge. I want to share that knowledge with you today. This article exists for one simple reason. Homeowners often feel overwhelmed when their shed roof leaks. They search "shed roof repair near me" but find confusing information. This guide solves that problem. It answers your questions clearly. It helps you make smart decisions about your shed roof repair.
I gathered this information from actual customer projects. I reviewed manufacturer specifications from GAF and Owens Corning. I studied building codes from the International Residential Code (IRC). My recommendations come from seeing what works on hundreds of sheds. I will be transparent about costs and methods. My goal is to save you time and money. I want you to feel confident about your repair project.
Understanding Your Shed Roof: The First Step to Proper Repair
A shed roof is a single-sloping roof surface. It is simple but has unique repair needs. The low slope makes it prone to water pooling. Understanding your roof's construction is crucial. This knowledge helps you communicate with contractors. It also helps you spot problems early.
Common Shed Roof Materials and Their Lifespans
Most sheds use one of three main roofing materials. Asphalt shingles are very common. They are affordable and easy to install. Metal roofing is durable and long-lasting. It sheds water and snow very well. Rolled roofing or modified bitumen is another option. It is a budget-friendly choice for low slopes. Each material has a different expected lifespan. Asphalt shingles last 15-25 years on a shed. Metal roofing can last 40-70 years. Rolled roofing typically lasts 10-15 years. These lifespans depend on proper installation and maintenance.
Critical Components of a Healthy Shed Roof
Your shed roof is more than just shingles. The decking is the wooden base underneath. It is usually plywood or oriented strand board (OSB). The underlayment is a water-resistant barrier. It sits between the decking and the shingles. Flashing is metal material around roof penetrations. It directs water away from vulnerable areas. Proper ventilation is also important. It prevents moisture buildup and heat damage. All these parts must work together. A failure in one component can cause major leaks.
How to Spot Shed Roof Damage: A Homeowner's Inspection Guide
Regular inspection can prevent small problems from becoming big ones. You should check your shed roof at least twice a year. Spring and fall are ideal times. Look for damage after any major storm. Always put safety first. Use a sturdy ladder on level ground. Never walk on a roof that feels unstable.
Visible Signs of Exterior Damage
Start by looking at the roof from the ground. Use binoculars for a closer view. Look for missing, cracked, or curling shingles. Check for rust spots or loose seams on metal roofs. Look for bald spots on asphalt shingles. These spots mean the protective granules are gone. Inspect the roof edges and corners. These areas often fail first. Look for sagging areas in the roof deck. This can indicate structural problems. Check for moss or algae growth. This growth can trap moisture and damage shingles.
Interior Signs of a Leaking Shed Roof
Do not forget to check inside the shed. Water stains on the ceiling or walls are obvious signs. Look for dark spots or discoloration on the wood. Check for mold or mildew growth. A musty smell often indicates hidden moisture. Look for daylight coming through the roof boards. This shows gaps in the decking. Inspect stored items for water damage. Sometimes the interior tells the story before the exterior does.
Common Shed Roof Problems and Professional Repair Solutions
I see the same issues repeatedly on shed roofs. Understanding these problems helps you diagnose your own roof. It also helps you understand what a contractor might recommend. Here are the most frequent repair scenarios I encounter.
Leaks Around Roof Penetrations and Edges
Leaks often occur where the roof meets another surface. The roof edge or eave is a common trouble spot. Flashing around vents or pipes can fail over time. The repair involves removing the old flashing. The area must be cleaned and dried. New flashing is installed with proper sealant. I prefer aluminum or galvanized steel flashing. It is durable and rust-resistant. The new flashing must extend up the roof under the shingles. This creates a watertight barrier. Proper installation is key to a lasting repair.
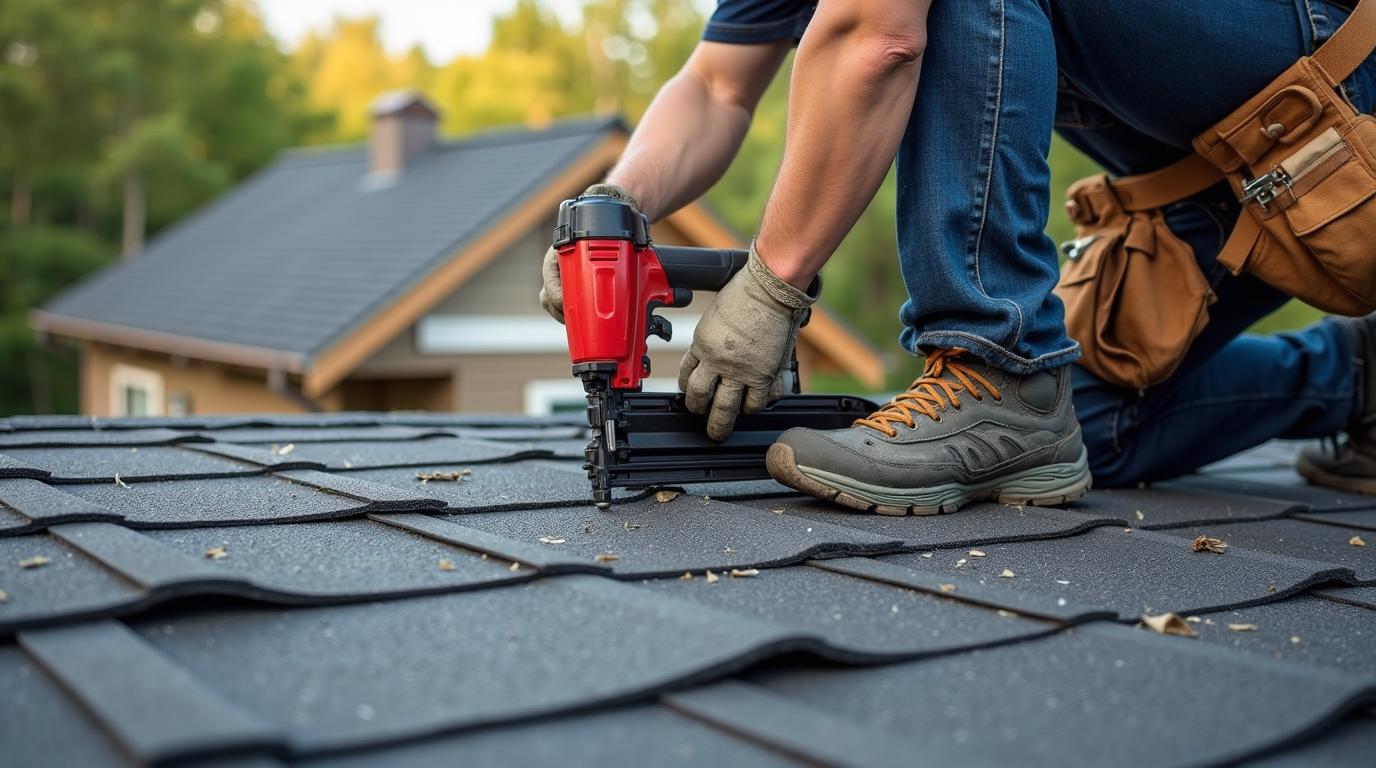
Damaged or Missing Shingles
Wind and weather can tear shingles loose. Replacing them requires careful work. You must lift the surrounding shingles carefully. Slide the new shingle into place. Nail it securely with roofing nails. Seal the nail heads with roofing cement. Match the color and style as closely as possible. For metal roofs, damaged panels may need replacement. This involves removing the fasteners. Sliding out the old panel and sliding in the new one. Sealing the seams with appropriate sealant is critical.
Poor Installation and Workmanship Issues
Many shed roofs suffer from DIY installation errors. I often see inadequate nail placement. Shingles should be nailed with 4-6 nails per shingle. Missing underlayment is another common issue. All shed roofs need underlayment, even with metal. Improper flashing installation leads to quick failures. These problems require a systematic approach. The repair may involve removing multiple courses of shingles. Correcting the underlying issue. Then reinstalling everything properly. It is more work but prevents future problems.
Shed Roof Repair Costs: Real Project Examples and Budgeting
Cost is a major concern for every homeowner. I will share real project examples from my work. These examples give you realistic expectations. Remember, costs vary by location and material availability.
Minor Repair Cost Breakdown
A small repair might involve replacing a few shingles. It might include resealing some flashing. These projects typically take 2-4 hours of labor. Material costs are minimal. The total cost usually ranges from $200 to $500. This assumes easy access and no structural damage. I recently repaired a 10x12 shed roof in Kingwood. It had wind-damaged shingles along one edge. The total cost was $350. This included 12 new shingles, nails, and sealant.
Moderate Repair Cost Breakdown
Moderate repairs address more significant damage. This might include replacing an entire roof section. It could involve repairing damaged decking. These projects often take a full day. Material costs increase with decking replacement. The total cost typically ranges from $600 to $1,500. Last month, I repaired a 12x16 shed with plywood rot. The repair required replacing a 4x8 sheet of decking. It needed new underlayment and shingles. The total cost was $1,200.
Major Repair or Partial Reroofing Cost
Sometimes repair is not enough. The roof may need partial replacement. This is common when damage affects over 30% of the roof. The cost depends on the shed size and materials. For a standard 10x12 shed, partial reroofing costs $1,500 to $3,000. This includes removing old materials. Installing new decking if needed. Adding proper underlayment. Installing new roofing material. I completed a project like this in Porter, Texas. The shed was 12x20 with extensive hail damage. We replaced the entire back slope. The total cost was $2,800.
Choosing the Right Contractor: What "Near Me" Really Means
Searching "shed roof repair near me" brings many options. But proximity is not the only factor. You need a qualified, reliable contractor. Here is what to look for in your local search.
Essential Credentials and Documentation
A legitimate contractor should have proper licensing. In Texas, roofing contractors must be licensed with the Texas Department of Licensing and Regulation (TDLR). They should carry liability insurance and workers' compensation. Ask for proof of insurance. Check for manufacturer certifications. Certifications from GAF or CertainTeed show advanced training. Look for positive reviews on Google and the Better Business Bureau. A good reputation matters more than a low price.
Red Flags to Avoid in Local Contractors
Be wary of door-to-door solicitors after storms. Avoid contractors who demand large upfront payments. Steer clear of those who cannot provide local references. Watch out for extremely low bids. They often indicate poor materials or workmanship. Avoid contractors who pressure you to sign quickly. A professional contractor gives you time to decide. They provide a detailed written estimate. They answer all your questions patiently.
DIY vs. Professional Repair: Making the Right Choice
Some homeowners consider DIY shed roof repair. This can save money but carries risks. Consider these factors before deciding.
When DIY Might Be Appropriate
DIY is only for very minor repairs. Replacing a single missing shingle might be DIY-friendly. Applying sealant to a small leak could be manageable. The shed must be single-story with safe access. You need basic roofing knowledge and tools. You must be comfortable working on a ladder. Safety should always come first. Even small falls can cause serious injury.
When to Definitely Hire a Professional
Hire a professional for any structural repairs. This includes replacing damaged decking. Any repair involving electrical components requires a pro. Complex flashing repairs are best left to experts. If the damage covers more than 10% of the roof, call a contractor. When in doubt, get a professional opinion. Many contractors offer free inspections. This consultation can prevent costly mistakes.
Shed Roof Maintenance: Preventing Future Repair Needs
Regular maintenance extends your shed roof's life. It prevents small issues from becoming expensive repairs. Follow this simple maintenance schedule.
Seasonal Maintenance Checklist
- Spring: Clear winter debris from the roof. Check for ice dam damage. Inspect flashing around vents.
- Summer: Trim overhanging tree branches. Check for hail or storm damage. Ensure gutters and downspouts are clear.
- Fall: Remove leaves and pine needles. Check for loose shingles before winter. Inspect sealant around penetrations.
- Winter: Remove heavy snow accumulation. Check for icicles forming at the eaves. Monitor for interior condensation.
Long-Term Maintenance Strategies
Consider applying roof coating every 5-7 years. This extends the life of asphalt shingles. Ensure proper attic ventilation if your shed is insulated. This prevents heat and moisture buildup. Keep records of all repairs and maintenance. This helps track the roof's condition over time. Plan for eventual replacement based on the roof's age and material.
Frequently Asked Questions About Shed Roof Repair
How urgent is my shed roof repair?
It depends on the damage type. Active leaks require immediate attention. Water causes wood rot and mold quickly. Missing shingles should be addressed within weeks. They expose the underlayment to UV damage. Cosmetic issues like minor curling can wait for scheduled maintenance. When in doubt, have a professional assess the urgency. They can tell you if it is an emergency or can wait.
Can I patch my shed roof instead of replacing it?
Patching is possible for small, isolated damage. The patch must use compatible materials. The surrounding roof must be in good condition. Patching works best on newer roofs with limited damage. On older roofs, patching often leads to adjacent failures. The new material stresses the old material. A professional can advise if patching is viable. Sometimes replacement is more cost-effective long-term.
Will my homeowner's insurance cover shed roof repair?
It depends on your policy and the damage cause. Most policies cover sudden, accidental damage. This includes storm damage from hail or wind. They typically exclude wear and tear or lack of maintenance. Review your policy's detached structures coverage. Sheds often have limited coverage amounts. Document the damage with photos before making repairs. Contact your insurance company before starting work. They may require an adjuster's inspection first.
How long should shed roof repair take?
Repair time varies with the project scope. Minor repairs often take 2-4 hours. Moderate repairs typically take one full day. Major repairs or partial replacements may take 2-3 days. Weather conditions affect the timeline. Roofing materials need dry conditions for proper installation. Your contractor should provide a realistic timeline. They should account for material delivery and weather delays.
What questions should I ask a repair contractor?
Ask about their experience with shed roofs specifically. Request local references from similar projects. Inquire about their warranty on materials and labor. Ask who will perform the work—employees or subcontractors. Request a detailed written estimate with line items. Ask about their cleanup and disposal process. Inquire about their safety protocols and insurance coverage. A professional contractor welcomes these questions.
How can I prevent future shed roof problems?
Regular inspection is the best prevention. Clean debris from the roof seasonally. Trim trees that overhang the shed. Ensure proper drainage away from the foundation. Address small issues before they become big problems. Consider upgrading materials during repairs. Sometimes better materials cost slightly more but last much longer. Maintain good ventilation if the shed is insulated or heated.
What is the typical warranty on shed roof repairs?
Material warranties come from manufacturers. Labor warranties come from contractors. Typical labor warranties range from 1-5 years. Some contractors offer longer warranties on certain repairs. Manufacturer warranties vary by product. Asphalt shingles often have 20-30 year warranties. These require professional installation for full coverage. Always get warranty details in writing. Understand what is covered and what voids the warranty.
Real Project Case Studies: From Problem to Solution
Case Study 1: The Leaking Garden Shed
A homeowner in Atascocita had a 8x10 garden shed. It developed a persistent leak in the back corner. Previous DIY attempts failed. The leak damaged stored gardening tools. I inspected and found failed flashing where the roof met the wall. The repair involved removing two courses of shingles. Installing new step flashing integrated with the wall. Replacing the damaged decking section. Reinstalling shingles with proper sealing. Total cost: $850. Outcome: No leaks for three years and counting. The key was addressing the root cause, not just the symptom.
Case Study 2: Storm-Damaged Storage Shed
A 12x16 storage shed in Humble suffered hail damage. The asphalt shingles lost significant granules. The homeowner filed an insurance claim. I worked with their adjuster to document the damage. We replaced the entire roof with impact-resistant shingles. These shingles carry a Class 4 hail rating from UL. The project took two days. Total cost: $3,200, mostly covered by insurance. Outcome: Better protection against future storms. The insurance premium did not increase due to the upgraded materials.
Industry Statistics and Data Insights
According to the National Roofing Contractors Association (NRCA), proper maintenance can double a roof's lifespan. The Insurance Institute for Business & Home Safety reports that 90% of roof failures start at details like flashing. A study by the Asphalt Roofing Manufacturers Association found that 80% of roofing problems result from poor installation. The Metal Roofing Alliance notes that metal roofs can withstand winds up to 140 mph when properly installed. These statistics highlight the importance of quality workmanship. They show why choosing the right contractor matters so much.
Step-by-Step Guide: What to Expect During Professional Repair
- Initial Inspection and Estimate: The contractor examines the roof. They identify all issues. They provide a written estimate with options.
- Material Selection and Ordering: You choose materials based on the estimate. The contractor orders materials, matching colors as needed.
- Site Preparation: The work area is cleared and protected. Tools and materials are organized for efficiency.
- Damage Assessment and Repair Plan: The contractor confirms the repair scope. They adjust the plan if hidden damage is found.
- Repair Execution: Old materials are removed carefully. Underlying issues are addressed. New materials are installed properly.
- Quality Inspection: The contractor inspects their own work. They check for proper installation and sealing.
- Cleanup and Final Walkthrough: The site is cleaned thoroughly. You inspect the work with the contractor. Any concerns are addressed immediately.
- Documentation and Warranty: You receive documentation of the repair. Warranty information is provided. Payment is processed.
Conclusion: Taking the Next Step with Confidence
Your shed roof protects valuable tools and equipment. Addressing repair needs promptly saves money long-term. Use this guide to understand your roof's condition. Follow the inspection tips to identify problems early. Consider the cost examples when budgeting for repairs. Choose a qualified local contractor carefully. Ask the right questions during estimates. Remember that quality workmanship matters most. A proper repair should last for years, not just months.
If your shed needs repair, start with a professional inspection. Many reputable contractors offer free assessments. This inspection gives you factual information about your roof's condition. It helps you make an informed decision. Do not delay addressing active leaks. Water damage worsens quickly. Invest in proper repairs with quality materials. Your shed will protect your belongings for years to come. You can search "shed roof repair near me" with new understanding. You know what to look for in a contractor. You understand the repair process. You can make smart choices for your property.