
Patio Roof Repair Guide: 20+ Years of Roofing Experience Helping Homeowners
My name is Michael, and I have been a licensed roofing contractor for over twenty years. I have completed more than three thousand roofing projects across Texas. I hold certifications from major manufacturers like GAF and Owens Corning. This experience gives me real-world knowledge about patio roof problems. I have seen every type of patio roof issue imaginable. This guide shares that practical, hands-on knowledge with you.
This article exists to solve a specific problem for homeowners. That problem is the stress and confusion of a damaged patio roof. You might see a leak, notice sagging, or hear strange noises. You wonder how serious it is and what to do next. This guide answers those questions clearly. It helps you understand your patio roof. It explains repair options and costs. It gives you the confidence to make smart decisions for your home.
The information here comes from real customer projects. It is based on industry data from sources like the National Roofing Contractors Association (NRCA). It references manufacturer specifications and local building codes. My recommendations follow proven methods. They are not just theory. They are what works on actual homes. My goal is to be transparent and helpful. I want to save you time and prevent costly mistakes.
Understanding Your Patio Roof Structure
Before fixing anything, you must know what you are working on. Patio roofs come in several common types. Each has unique repair needs. The most common is the attached patio cover. This structure connects directly to your house. It uses the house wall for support. Another popular type is the freestanding pergola or gazebo. These have their own support posts. They are not attached to the main house.
Common Patio Roof Framing Materials
The frame holds everything up. Wood is the traditional choice. Pressure-treated pine or cedar are common. Wood looks beautiful but requires maintenance. It can rot or attract insects. Aluminum framing is lightweight and rust-proof. It is popular for modern patio covers. Steel is very strong and durable. It is often used for larger spans. Vinyl or PVC frames are low maintenance. They never need painting. However, they can become brittle in extreme cold.
Identifying Load-Bearing vs. Non-Load-Bearing Elements
This is a critical safety concept. Load-bearing elements carry the weight of the roof. They include beams, posts, and rafters. Non-load-bearing elements are for looks or weather protection. They include latticework or decorative trim. Never remove or alter a load-bearing component without professional advice. A mistake here can cause the roof to collapse. Always check your local building department for permit requirements.
Diagnosing Common Patio Roof Problems
Accurate diagnosis is the first step to a proper repair. Many symptoms point to specific underlying issues. Learning to read these signs can save you money. It helps you explain the problem clearly to a contractor.
Leaks and Water Damage
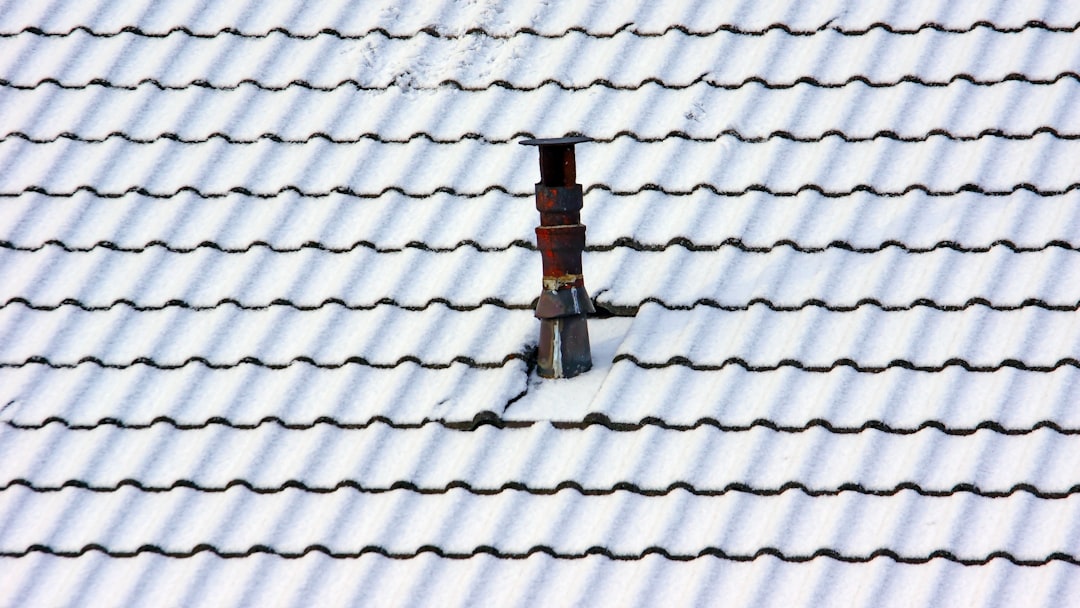
Water is the enemy of all structures. A leak might seem simple. But water can travel far from the original entry point. Start by looking for water stains on the ceiling or walls. Follow the stain upward to find the source. Check all roof penetrations. These include areas around screws, nails, and light fixtures. Inspect the flashing. Flashing is the metal or rubber seal around edges and joints. Damaged flashing is a very common leak source.
For solid patio roofs, check the roofing material itself. Look for cracked tiles, torn shingles, or punctures in metal panels. On lattice or fabric covers, check the tightness of the material. Sagging fabric can create pockets where water collects. Always inspect the problem during or right after rain. This makes the leak path easier to trace. The National Roofing Contractors Association (NRCA) has excellent resources on leak diagnosis.
Sagging, Bowing, and Structural Issues
Sagging is a serious warning sign. It often indicates structural failure. The cause could be rotten wood, corroded metal, or overloading. Overloading happens when too much weight is on the roof. This could be heavy snow, piled-up leaves, or improper installation of equipment like an HVAC unit. Use a long, straight board or a tight string line. Place it along the underside of the roof frame. Any significant dip or bow is a problem.
Check all connection points. Look where beams meet posts and where rafters sit on beams. Are the bolts or nails tight? Is there cracking or splitting in the wood? Is there rust on metal connectors? Pay special attention to areas that are constantly damp. These are prime spots for rot and corrosion. Structural repairs often require a building permit. Always consult a professional for any sagging issue. Safety must come first.
Material-Specific Failures
Different roofing materials fail in different ways. Asphalt shingles may lose granules or curl at the edges. Wood shingles can crack, split, or develop moss. Clay or concrete tiles can break from impact or freeze-thaw cycles. Metal roofs can develop rust spots or loose fasteners. Polycarbonate or plastic panels can become cloudy, brittle, or discolored by UV rays. Fabric canopies can tear, fade, or mildew.
Know what material is on your patio roof. Then, learn its common failure points. Manufacturer websites are great for this. For example, GAF's homeowner site details shingle problems. The Metal Construction Association has info on metal roofing. This knowledge helps you communicate effectively with repair professionals.
Patio Roof Repair Costs and Budgeting
Cost is a major concern for every homeowner. Prices vary widely based on many factors. I will give you real examples from recent projects. This will help you set a realistic budget. Remember, the cheapest option is not always the best value. Quality work lasts longer and protects your home.
Cost Breakdown by Repair Type
Here is a general cost guide based on Texas market prices. These are averages for materials and labor. Your actual cost may differ.
- Minor Leak Repair: $150 - $500. This fixes a single leak point. It involves resealing flashing or replacing a few shingles.
- Partial Re-Roofing: $800 - $2,500. This replaces a damaged section of roofing material. It includes new underlayment and proper sealing.
- Structural Reinforcement: $1,000 - $4,000+. This addresses sagging or weak framing. It may involve sistering new lumber to old or adding support posts.
- Complete Patio Roof Replacement: $3,000 - $15,000+. This is a full tear-off and rebuild. Cost depends heavily on size, materials, and complexity.
I recently worked on a project in Kingwood. The homeowner had a leaking attached aluminum patio cover. The leak was at the seam where it met the house. We had to remove a section of panels. We then repaired the rusted underlying frame. We installed new high-quality flashing and resealed everything. The total cost was $1,200. The repair has held perfectly for three years now.
Factors That Influence Your Final Bill
Many things affect the price of your repair. The size of your patio is the biggest factor. Contractors often price by the square foot. The height and pitch of the roof matter. A very high or steep roof requires more safety equipment. This increases labor time and cost. The type of material is crucial. Replacing a clay tile is more expensive than an asphalt shingle.
Accessibility is another key factor. Is the patio behind a locked gate? Are there plants or furniture in the way? Easy access saves time and money. Local building codes can add cost. Your repair might need a permit and inspections. The contractor must factor this into the price. Finally, season and weather play a role. Demand is high after major storms. Prices may be higher during these busy periods.
Choosing the Right Repair Materials
Selecting materials is about balance. You want durability, aesthetics, and value. I have installed almost every material available. Here is my hands-on comparison to help you choose.
Roofing Membrane and Sheet Goods
For low-slope or flat patio roofs, membranes are common. EPDM (rubber) is a synthetic rubber sheet. It is very durable and flexible. It handles temperature extremes well. It is installed in large sheets with glued or taped seams. TPO (Thermoplastic Polyolefin) is a white, reflective membrane. It is great for energy efficiency. It reflects sunlight, keeping the patio cooler. It is also highly resistant to punctures.
Modified Bitumen is like a high-tech version of tar paper. It comes in rolls. It is torch-applied or cold-adhered. It is very tough and waterproof. For homeowners, I often recommend TPO for attached patio covers. Its reflective properties and clean look provide good value. Firestone Building Products is a leading manufacturer of these systems.
Shingles, Tiles, and Panels
For pitched patio roofs, shingles and tiles are popular. Asphalt architectural shingles are affordable and easy to install. They come in many colors. They have a good lifespan of 20-30 years. Metal panels are long-lasting and lightweight. They shed water and snow easily. They can be noisy during rain. Clay or concrete tiles are very durable and beautiful. They are also very heavy. Your roof structure must be strong enough to support them.
Polycarbonate or PVC panels are clear or tinted. They let in light while providing shelter. They are impact-resistant but can scratch. For a classic look that matches your house, use shingles. For a modern, industrial look, choose metal. For a sunroom feel, polycarbonate is excellent. Always check the product's UL rating or wind warranty. This is important in storm-prone areas like Texas.
The Professional Repair Process: What to Expect
Hiring a professional brings peace of mind. Knowing what will happen reduces anxiety. Here is a step-by-step guide based on my field experience.
Step 1: The Initial Inspection and Estimate
A good contractor starts with a thorough inspection. They will examine the entire patio structure. They will look at the roof, frame, connections, and foundation. They will take measurements and photos. They will discuss your concerns and goals. Then, they will provide a detailed written estimate. This estimate should list all work to be done. It should specify materials by brand and type. It should include a timeline and payment schedule. It should also show proof of insurance and licensing.
Step 2: Preparation and Protection
Before work begins, the crew will prepare the site. They will move or cover your patio furniture and grill. They will lay down protective tarps on the ground. They will set up safety barriers if needed. They will gather all tools and materials. Good preparation prevents damage to your property. It also makes the work go faster and smoother.
Step 3: The Repair Work
The actual repair depends on the problem. For a leak, they will first locate the exact source. They will remove damaged materials carefully. They will inspect the underlying wood or structure for rot. Any rotten wood must be cut out and replaced. They will then install new underlayment or membrane. They will install new flashing according to manufacturer instructions. They will seal all edges and penetrations with high-quality sealant. For structural repairs, they may need to temporarily support the roof. Then they can reinforce or replace beams and posts.
Step 4: Cleanup and Final Walkthrough
A professional job includes a professional cleanup. All old materials and nails should be removed. The area should be swept clean. The contractor should then do a final inspection with you. They will explain what was done. They will show you the repaired areas. They will provide you with warranty information for both labor and materials. They may also give you maintenance tips. This final step ensures you are completely satisfied.
Practical Homeowner Tips from Real Projects
Over the years, I have learned what helps homeowners the most. These are not complex tricks. They are simple, effective actions you can take.
- Perform Seasonal Inspections: Check your patio roof every spring and fall. Look for debris, loose fasteners, and signs of wear. Clean out gutters and downspouts attached to the patio cover.
- Keep It Clean: Remove leaves, pine needles, and dirt regularly. Debris holds moisture against the roof. This speeds up deterioration. It can also clog drainage.
- Trim Overhanging Branches: Tree branches can scratch roofing materials. They drop leaves and sap. They can break and fall during storms. Keep trees trimmed back from your patio roof.
- Reseal Proactively: Check the sealant around flashing and penetrations every two years. If it is cracked or peeling, scrape it out and apply new sealant. This is a cheap and easy DIY task that prevents big leaks.
- Document Everything: Take photos of your patio roof when it is new or after a repair. Keep receipts for materials and contractor invoices. This documentation is invaluable for insurance claims or future sales of your home.
Frequently Asked Questions (FAQ)
Can I repair my patio roof myself?
Some minor repairs are DIY-friendly. These include reapplying sealant or replacing a single shingle. However, any repair involving structure, electricity, or major waterproofing should be done by a professional. A mistake can lead to injury, more damage, or voided warranties. Always assess your own skill level and safety risks honestly.
How long should a patio roof repair last?
A proper repair should last as long as the original material's expected lifespan. For example, a well-done shingle repair should last 20+ years. A flashing repair with high-quality metal and sealant should last 10-15 years. The key is using the right materials and correct installation techniques. A cheap, quick fix might only last one season.
Will my homeowner's insurance cover patio roof repair?
It depends on the cause of damage. Insurance typically covers sudden, accidental damage. This includes damage from a storm, falling tree, or hail. It usually does not cover damage from lack of maintenance or normal wear and tear. You must file a claim promptly and provide evidence. Always review your specific policy and talk to your agent. The Insurance Information Institute provides a good overview of standard coverage.
What is the most common mistake homeowners make with patio roofs?
The most common mistake is ignoring small problems. A tiny leak or a little sagging seems minor. But water and structural issues get worse over time. Delaying repair always increases the final cost. A $200 fix today can become a $2,000 repair next year. Address issues as soon as you notice them.
How do I find a reliable patio roof repair contractor?
Look for a licensed, insured, and local contractor. Ask for references from recent patio projects. Check online reviews on multiple platforms. Verify their standing with the Texas Department of Licensing and Regulation (TDLR). Get at least three detailed written estimates. A reliable contractor will answer your questions patiently. They will not pressure you to sign a contract immediately.
What questions should I ask a contractor before hiring them?
Ask about their experience with patio roofs specifically. Ask who will perform the work (employees or subcontractors). Request proof of liability insurance and workers' compensation. Ask about the warranty for both labor and materials. Inquire about the estimated start and completion dates. Ask how they will protect your property during the job. A trustworthy contractor will have clear answers.
Is a building permit required for patio roof repair?
It depends on the scope of work and your local jurisdiction. Minor repairs like shingle replacement often do not need a permit. Structural repairs, electrical work, or changing the roof's footprint usually do require a permit. The contractor should know the local codes and pull the necessary permits. You can also call your city or county building department to ask. Following code ensures the work is safe and increases your home's value.
Real Project Case Studies with Outcomes
Real examples show how theory works in practice. Here are two recent cases from my work.
Case Study 1: The Hidden Rot
A homeowner in The Woodlands reported a small leak. The patio had a wood-framed roof with asphalt shingles. The leak was near the house. We removed the shingles and underlayment. We found extensive dry rot in the roof sheathing and a rafter. The leak had been slow for years. The repair expanded from a simple patch to replacing a 4x8 section of sheathing and sistering a new rafter. We used pressure-treated wood for the new frame. We installed ice-and-water shield underlayment for extra protection. The total cost was $1,800. The outcome was a solid, dry repair. The lesson: what you see is often just the tip of the iceberg.
Case Study 2: The Storm-Damaged Metal Roof
After a hailstorm in Spring, Texas, a client had dents and a puncture in their patio's standing seam metal roof. The roof was only five years old. We worked with the homeowner's insurance adjuster. We documented the damage with photos and measurements. The insurance approved a full repair. We sourced matching panels from the original manufacturer. We carefully removed the damaged sections. We installed new panels and integrated them with the existing roof. We also applied a protective coating to help prevent future hail damage. The insurance covered most of the $3,500 cost. The outcome was a seamless repair that restored both function and appearance.
Industry Statistics and Data
Data helps put things in perspective. According to industry surveys, outdoor living spaces like patios are a top priority for homeowners. A 2023 report by the National Association of Home Builders (NAHB) states that covered patios are among the most desired outdoor features. Proper maintenance of these structures protects your investment. The NRCA notes that proactive maintenance can extend a roof's life by up to 50%. Neglect is the leading cause of premature roof failure. In Texas, wind and hail are the most common causes of insured patio roof damage, according to Texas Department of Insurance data.
Conclusion: Your Path to a Secure Patio Roof
Your patio roof is an important part of your home. It provides shelter and expands your living space. Protecting it is a smart investment. This guide has given you the knowledge to understand common problems. You now know about repair costs and material choices. You have seen the professional repair process. You have learned practical maintenance tips.
The next step is action. Start with a careful inspection of your own patio roof. Look for the signs we discussed. Decide if it is a DIY task or time to call a pro. If you need a contractor, use the tips to find a reliable one. Get clear estimates and ask good questions. Do not let a small issue become a major expense. A well-maintained patio roof will give you years of enjoyment. It will also protect the value of your Texas home. Thank you for trusting my experience. I wish you success with your patio roof repair project.