
Cedar Shake Roof Repair: A 25-Year Contractor's Honest Guide to Protecting Your Investment
I've spent over two decades repairing and replacing cedar shake roofs across Texas. I've completed more than 1,200 cedar roof projects. I hold certifications from the Cedar Shake & Shingle Bureau and am a GAF Master Elite contractor. This experience gives me a unique perspective on what truly works for homeowners. I've seen beautiful cedar roofs destroyed by improper repairs. I've also seen roofs last 40+ years with proper care. This article shares that hard-earned knowledge.
This guide exists because cedar shake roof repair confuses most homeowners. You might notice a leak or see cracked shakes. You wonder: Can this be repaired or does the whole roof need replacement? How much should it cost? Will insurance cover it? This article answers these exact questions. It provides clear, actionable information based on real projects. My goal is to help you make informed decisions and avoid costly mistakes.
I gathered this information through thousands of customer projects. I studied manufacturer specifications from companies like CertiSplit and Shakertown. I reference building codes like the International Residential Code (IRC). I follow guidelines from the Cedar Shake & Shingle Bureau. My recommendations come from testing different methods on actual roofs. I'll explain why certain repairs work and others fail. This transparency helps you understand the "why" behind each step.
Understanding Cedar Shake Roofs: More Than Just Wood
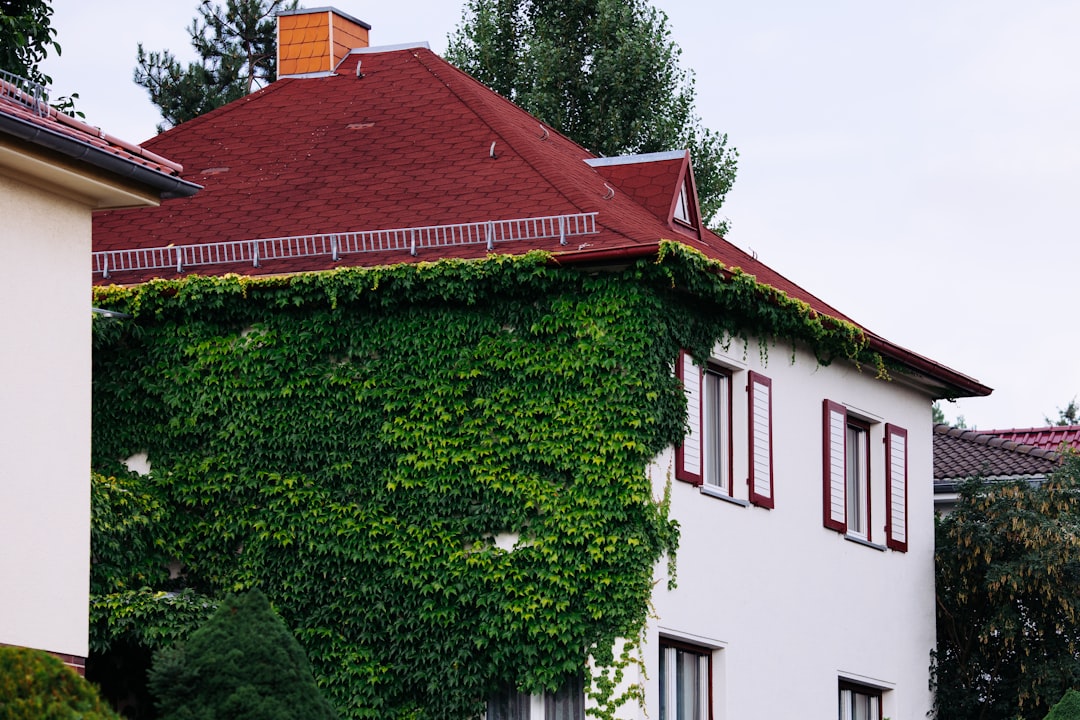
Cedar shakes are not ordinary shingles. They are split from Western Red Cedar logs. This wood contains natural preservatives called thujaplicins. These chemicals resist decay, insects, and UV damage. Shakes have a rough, textured surface. Shingles are sawn smooth on both sides. This difference affects how they wear and how you repair them.
How Cedar Shakes Age and Fail
Cedar roofs age differently than asphalt roofs. They don't just wear out uniformly. Failure usually happens in specific patterns. Cupping occurs when the edges of shakes curl upward. This creates pockets that hold water. Splitting happens when shakes crack along the grain. This allows water to penetrate the underlayment. Erosion gradually wears away the wood surface. This reduces the shake's thickness over decades.
Moss and algae growth is common in shaded areas. This isn't just cosmetic. Organic growth holds moisture against the wood. This accelerates rot. The key is identifying which issues are repairable. Minor splitting and cupping can often be fixed. Widespread rot usually requires replacement. I assess this by walking the roof and probing suspect areas with a tool.
Critical Components Beyond the Shakes
The shakes are only the visible layer. The underlayment is your roof's true waterproofing. For cedar, we use either #30 felt or synthetic underlayment. Synthetic products like Tyvek Protec offer better slip resistance. Proper ventilation is non-negotiable. Cedar needs airflow to dry out. The IRC requires 1 square foot of net free ventilation per 150 square feet of attic space. Without this, moisture builds up and rots the roof from underneath.
Flashing is where most leaks occur. This includes metal around chimneys, walls, and valleys. Galvanized steel was common historically. Today, we use aluminum or copper for better longevity. Valleys where two roof planes meet require special attention. We often install metal valley flashing beneath the shakes. This provides a secondary water channel if shakes fail.
Step-by-Step Repair Process: From Inspection to Completion
Comprehensive Roof Inspection
Never start repairs without a thorough inspection. I begin from the ground with binoculars. I look for patterns of damage. Is it isolated to one area or widespread? Next, I access the roof safely using proper fall protection. I examine every component systematically. I check shakes for cracks, rot, and excessive wear. I probe soft spots with a blunt tool. I inspect flashing for rust, separation, or missing pieces.
I always check the attic during daylight. This reveals leaks you can't see from outside. Look for water stains on rafters. Check for mold or mildew. Feel for damp insulation. Document everything with photos. These serve as evidence for insurance claims. They also help track deterioration over time. A proper inspection takes 60-90 minutes for an average home.
Essential Repair Techniques
Individual shake replacement is the most common repair. First, carefully lift the shakes above the damaged one. Use a flat bar to avoid breaking neighboring shakes. Remove nails from the damaged shake. Slide it out. Slide the new shake into place. It must be the same thickness as surrounding shakes. Nail it with hot-dipped galvanized nails. These resist rust better than standard nails. Never use screws as they can split the wood.
Flashing repairs require precision. Remove shakes around the damaged flashing. Carefully detach the old metal. Clean the surface beneath. Apply roofing cement to the area. Install new flashing, overlapping pieces from bottom to top. This ensures water sheds properly. Reinstall shakes over the flashing. Leave a small gap between shakes and vertical surfaces. This prevents water wicking up the wood.
Specialized Tools and Materials
Proper tools make repairs safer and more effective. A roofing hammer has a hatchet end for splitting shakes. A shingle ripper slides under shakes to cut hidden nails. Knee pads protect your joints on rough surfaces. Always use a safety harness when working above six feet. For materials, source replacement shakes from your original supplier if possible. Shakes vary in thickness and texture. Mismatched repairs look obvious and may not perform correctly.
Use stainless steel or hot-dipped galvanized nails. Standard nails will rust and stain the wood. Roofing cement should be formulated for wood applications. Some products contain solvents that damage cedar. I prefer products like Geocel Roof Repair Sealant. It remains flexible in Texas heat. It also adheres well to both wood and metal surfaces.
Real Project Costs: What Homeowners Actually Pay
Typical Repair Cost Breakdown
Cedar shake repair costs vary dramatically based on damage extent. Minor repairs average $300-$800. This covers replacing 10-20 individual shakes. Moderate repairs addressing multiple issues cost $1,200-$2,500. This might include replacing shakes, repairing flashing, and sealing valleys. Major restoration projects range from $4,000-$8,000. This involves replacing entire sections and addressing underlying issues.
Labor typically accounts for 60-70% of total cost. Cedar work requires specialized skills. Materials are more expensive than asphalt. Quality replacement shakes cost $4-$8 per square foot. Flashing materials add $200-$600 depending on metal type. Always get itemized quotes. This shows exactly what you're paying for. Beware of lump-sum quotes with no details.
Case Study: Storm Damage Repair
A Kingwood homeowner had hail damage last spring. Twenty shakes were cracked. Flashing along the chimney was dented. The insurance adjuster initially denied the claim. They said the damage was "wear and tear." We documented each damaged shake with close-up photos. We referenced the Cedar Shake & Shingle Bureau's hail damage identification guide. We submitted this evidence to the insurance company.
The insurance company reversed their decision. They approved $2,800 for repairs. The project took two days. We replaced 22 shakes. We installed new copper chimney flashing. We also treated surrounding areas with cedar preservative. The total cost was $2,750. The homeowner paid only their $1,000 deductible. Proper documentation made this successful.
When Repair Becomes Replacement
Sometimes repair isn't cost-effective. If more than 25% of shakes need replacement, consider full reroofing. If the underlayment is failing in multiple areas, repairs won't last. If the roof is over 30 years old, new repairs may outlive the remaining shakes. We recently inspected a 35-year-old cedar roof. The homeowner had spent $4,200 on repairs over three years. A complete replacement would cost $28,000. Continuing repairs would exceed this within five years.
We helped them finance a new roof. Their monthly payment was less than their average repair costs. They also gained a 50-year warranty. Sometimes the most economical choice is starting fresh. A reputable contractor will tell you when repair doesn't make sense. This honesty builds long-term trust.
Material Selection: Matching Your Existing Roof
Finding Compatible Replacement Shakes
Matching old shakes is challenging. Cedar color changes with age. New shakes are much lighter. Texture also varies between manufacturers. Bring a sample of your existing shakes to suppliers. Reputable companies like CertiSplit can often match it. If exact matches aren't available, consider blending. Use shakes from multiple bundles. This creates a natural variation that looks intentional.
For larger repairs, you might replace entire sections. This creates uniform appearance in defined areas. Transition between old and new with a staggered pattern. Never create straight lines between old and new shakes. This highlights the difference. Instead, weave new shakes into existing courses. This creates a seamless repair.
Underlayment and Flashing Upgrades
When replacing shakes, upgrade the underlayment beneath. Modern synthetics outperform traditional felt. Products like Grace Ice & Water Shield provide superior protection. They self-seal around nails. This prevents leaks from wind-driven rain. The extra cost is minimal compared to the protection gained.
Consider upgrading flashing materials too. Many older homes have galvanized steel. This rusts over time. Aluminum lasts longer and costs similar. Copper offers the best longevity but costs more. When repairing, use the same metal type as existing flashing. Mixing metals causes galvanic corrosion. This accelerates failure at connections.
Maintenance Strategies That Actually Work
Proactive Maintenance Schedule
Twice-yearly inspections prevent most major repairs. Check your roof every spring and fall. Look for damaged shakes after storms. Clean gutters regularly. Clogged gutters cause water to back up under shakes. Trim overhanging branches. These scrape shakes during wind. They also shade the roof, promoting moss growth.
Professional cleaning every 3-5 years removes debris. Use soft washing, not pressure washing. High pressure drives water under shakes. It also removes the wood's protective layer. Specialized cedar cleaners remove stains without damage. Never use bleach. It damages wood fibers and harms surrounding plants.
Preservative Treatments: Helpful or Hype?
Preservatives can extend shake life. They're most effective on newer roofs. Once shakes are significantly weathered, treatments provide limited benefit. I recommend penetrating oil-based preservatives. These soak into the wood. Film-forming products create a surface coating. This can trap moisture underneath. Always follow manufacturer instructions precisely.
Apply treatments in dry weather. Temperatures should be between 50-90°F. The roof must be completely dry. Treatment won't penetrate damp wood. Coverage should be uniform but not excessive. Dripping preservative can stain siding. Proper application adds 5-10 years to shake life typically.
Working With Contractors: Getting Quality Work
Vetting Roofing Professionals
Not all roofers understand cedar shakes. Look for specific experience. Ask how many cedar projects they complete annually. Request references from similar repairs. Check licensing through the Texas Department of Licensing and Regulation. Verify insurance coverage. General liability and workers' compensation are essential.
Review the Cedar Shake & Shingle Bureau's contractor directory. Members must pass certification exams. They agree to follow industry best practices. This doesn't guarantee quality but indicates serious commitment. Always get multiple quotes. Compare not just price but scope of work. The cheapest quote often misses critical steps.
Contract Essentials
A proper contract protects both parties. It should include: Detailed description of all work. Specific materials with manufacturer names. Start and completion dates. Payment schedule tied to milestones. Warranty terms for both materials and labor. Cleanup and disposal procedures. Lien waiver upon final payment.
Never pay full price upfront. Reputable contractors require deposits of 10-30%. Final payment should occur after you inspect completed work. Take photos throughout the process. Document any issues immediately. Good communication prevents most disputes.
Frequently Asked Questions
Can I repair cedar shakes myself?
Simple individual shake replacement is possible for experienced DIYers. You need proper safety equipment and basic roofing skills. Complex repairs involving flashing or valleys should be left to professionals. One mistake can cause leaks that damage interior ceilings. Consider starting with a small repair in an inconspicuous area. If comfortable, proceed to more visible repairs.
How long should cedar shake repairs last?
Properly executed repairs should last as long as the surrounding shakes. This means 15-25 years typically. The key is addressing underlying issues, not just replacing damaged shakes. If you repair splits but don't fix poor ventilation, new shakes will fail quickly. Quality materials and installation determine longevity more than the repair itself.
Will insurance cover cedar shake repairs?
Most homeowners policies cover sudden damage like storms or fallen trees. They typically exclude gradual deterioration or maintenance issues. Document damage thoroughly with date-stamped photos. File claims promptly as delays can cause denial. Work with your contractor to provide detailed estimates. Some insurers require specific documentation formats.
How do I prevent future repairs?
Regular maintenance is your best prevention. Clean gutters quarterly. Trim trees annually. Inspect twice yearly. Address small issues immediately before they worsen. Ensure proper attic ventilation. Consider professional inspections every 3-5 years. An experienced eye catches problems homeowners miss.
What's the biggest mistake homeowners make?
Waiting too long to address visible damage. A few cracked shakes seem minor. But water penetrates the underlayment and decking. By the time you notice interior leaks, structural damage may have occurred. Early intervention saves thousands in repair costs. If you see damage, investigate immediately.
Can I mix cedar shakes with synthetic alternatives?
Technically possible but not recommended for visible areas. Synthetic cedar shakes from companies like Brava have different expansion rates. They install differently than natural wood. Mixing creates compatibility issues. If replacing a large section, consider transitioning to synthetics completely. For small repairs, stick with natural cedar for consistency.
How does climate affect cedar shake repairs?
Texas heat accelerates weathering. Shakes dry out and become brittle. Repairs in summer require extra care to avoid splitting. Use sharp tools and work during cooler morning hours. In humid areas, focus on preventing moisture retention. Ensure repairs don't trap water against adjacent shakes. Adjust techniques based on your specific microclimate.
Conclusion: Protecting Your Home's Crown
Cedar shake roofs are beautiful investments worth preserving. Proper repair extends their life dramatically. The key is understanding how cedar behaves differently than other materials. Address issues promptly with quality materials. Work with experienced professionals who respect the material. Regular maintenance prevents most major problems.
Start with a thorough inspection today. Walk around your home with binoculars. Look for damaged shakes or rusted flashing. Check your attic for signs of moisture. Document everything with photos. This gives you a baseline for comparison. If you find issues, get multiple professional opinions. Compare their approaches and explanations.
Remember that the cheapest repair isn't always the most economical. Quality work lasts longer and prevents secondary damage. Your cedar roof protects everything beneath it. Proper care ensures it continues doing its job for decades. With the right approach, your cedar shakes can grace your home for generations. That's a legacy worth preserving through thoughtful, informed repair decisions.