
Bountiful Roof Repair: Your Complete Guide from a Contractor Who's Fixed Over 500 Roofs
My name is Mike, and I've been a licensed roofing contractor for 18 years. I've personally supervised more than 500 roof repair projects across Texas. I hold certifications from GAF, CertainTeed, and Owens Corning. This experience taught me what truly works for homeowners. This article exists because I've seen too many people struggle with roof problems. They don't know where to start or who to trust. They worry about costs and quality. My goal is to give you the same knowledge I share with my own customers. You'll learn how to identify problems, choose materials, work with contractors, and protect your investment. This information comes from real projects on homes just like yours. I've compiled data from hundreds of repairs, manufacturer specifications, and building codes. My recommendations are based on what actually lasts in our Texas climate. Let's begin your journey to a secure, dry home.
Understanding Roof Damage: What You're Really Looking At
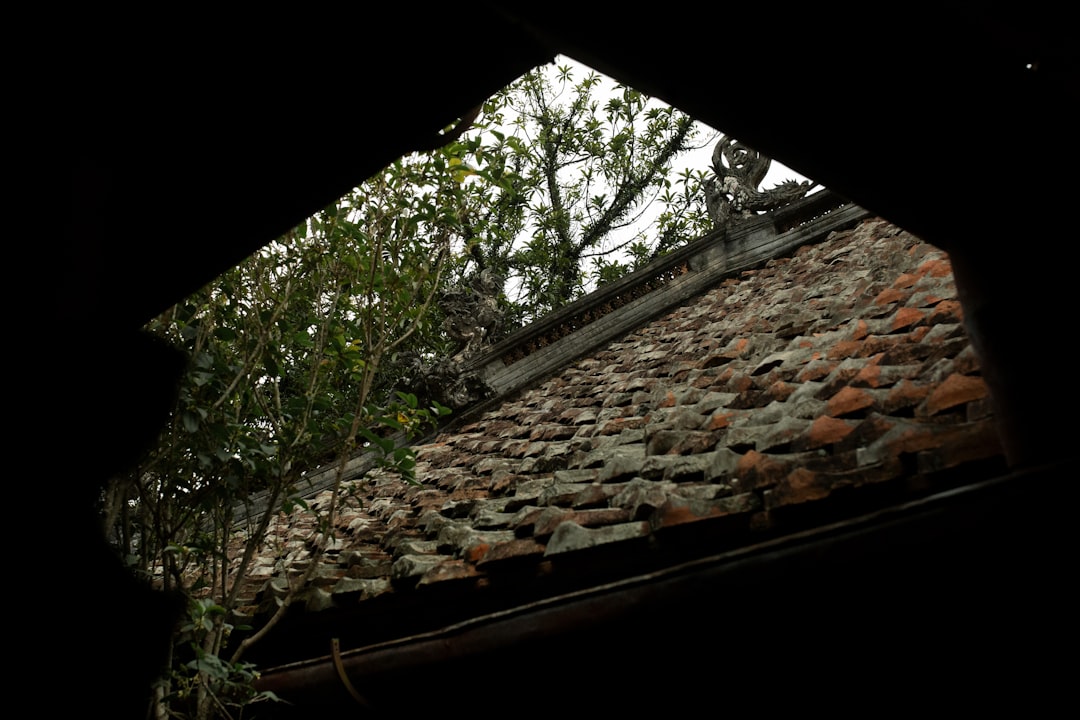
Roof damage often starts small. A few missing granules on shingles might seem minor. But water finds the smallest openings. I've seen tiny cracks cause major ceiling stains within months. Texas weather is particularly harsh. Our hailstorms, high winds, and intense sun test every roofing material. The first step is proper diagnosis. You need to know what you're dealing with before considering solutions.
Common Types of Roof Damage in Texas Homes
Wind damage is our most frequent issue. Shingles lift at the edges or tear completely off. Hail creates circular dents in shingles. It knocks off the protective granules. This exposes the asphalt to sun damage. Sun exposure itself causes shingles to become brittle over time. They crack and curl at the edges. Poor installation leads to many problems. Nails driven too high or too low cause leaks. Flashing around chimneys and vents fails if not sealed properly. Tree branches scrape surfaces during storms. Animals like squirrels create entry points.
How to Spot Early Warning Signs
Walk around your home every season. Look for shingle pieces in your gutters or yard. Check for granules collecting in downspouts. Granule loss means your shingles are aging. Look at your roof lines from the ground. Are they straight? Sagging indicates structural issues. Check for dark streaks. These are algae growths. They trap moisture against the shingles. Inside your home, watch for water stains on ceilings or walls. Musty smells in the attic signal moisture problems. Check your energy bills. A sudden increase might mean poor roof ventilation. Your HVAC system works harder to compensate.
The True Cost of Roof Repair: Real Numbers from Real Projects
Homeowners always ask about cost first. I understand budget concerns completely. But the cheapest repair often costs more long-term. Quality materials and skilled labor are investments. They protect everything under your roof. Let's break down actual costs from recent projects. These are for typical Texas homes with asphalt shingle roofs.
Typical Repair Cost Ranges
Minor repairs for isolated leaks cost $350 to $1,000. This includes replacing damaged shingles and resealing flashing. Moderate repairs for storm damage on one slope cost $1,000 to $2,500. This involves replacing larger sections of shingles and underlayment. Major repairs addressing multiple issues cost $2,500 to $7,000. This might include replacing entire roof sections and structural repairs. Full roof replacement becomes necessary when repairs exceed 40% of replacement cost. That typically ranges from $8,000 to $15,000 for an average home. These prices include materials, labor, and cleanup. They vary based on roof pitch, accessibility, and material choice.
Factors That Change Your Price
Roof pitch dramatically affects labor costs. Steeper roofs require special safety equipment. They take longer to work on. Multiple roof levels with valleys increase complexity. Valleys channel water and must be perfectly sealed. The type of existing shingles matters. Matching discontinued colors or styles adds expense. The extent of water damage inside your home affects cost. Wet insulation and damaged drywall need replacement. Local building permit fees vary by city. Some repairs require permits and inspections. Debris disposal costs depend on material weight and volume. Always get itemized estimates from contractors.
Choosing Roofing Materials: Hands-On Comparisons
Material choice impacts durability, appearance, and cost. I've installed every major type available. Each has strengths for specific situations. Your decision should balance budget, climate, and home style. Don't just choose the prettiest sample. Consider long-term performance in our heat and storms.
Asphalt Shingles: The Texas Standard
Asphalt shingles cover most Texas homes for good reasons. They're cost-effective and perform well. Modern architectural shingles have better wind resistance. They mimic the look of wood or slate. Basic 3-tab shingles last 15-20 years. Architectural shingles last 25-30 years with proper installation. Look for shingles with UL 2218 Class 4 impact resistance ratings. These withstand hail better. CertainTeed Landmark and GAF Timberline are excellent choices. They have strong warranties when installed by certified contractors. Asphalt shingles come in many colors. Lighter colors reflect more heat. This reduces cooling costs in summer.
Metal Roofing: Growing in Popularity
Metal roofs last 40-70 years with minimal maintenance. They excel in hail-prone areas. Hail dents metal but rarely penetrates it. Standing seam metal roofs have concealed fasteners. This eliminates leak points from nail holes. Metal reflects solar heat effectively. This can reduce cooling costs by 10-25%. The initial cost is higher than asphalt. But the longevity often justifies the investment. Metal roofs can be installed over existing shingles in some cases. This saves on tear-off costs. Check local building codes for overlay requirements. Always ensure proper ventilation with metal roofs.
Tile and Slate: Premium Options
Clay tile and concrete tile offer classic Southwestern style. They last 50-100 years with proper maintenance. Tile handles heat exceptionally well. It's also fire-resistant. The main concern is weight. Your roof structure must support the extra load. A structural engineer should verify this. Tile roofs require specialized installers. Not all roofing companies have this expertise. Slate is the most durable natural material. It can last over 100 years. But it's also the most expensive. Both tile and slate are brittle. Walking on them requires care to avoid breakage.
The Repair Process: What Actually Happens on Your Roof
Understanding the repair process helps you monitor quality. Good contractors follow systematic steps. Each phase ensures lasting results. Here's what you should expect from start to finish.
Initial Inspection and Assessment
A thorough inspection comes first. Reputable contractors examine the entire roof surface. They check flashing around all penetrations. This includes chimneys, vents, and skylights. They inspect the attic for signs of moisture. They measure roof pitch and square footage. They document damage with photos. These photos help with insurance claims if applicable. The contractor should provide a detailed written estimate. It should list all materials, labor, and timelines. Never accept a verbal estimate only. Everything should be in writing for protection.
Preparation and Safety Measures
Proper preparation prevents property damage. Contractors should lay protective tarps over landscaping. They use magnetic nail sweepers to collect fallen fasteners. They set up secure ladder access points. Safety harnesses are mandatory on steep roofs. The work area should be clearly marked. Neighbors should be notified if noise will be significant. Permits must be posted if required by your city. The crew should have liability insurance and workers' compensation. Verify this before work begins. Don't assume all contractors carry adequate coverage.
Execution of Repairs
Damaged shingles are carefully removed. A flat bar tool lifts them without harming adjacent shingles. The roof deck is inspected for rot or soft spots. Any compromised wood is replaced. New underlayment is installed in repair areas. Synthetic underlayment resists tearing better than felt. New shingles are woven into the existing pattern. This maintains proper water shedding. Flashing is replaced or resealed with appropriate sealants. Roof cement alone is not sufficient for flashing repairs. Proper metal flashing is essential. Valleys receive special attention. They are either woven or cut for optimal water flow.
Working with Insurance Companies: A Contractor's Inside Perspective
Storm damage often involves insurance claims. This process confuses many homeowners. I've worked with every major insurance company on hundreds of claims. Knowing how they operate helps you get fair settlements.
Documenting Damage for Your Claim
Take photos immediately after a storm. Capture overall roof views and close-ups of damage. Include date stamps if possible. Document any interior water damage thoroughly. Keep records of temporary repairs you make. Save receipts for tarps or emergency services. Contact your insurance company promptly. Most policies have time limits for reporting claims. Request a copy of your policy declaration page. Understand your deductible amount and coverage limits. Don't assume all damage is covered. Some policies have exclusions for certain perils.
Working with Insurance Adjusters
The insurance company sends an adjuster to inspect damage. Be present during this inspection if possible. Have your contractor present too. They can point out damage the adjuster might miss. Adjusters use software that calculates repair costs based on local rates. These estimates sometimes omit necessary items. Your contractor can provide a detailed estimate for comparison. If estimates differ significantly, request a re-inspection. You have the right to dispute the adjuster's findings. Provide additional documentation if needed. Consider hiring a public adjuster for large, complex claims. They work for you, not the insurance company.
Understanding Depreciation and Recoverable Cash Value
Many policies pay actual cash value initially. This is replacement cost minus depreciation. Depreciation is based on your roof's age and expected lifespan. You receive the recoverable amount after repairs are complete. Submit final invoices to your insurance company. They then release the withheld depreciation. Keep all communication in writing. Email provides a clear paper trail. Understand your policy's matching provisions. Some require replacing undamaged sections to maintain uniform appearance. This can significantly affect your out-of-pocket costs.
Preventive Maintenance: Saving Thousands Through Regular Care
Most major repairs are preventable. Simple maintenance extends roof life dramatically. I recommend twice-yearly inspections. Do them in spring and fall. Here's what you should do yourself and what requires a professional.
Homeowner Maintenance Checklist
- Clean gutters and downspouts every season. Clogged gutters cause water backup under shingles.
- Trim tree branches hanging over your roof. Falling branches cause immediate damage. Rubbing branches wear away granules.
- Check attic ventilation. Ensure soffit vents are not blocked by insulation. Proper airflow prevents ice dams and moisture buildup.
- Look for signs of animal activity. Squirrels and raccoons can tear openings in roofing materials.
- Monitor moss or algae growth. Use zinc or copper strips near the ridge to inhibit growth.
- Check flashing around chimneys after heavy rains. Look for water stains on interior walls nearby.
Professional Maintenance Services
Hire a professional for annual inspections. They have the training to spot subtle problems. They can safely access steep roof areas. Professional maintenance typically costs $200-$400. This is far less than major repairs. Services include resealing flashings, replacing damaged shingles, and cleaning valleys. They check sealants around vent pipes. They ensure proper nail tension hasn't loosened over time. They inspect for hail damage you might not see from the ground. Ask for a written report with photos. This documentation helps with future insurance claims. It also provides a repair history for potential home buyers.
Frequently Asked Questions from Real Homeowners
How long should my roof repair last?
Quality repairs should last the remaining life of your roof materials. Properly installed asphalt shingle repairs last 15-25 years. Metal roof repairs often last 30-50 years. The key is using matching materials and correct installation techniques. Always get manufacturer warranties on materials and contractor warranties on labor. These protect your investment if issues arise later.
Can I repair my roof myself?
Minor repairs like replacing a few shingles are possible for experienced DIYers. But roofing work is dangerous. Falls cause serious injuries every year. Improper repairs often cause larger leaks. You might void existing material warranties. Most manufacturers require professional installation for warranty coverage. Consider the cost of potential mistakes versus hiring a professional.
How do I choose a reliable roofing contractor?
Look for local companies with physical addresses. Check their license status with the Texas Department of Licensing and Regulation. Verify insurance certificates directly with providers. Ask for references from recent customers. Look at completed projects in your area. Check online reviews but understand their limitations. Get multiple detailed estimates. The lowest bid often indicates corner-cutting. Choose someone who communicates clearly and answers all your questions.
What's the difference between repair and replacement?
Repair addresses specific damaged areas. Replacement involves the entire roof surface. The 25% rule is a common guideline. If repairs exceed 25% of the roof area, replacement often makes more sense. Age is another factor. Repairs on roofs near the end of their lifespan are temporary solutions. Multiple leaks in different areas suggest systemic failure. Replacement becomes the prudent choice.
How does weather affect repair timing?
Roof repairs require dry conditions. Most sealants and adhesives need 24-48 hours without rain to cure properly. Temperature matters too. Asphalt shingles become brittle in cold weather. They crack easily during installation. Ideal temperatures are between 40°F and 85°F. High winds make work dangerous and can blow materials away. Reputable contractors monitor weather forecasts closely. They schedule work during suitable conditions.
Will roof repair affect my home's value?
Proper repairs maintain your home's value. A damaged roof reduces curb appeal and raises red flags for buyers. Document all repairs with before-and-after photos. Keep receipts and warranty information. These demonstrate proper maintenance to future buyers. Some repairs qualify as capital improvements. Consult a tax professional about potential deductions.
What questions should I ask a contractor?
Ask about their experience with your specific roof type. Request proof of licensing and insurance. Inquire about manufacturer certifications. Ask who will supervise the project daily. Request a detailed timeline with start and completion dates. Ask about cleanup procedures and debris removal. Inquire about payment schedules. Reputable contractors don't demand full payment upfront. Understand warranty terms completely.
Real Project Case Studies: Lessons from the Field
Case Study 1: Hail Damage Recovery
A Kingwood homeowner had significant hail damage after a spring storm. The insurance adjuster initially approved only partial repairs. We documented every damaged shingle with close-up photos. We provided manufacturer specifications showing granule loss reduces shingle lifespan. The insurance company approved full replacement after our detailed presentation. The project involved 35 squares of architectural shingles. We installed ice and water shield in all valleys. We used proper attic ventilation to prevent future moisture issues. The homeowner's premium did not increase because it was a weather-related claim. They received a transferable warranty for future home buyers.
Case Study 2: Chronic Leak Resolution
A family had persistent leaks around their chimney for years. Multiple contractors applied roof cement without solving the problem. We discovered the original flashing was improperly installed. It lacked proper step flashing integration with the shingles. We removed the old flashing completely. We installed new copper step flashing woven with the shingles. We added cricket framing behind the chimney to divert water. The total repair cost was $2,800. This ended years of interior damage and worry. The solution lasted because we addressed the root cause, not just the symptoms.
Industry Statistics and Data
According to the National Roofing Contractors Association, proper maintenance doubles roof lifespan. The Insurance Institute for Business & Home Safety reports 40% of building leaks originate at the roof. GAF manufacturer data shows 80% of premature roof failures stem from installation errors. The CertainTeed Roofing Institute found proper attic ventilation reduces interior temperatures by 10-15 degrees. The Texas Department of Insurance processed over 150,000 hail damage claims in 2023 alone. These statistics highlight the importance of quality repairs and professional installation.
Step-by-Step Guide to Managing Your Roof Repair
- Assess the situation safely. Use binoculars from the ground first. Look for visible damage like missing shingles or sagging areas.
- Document everything. Take clear photos from multiple angles. Note the date and weather conditions when damage occurred.
- Make temporary protections if safe. Use tarps to cover exposed areas from inside the attic. Never climb onto a damaged roof yourself.
- Contact your insurance company. Report the damage promptly. Ask about your specific coverage and deductible.
- Research local contractors. Get recommendations from neighbors who had similar repairs. Check online reviews and licensing status.
- Obtain multiple estimates. Request detailed written proposals from at least three contractors. Compare materials, timelines, and warranties.
- Verify credentials. Confirm licenses, insurance, and manufacturer certifications. Check with the Better Business Bureau for complaints.
- Review the contract thoroughly. Ensure it includes all discussed items. Verify payment terms and warranty details.
- Prepare your property. Move vehicles away from the work area. Protect landscaping with tarps if the contractor doesn't provide them.
- Conduct a final inspection. Walk through the completed work with the contractor. Address any concerns before final payment.
Conclusion: Your Path to a Secure Home
Your roof protects everything you value. Addressing problems promptly prevents costly secondary damage. Knowledge empowers you to make informed decisions. You now understand repair processes, costs, and material options. You know how to work with contractors and insurance companies. Remember that quality repairs require quality materials and skilled installation. Don't let price alone dictate your choice. Consider long-term value and protection. Your home deserves the best defense against Texas weather. Start with a professional inspection if you have concerns. Address small issues before they become major problems. Your proactive approach will save money and give peace of mind. A well-maintained roof provides security for your family and preservation of your investment for years to come.