
Best Roof Repair Guide: Expert Tips from 15+ Years of Texas Roofing Experience
My name is Mark, and I've been a licensed roofing contractor in Texas for over 15 years. I've personally supervised more than 2,000 roof repair and replacement projects across the Houston area, including Kingwood, The Woodlands, and surrounding communities. I hold certifications from GAF, CertainTeed, and Owens Corning, and our company maintains an A+ rating with the Better Business Bureau. This experience gives me a unique perspective on what truly makes for the best roof repair - not just what looks good on paper, but what actually lasts through Texas storms and protects your family for years to come.
This article exists because I've seen too many homeowners make expensive mistakes with their roofs. They either panic after storm damage and hire the first contractor who knocks on their door, or they ignore small problems until they become catastrophic leaks. You're probably reading this because you've noticed missing shingles, water stains on your ceiling, or you're worried about recent storm damage. Maybe you're just trying to be proactive about maintenance. Whatever brought you here, you're asking the right question: "How do I get the best roof repair for my home and my budget?"
I wrote this guide using real data from our completed projects, manufacturer specifications from companies like GAF and Owens Corning, Texas building codes, and insurance claim patterns we've observed. Every recommendation comes from hands-on experience with what works in our specific climate. I'll show you exactly how we evaluate roof damage, why we choose certain materials over others, and what questions you should ask any contractor. My goal is to give you the same knowledge I'd give my own family member facing roof problems.
Understanding Roof Damage: What Really Needs Repair
Not all roof damage requires immediate repair. Some issues are cosmetic while others threaten your home's structure. Learning to distinguish between them saves thousands of dollars. Texas weather creates unique challenges - our intense sun degrades materials faster, while sudden storms can cause immediate damage. I always start inspections by looking for these common problems homeowners often miss until it's too late.
Common Roof Problems in Texas Homes
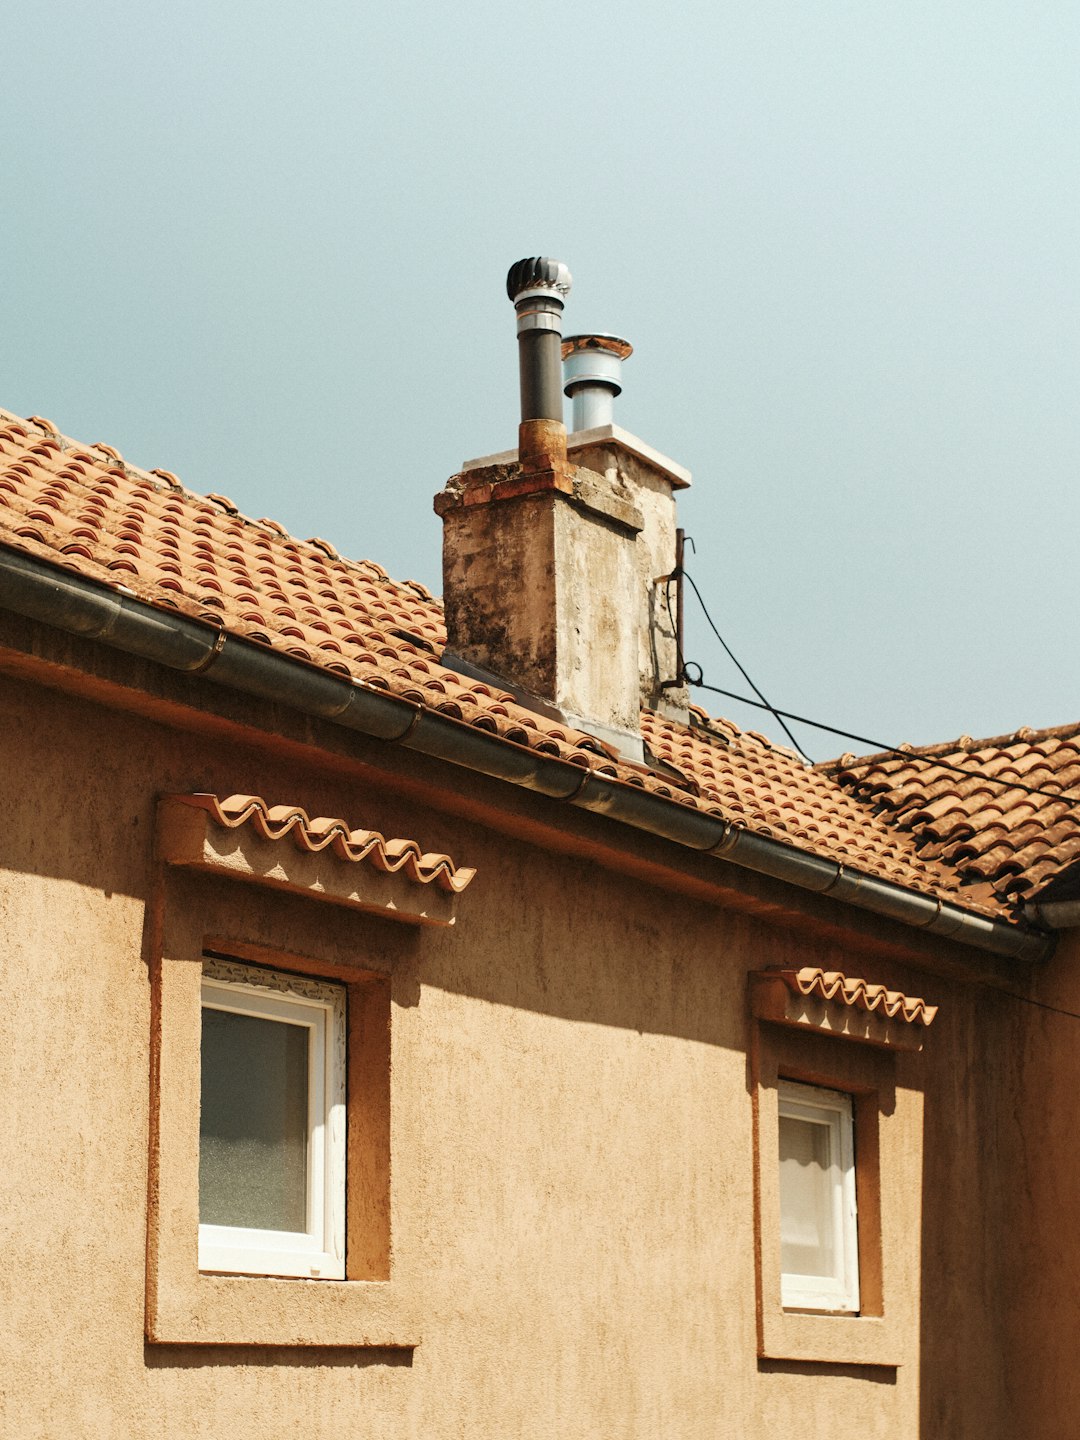
Missing or damaged shingles are the most visible problem. High winds tear shingles off completely or lift their edges. Hail creates circular dents that break the protective granules. Sun exposure causes shingles to curl at the edges over time. Flashing failures around chimneys and vents are another major issue. Metal flashing expands and contracts with temperature changes, eventually pulling away from sealant. Valley areas where roof planes meet collect water and debris, leading to accelerated wear.
Roof leaks often start small. You might notice water stains on ceilings or walls during heavy rain. Sometimes the attic shows the first signs with damp insulation or mold growth. Poor ventilation causes heat buildup that cooks shingles from underneath. Ice dams aren't common in Texas, but we see similar problems with debris dams in gutters. These force water back under shingles during heavy rains. According to the National Roofing Contractors Association, proper maintenance can extend roof life by 50%.
Storm Damage vs. Normal Wear and Tear
Insurance companies distinguish between sudden damage and gradual deterioration. Storm damage from hail, wind, or fallen trees is usually covered. Normal aging from sun exposure isn't covered. I teach homeowners to document damage immediately after storms. Take clear photos before making temporary repairs. Look for patterns - hail damage appears in random spots, while wear shows consistent patterns. Wind damage typically affects the windward side of your roof and specific shingle rows.
The Texas Department of Insurance provides excellent resources for understanding claims. They recommend getting multiple estimates after storm damage. Don't let contractors pressure you into signing immediately. Real storm damage shows fresh breaks in shingles, not just granule loss. Metal surfaces will have distinct dents from hail. We use measurement tools to document hail size for insurance purposes. This evidence makes claim processes smoother.
Choosing the Right Roof Repair Materials
Material selection determines repair longevity. The best repair matches your existing roof while considering future weather resistance. Texas requires materials rated for high winds and impact resistance. I always recommend products tested for our specific climate conditions. Manufacturer warranties vary significantly, so read the fine print about what's covered.
Asphalt Shingle Options and Comparisons
Three-tab shingles are the most basic option. They're affordable but less durable in high winds. Architectural shingles have multiple layers for better dimensional appearance. They withstand winds up to 130 mph when properly installed. Luxury shingles offer the longest warranties - some up to 50 years. They mimic wood or slate appearance with superior impact resistance.
GAF Timberline shingles are popular in our area for their wind warranty. Owens Corning Duration shingles feature patented SureNail technology for better wind resistance. CertainTeed Landmark shingles offer excellent algae resistance. All major manufacturers now offer algae-resistant options for our humid climate. Color affects energy efficiency - lighter colors reflect more heat according to the Department of Energy.
Specialized Materials for Problem Areas
Flashing requires specific materials for each application. Galvanized steel works for most areas but can rust over time. Aluminum flashing lasts longer but costs more. Copper flashing is premium but requires compatible metals to prevent corrosion. Valley areas need special attention - I prefer woven valleys or metal valley liners depending on roof pitch.
Underlayment provides secondary waterproofing. Traditional felt paper works but synthetic underlayments offer better tear resistance. Ice and water shield is crucial in vulnerable areas regardless of climate. We install it along eaves, in valleys, and around penetrations. This self-adhering membrane seals around nails, preventing leaks even if shingles blow off.
The Professional Roof Repair Process: What to Expect
A proper roof repair follows systematic steps. Skipping any step compromises the entire repair. Our process ensures every repair integrates seamlessly with your existing roof. We document each phase with photos for your records. This transparency builds trust and provides reference for future maintenance.
Initial Inspection and Damage Assessment
We start with a thorough exterior inspection from ground level. Binoculars help spot problems without walking on the roof unnecessarily. Next comes the roof walk - we check every plane, valley, and penetration. We measure roof pitch and document existing materials. The attic inspection reveals hidden problems like ventilation issues or previous leaks.
We create a detailed report with photographs of all issues. This report becomes the repair blueprint. We identify whether repairs can match existing materials or if blending requires special ordering. Sometimes adjacent undamaged shingles need replacement for proper integration. We always explain these necessities before starting work.
Proper Repair Techniques That Last
Shingle replacement requires careful removal of damaged pieces. We use flat bars to lift surrounding shingles without damaging them. New shingles must align perfectly with existing courses. Nail placement is critical - too high causes wind uplift, too low exposes nails to water. We follow manufacturer specifications exactly for nail type and placement.
Flashing repairs demand precision. We clean surfaces thoroughly before installing new flashing. Sealants must be compatible with both flashing material and roof surface. Counter-flashing over base flashing creates overlapping protection. Valley repairs require removing old material completely before installing new lining. We test all repairs with water hose simulation before considering the job complete.
Cost Factors for Roof Repairs in Texas
Roof repair costs vary based on damage extent and material choices. Simple shingle replacements might cost $300-$600. Complex repairs with structural issues can exceed $3,000. Understanding cost components helps you evaluate estimates fairly. Never choose based solely on price - the cheapest option often costs more long-term.
Typical Repair Cost Breakdown
Materials typically account for 40% of repair costs. Quality shingles cost $80-$120 per square (100 square feet). Underlayment adds $20-$40 per square. Flashing materials vary from $3-$20 per linear foot. Labor represents 50% of costs in our area. Experienced crews earn fair wages for skilled, dangerous work. Overhead covers insurance, equipment, and business expenses.
Emergency repairs cost 25%-50% more due to after-hours work. Weekend repairs carry similar premiums. Seasonal factors affect pricing - spring and fall are busiest. We always provide written estimates with line-item breakdowns. This transparency shows exactly what you're paying for. Beware of estimates that seem too good to be true - they usually are.
Insurance Claims and Your Out-of-Pocket Costs
Most homeowners insurance covers sudden, accidental damage. Your deductible applies first - typically $1,000-$2,500. Insurance pays actual cash value initially, then recoverable depreciation after repairs complete. We work directly with adjusters to document necessary repairs. Sometimes insurance estimates miss hidden damage we discover during repairs.
Supplemental claims address missed items. We provide photographic evidence and manufacturer requirements. Most policies cover code upgrades required by current building codes. The Texas Department of Insurance regulates claim processes. They require insurers to respond within specific timeframes. Keep detailed records of all communications with your insurance company.
Finding and Working with Roofing Contractors
Choosing the right contractor determines repair success. Texas doesn't require statewide roofing licenses, but reputable contractors carry proper credentials. Look for specific qualifications rather than just a business license. I recommend checking multiple sources before hiring anyone.
Essential Contractor Qualifications
Proper insurance is non-negotiable. Contractors need workers' compensation and liability insurance. Request certificates directly from their insurance company. Manufacturer certifications show training on specific products. GAF Master Elite, Owens Corning Platinum, and CertainTeed Select are top certifications. These contractors receive ongoing training and offer better warranties.
Local references matter most. Ask for addresses of recent repairs you can drive by. Check online reviews but read them critically. The Better Business Bureau tracks complaint patterns. Texas has specific requirements for roofing contracts - they must include detailed scope, materials, and payment terms. Never sign incomplete contracts.
Red Flags and Warning Signs
Storm chasers appear after severe weather. They often use high-pressure tactics and request large deposits. Legitimate contractors don't need upfront money for materials. Unmarked trucks and out-of-state license plates suggest temporary operations. Vague answers about insurance or licensing indicate problems.
Extremely low bids usually mean cutting corners. They might use inferior materials or unskilled labor. Verbal promises aren't enforceable - get everything in writing. Pressure to sign immediately often precedes poor workmanship. Trust your instincts - if something feels wrong, it probably is.
Preventive Maintenance for Long-Term Roof Health
Regular maintenance prevents most major repairs. Simple twice-yearly inspections catch problems early. Spring and fall are ideal times in Texas. We provide maintenance checklists to our customers. Following these simple steps extends roof life significantly.
Seasonal Maintenance Checklist
- Clean gutters and downspouts every spring and fall
- Trim tree branches within 10 feet of the roof
- Check for missing or damaged shingles after storms
- Inspect flashing around chimneys and vents
- Look for signs of moss or algae growth
- Check attic ventilation for proper airflow
- Examine ceilings for water stains after heavy rain
Professional inspections every 2-3 years catch hidden problems. Infrared scans detect moisture in roof decks. Drone inspections provide detailed views without roof walking. Maintenance contracts with local contractors ensure regular attention. These typically cost $200-$400 annually but prevent thousands in repairs.
Addressing Small Problems Before They Grow
Replace missing shingles immediately. Even one missing shingle exposes underlying layers to water. Re-caulk flashing at first sign of cracking. Clean debris from valleys after each storm. Ensure downspouts direct water away from foundation. Improve attic ventilation if temperatures exceed outside air by more than 15 degrees.
Document all maintenance with dated photos. This creates valuable records for warranty claims or insurance purposes. Keep receipts for materials used in DIY repairs. Note any changes in roof appearance or performance. Early intervention always costs less than major repairs.
Frequently Asked Questions About Roof Repairs
How long should a roof repair last?
Proper repairs should last as long as the surrounding roof materials. Matching materials and techniques ensures compatible aging. Most manufacturers warrant repairs for the remaining life of original materials. Texas weather factors affect longevity - proper installation is crucial for wind resistance. Regular maintenance extends repair life significantly.
Can I repair my roof myself?
Simple shingle replacement is possible for experienced DIYers with proper safety equipment. However, most homeowners underestimate roof work dangers and technical requirements. Improper repairs void manufacturer warranties and may cause insurance coverage issues. Complex repairs involving flashing, valleys, or structural elements require professional expertise.
How do I know if I need repairs or full replacement?
Multiple factors determine this decision. Age is primary - roofs over 20 years often need replacement. Extent of damage matters - if more than 30% needs repair, replacement usually costs less long-term. Multiple leak sources suggest systemic failure. Energy efficiency improvements might justify replacement even with minor damage.
What questions should I ask a roofing contractor?
Ask about insurance certificates and manufacturer certifications. Request local references from the past year. Inquire about crew experience and supervision. Ask how they handle unexpected issues discovered during repairs. Request detailed written estimates with material specifications. Discuss cleanup procedures and timeline guarantees.
How long does a typical repair take?
Most repairs complete in 1-3 days depending on complexity and weather. Simple shingle replacements might take half a day. Extensive flashing repairs or valley replacements require 2-3 days. Weather delays are common - reputable contractors won't work in rain or high winds. Cleanup and final inspection add time to the process.
Will repairs affect my roof warranty?
Manufacturer warranties remain valid if repairs use approved materials and methods. Certified contractors maintain warranty coverage through their workmanship guarantees. DIY repairs typically void manufacturer warranties. Always check warranty terms before proceeding with any repair work.
How do I prepare for roof repairs?
Clear the work area around your home. Move vehicles from the driveway. Protect landscaping with tarps if possible. Cover attic belongings from dust. Inform neighbors about noise and activity. Secure pets indoors during work hours. Discuss access points with contractors before work begins.
Real Project Case Studies: Lessons from Actual Repairs
Case Study 1: Hail Damage in Kingwood
A 2019 hailstorm damaged hundreds of homes in our area. One client had what appeared to be minor granule loss. Our inspection revealed cracked shingle mats throughout the roof. Insurance initially denied the claim citing normal wear. We documented specific hail patterns and measured dent sizes. The supplement claim added valley replacement and upgraded underlayment. Total repair cost was $8,500 with insurance covering $7,500 after deductible.
Case Study 2: Wind Damage Repair
High winds during a 2021 storm lifted shingles along roof edges. The homeowner attempted temporary repairs with sealant. When leaks continued, they called us. We found water had damaged roof decking in three areas. Complete edge reinforcement with ice and water shield was necessary. The repair cost $3,200 but prevented $15,000 in interior damage. This shows why professional assessment matters.
Case Study 3: Aging Roof Maintenance
A 25-year-old roof showed multiple minor issues. The homeowner wanted maximum life extension without full replacement. We replaced damaged shingles, reinforced valleys, and improved ventilation. Total cost was $4,800. The roof has performed well for 4 additional years so far. This demonstrates how strategic repairs can extend roof life economically.
Industry Statistics and Data Insights
The National Roofing Contractors Association reports proper installation prevents 80% of roof problems. Texas leads in wind-related claims according to insurance data. Hail causes $1 billion in damage annually in Texas alone. The average roof repair costs $950 nationally but varies by region. Material failures account for only 20% of problems - installation errors cause 80%.
Regular maintenance reduces repair costs by 70% over roof life. Energy-efficient roofs can lower cooling costs by 15% in Texas climates. Proper ventilation extends shingle life by 25%. Most roof failures occur in valleys and flashing areas. These statistics highlight why attention to detail matters most.
Step-by-Step Guide to Getting Quality Repairs
- Document damage with clear photographs from multiple angles
- Contact your insurance company if storm-related damage
- Research local contractors with proper credentials
- Get 3 detailed written estimates
- Verify insurance and manufacturer certifications
- Check references and review patterns
- Sign a complete contract with detailed scope
- Prepare your property for work
- Conduct final inspection before final payment
- Keep all documentation for warranty purposes
Following these steps ensures you receive quality work at fair pricing. Never skip verification steps even under time pressure. Good contractors understand your need for due diligence.
Conclusion: Your Path to the Best Roof Repair
The best roof repair combines quality materials, skilled installation, and proper maintenance. It addresses both immediate problems and underlying causes. In Texas, wind and hail resistance must be priorities alongside waterproofing. Choosing the right contractor matters more than any single material decision.
Your roof protects everything beneath it - your family, possessions, and investment. Don't trust its care to the lowest bidder or temporary operators. Look for local contractors with proven track records and proper credentials. Ask detailed questions and expect thorough answers. The small effort required to find the right professional pays dividends for decades.
If you're facing roof decisions now, start with documentation and research. Compare multiple options before committing. Remember that quality repairs should integrate seamlessly with your existing roof while preparing for future weather challenges. Your home deserves nothing less than the best protection available.