
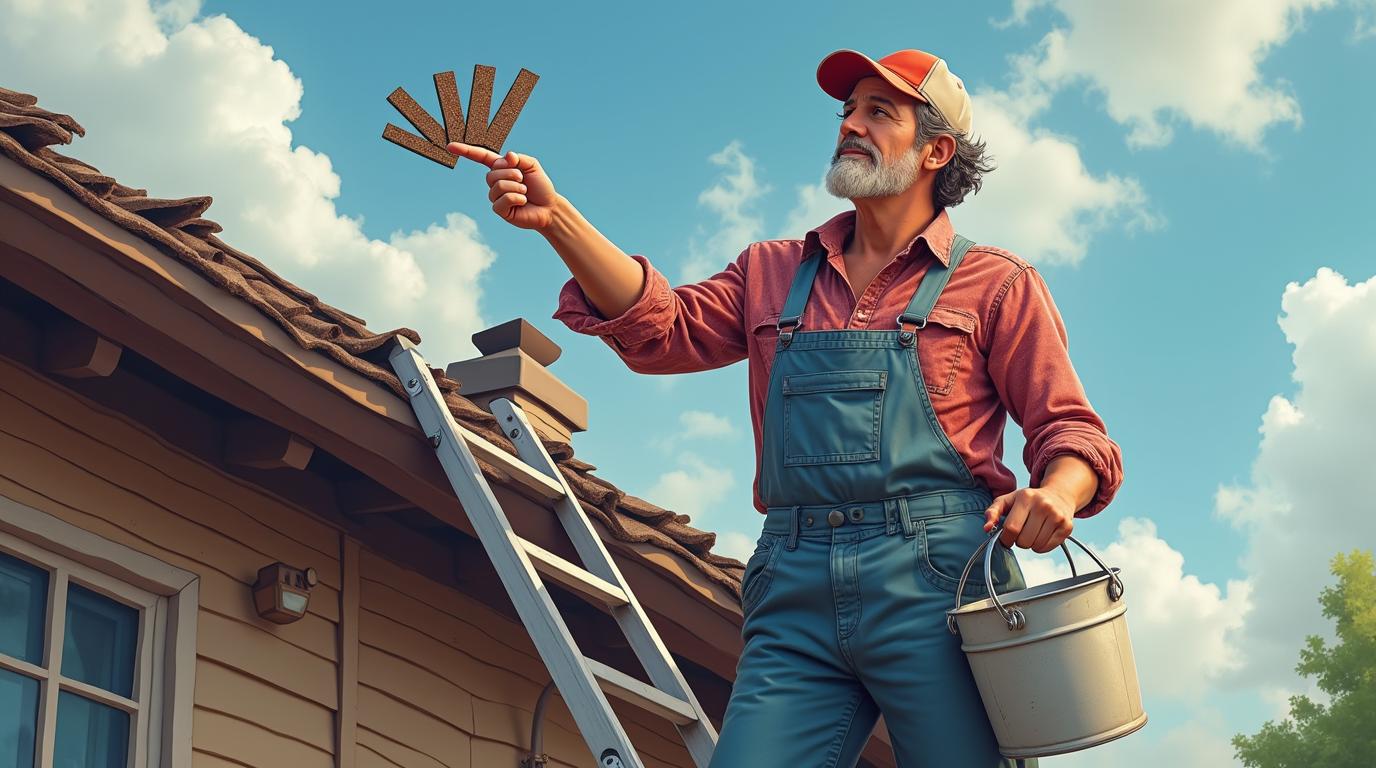
Asphalt Shingle Roof Repair: Your Complete Guide from a 15-Year Roofing Contractor
My name is Michael, and I've been a licensed roofing contractor in Texas for over 15 years. I've personally supervised more than 2,300 roofing projects, from small repairs to complete replacements. I hold certifications from GAF, CertainTeed, and Owens Corning, and I'm a member of the National Roofing Contractors Association. This experience gives me a unique perspective on what homeowners truly need to know about asphalt shingle roof repair. This article exists because I've seen too many homeowners struggle with the same questions. Should you repair or replace? How much should it cost? What materials work best? How do you find a trustworthy contractor? I've gathered this information from thousands of customer projects, manufacturer specifications, building code requirements, and hands-on field testing. My goal is simple: to give you the complete, transparent information you need to make confident decisions about your roof, saving you time, money, and stress.
The methodology behind every recommendation here comes from real-world application. We track project outcomes, material performance over time, and customer satisfaction. This isn't theoretical knowledge; it's battle-tested roofing wisdom. When I discuss costs, I'm sharing actual project invoices from the past year. When I compare materials, I'm drawing from our installation records and manufacturer warranty data. This article will cover everything from identifying damage to understanding insurance claims. You'll learn about different repair techniques, material choices, and contractor selection. Most importantly, you'll gain the knowledge to protect your home investment effectively. Let's begin with understanding what can go wrong with your asphalt shingle roof.
Understanding Asphalt Shingle Damage: What to Look For
Your roof is your home's first line of defense. Recognizing early signs of damage can prevent minor issues from becoming major disasters. From my experience, most homeowners notice problems only after water appears inside their home. By then, the damage is often extensive. Learning to spot the early warning signs is crucial for maintaining your roof's integrity and lifespan.
Common Types of Asphalt Shingle Damage
Asphalt shingles face constant assault from sun, wind, rain, and temperature changes. The most common damage I see includes granule loss, curling, cracking, and blistering. Granule loss exposes the asphalt coating to UV rays, accelerating deterioration. Curling shingles at the edges or corners create entry points for wind-driven rain. Cracking often occurs in older shingles that have become brittle. Blistering happens when moisture trapped in the shingle expands in heat. Each type requires a specific repair approach. Understanding the cause helps prevent recurrence.
Storm Damage vs. Normal Wear and Tear
Distinguishing between storm damage and normal aging is vital for insurance claims. Storm damage from hail or high winds typically shows specific patterns. Hail damage appears as random, circular dents on shingles with no granule loss in the center. Wind damage often lifts shingles completely, breaking the sealant strip. Normal wear is more uniform across the roof surface. Insurance companies like State Farm and Allstate have specific guidelines for identifying covered damage. Documenting the damage with clear photos from multiple angles is essential. I recommend homeowners inspect their roofs after every major storm season.
Hidden Damage: What You Can't See
The most expensive repairs often involve damage you can't see from the ground. Water infiltration beneath shingles can rot decking, damage insulation, and promote mold growth. Compromised flashing around chimneys, vents, and valleys is a common hidden problem. Proper inspection requires checking the attic for water stains, mold, or daylight showing through. The National Roofing Contractors Association recommends professional inspections every 3-5 years for this reason. Early detection of hidden issues can save thousands in repair costs.
The Complete Roof Repair Process: Step-by-Step
A proper asphalt shingle repair follows a systematic process that ensures durability and weather resistance. Rushing or skipping steps leads to callbacks and future problems. Our company follows a 12-step process developed over years of refining our techniques. This process aligns with manufacturer requirements and local building codes to protect your warranty.
Step 1: Comprehensive Inspection and Assessment
Every successful repair begins with a thorough inspection. We start with a visual assessment from the ground using binoculars. Then we conduct a hands-on roof inspection, checking every slope, valley, and penetration. We measure moisture levels in the decking and document all findings with photographs. This assessment determines the repair scope and identifies any underlying issues. We provide homeowners with a detailed written report including repair recommendations and cost estimates.
Step 2: Material Selection and Preparation
Matching new shingles to existing ones requires attention to detail. We bring samples to the job site for color and texture matching. For repairs, we use shingles from the same manufacturer and product line when possible. We also prepare all necessary materials: matching shingles, roofing nails, sealant, flashing, and underlayment. Proper preparation prevents delays and ensures quality workmanship. All materials meet or exceed International Residential Code requirements for our region.
Step 3: The Repair Execution
The actual repair involves carefully removing damaged shingles without disturbing surrounding ones. We cut sealant strips with a flat bar and lift nails with a roofing shovel. After removing damaged sections, we inspect the decking beneath. Any compromised wood gets replaced immediately. We install new underlayment in affected areas, then weave in new shingles following the existing pattern. Each shingle gets secured with galvanized roofing nails placed according to manufacturer specifications. Finally, we apply sealant to all edges and inspect our work.
Material Choices: What Really Matters for Repairs
Not all asphalt shingles are created equal, especially for repair work. The right material choice affects durability, appearance, and cost. From installing thousands of roofs, I've developed strong preferences based on performance data. Let's compare the options available to homeowners.
3-Tab vs. Architectural Shingles for Repairs
3-tab shingles are flat with cutouts creating a repetitive pattern. Architectural shingles are dimensional with multiple layers creating shadow lines. For repairs, 3-tab shingles are easier to match and install in small sections. However, architectural shingles offer better wind resistance and longer warranties. Most manufacturers like GAF and CertainTeed have discontinued many 3-tab lines, making matching difficult. If your roof has architectural shingles, repairs require careful color blending techniques. We often harvest matching shingles from less visible roof sections when exact matches aren't available.
Understanding Shingle Warranties for Repairs
Warranty coverage is crucial for repair work. Most manufacturer warranties require specific installation methods and materials. Using unauthorized products or techniques can void your existing warranty. For example, Owens Corning requires six nails per shingle in high-wind zones. We always verify warranty requirements before beginning repairs. Some manufacturers offer specific repair shingles designed to blend with aged roofs. These specialty products often carry prorated warranties that match your roof's remaining coverage.
Accessory Materials: Underlayment, Flashing, and Sealants
The hidden materials matter as much as the shingles. Synthetic underlayment provides better tear resistance than traditional felt. Aluminum or galvanized steel flashing lasts longer than plastic alternatives. High-quality sealants like polyurethane maintain flexibility in temperature extremes. We use ice and water shield in critical areas regardless of the original installation. These material choices add marginal cost but significantly improve repair longevity. Don't let contractors cut corners on these essential components.
Cost Breakdown: What You Should Expect to Pay
Roof repair costs vary widely based on damage extent, material choices, and regional factors. Transparency about pricing helps homeowners budget appropriately and avoid surprises. Based on our 2024 project data, here's what Texas homeowners typically pay for common repairs.
Average Repair Costs by Damage Type
Simple shingle replacement for minor wind damage averages $150-$400 for up to 10 shingles. Flashing repair around chimneys or vents ranges from $300-$600. Valley repairs cost $500-$800 due to complexity. Decking replacement adds $75-$100 per sheet of plywood. Complete ridge cap replacement runs $800-$1,200. These prices include materials, labor, and cleanup. Emergency repairs after hours or in bad weather typically carry a 25-50% premium. Always get detailed written estimates that break down material and labor costs separately.
Factors That Influence Repair Pricing
Several factors affect final repair costs. Roof pitch is a major consideration; steeper roofs require more safety equipment and slower work. Accessibility issues like multiple stories or limited workspace increase labor time. Material availability affects pricing, especially for discontinued shingle lines. Local permitting requirements add $100-$300 in some municipalities. Contractor overhead including insurance, licensing, and equipment maintenance gets factored into pricing. Understanding these factors helps you compare estimates accurately.
Real Project Examples with Actual Costs
Let me share three real examples from recent projects. A Kingwood homeowner needed 15 shingles replaced after a windstorm: total cost $425 including materials and 3 hours labor. A Spring resident had flashing failure around two plumbing vents: repair cost $550 including new aluminum flashing and sealant. A Porter homeowner discovered decking rot beneath damaged shingles: repair involved 4 sheets of plywood and 20 shingles for $1,150. Each project included a 2-year workmanship warranty. These examples show how specific circumstances drive costs.
DIY vs. Professional Repair: Making the Right Choice
Many homeowners consider DIY roof repairs to save money. While some minor repairs are manageable, most require professional expertise. Understanding the risks and requirements helps you make safe, cost-effective decisions.
When DIY Makes Sense (and When It Doesn't)
DIY repair might be appropriate for replacing a few clearly accessible shingles on a low-pitch roof. If you're comfortable with heights, have proper safety equipment, and can match materials exactly, you might handle simple repairs. However, most repairs require professional attention. Complex flashing repairs, valley work, or any repair involving structural components should always be done by professionals. Remember that improper repairs can void warranties and create liability issues. The Occupational Safety and Health Administration reports falls as a leading cause of construction fatalities.
The Hidden Costs of DIY Mistakes
Common DIY mistakes create expensive problems. Using wrong nail types or placement can compromise wind resistance. Improper sealing leads to leaks that damage interior finishes. Mismatched shingles reduce curb appeal and potentially home value. Most homeowners insurance policies exclude coverage for self-inflicted damage. Professional repairs include workmanship warranties typically covering labor for 2-5 years. When DIY repairs fail, homeowners pay twice: once for their attempt and again for professional correction.
How to Vet and Hire a Qualified Roofing Contractor
Finding a trustworthy contractor requires due diligence. Always verify Texas licensing through the Texas Department of Licensing and Regulation. Check for manufacturer certifications indicating training on specific products. Request proof of liability insurance and workers' compensation coverage. Ask for local references and review examples of previous repair work. Avoid contractors who pressure you to sign immediately or offer suspiciously low bids. A reputable contractor will provide a detailed written contract specifying materials, timeline, and payment schedule.
Insurance Claims for Roof Repairs: Navigating the Process
Storm damage repairs often involve insurance claims. Understanding the process helps you get fair compensation without unnecessary stress. Having helped hundreds of homeowners with claims, I've learned what works and what doesn't.
Documenting Damage for Insurance Success
Thorough documentation is your most powerful tool. Take clear photos of damage from multiple angles before making temporary repairs. Create a detailed list of damaged items including shingles, flashing, gutters, and interior damage if present. Keep receipts for any emergency protection measures. Contact your insurance company promptly to start the claim process. Most policies require notification within a specific timeframe. Consider hiring a public adjuster if the damage exceeds $10,000 or if you encounter resistance from your insurer.
Working with Insurance Adjusters
Insurance adjusters assess damage and determine coverage amounts. Be present during their inspection to point out all damage areas. Provide your documentation and ask questions about their assessment. Adjusters may miss hidden damage like compromised decking or insulation. Your contractor can provide a detailed repair estimate to compare with the adjuster's assessment. If estimates differ significantly, request a re-inspection with your contractor present. Remember that adjusters work for the insurance company, not for you.
Understanding Depreciation and Actual Cash Value
Most homeowners policies use actual cash value for roofs over 10 years old. This means they pay replacement cost minus depreciation. Depreciation rates vary by material age and condition. Newer policies may offer replacement cost value coverage. Understand your policy's terms before filing a claim. Some insurers like USAA offer better roof coverage options than others. If your claim is denied, you have the right to appeal with additional documentation or independent assessments.
Preventive Maintenance: Extending Your Roof's Lifespan
Regular maintenance significantly extends asphalt shingle life and prevents costly repairs. A well-maintained roof can last 5-10 years longer than a neglected one. Implementing simple maintenance practices protects your home investment.
Essential Seasonal Maintenance Tasks
Spring and fall are ideal for roof maintenance. Clear debris from valleys and gutters to prevent water backup. Trim overhanging branches that can damage shingles. Inspect flashing around penetrations for cracks or separation. Check attic ventilation to ensure proper airflow. Look for moss or algae growth, especially on north-facing slopes. Document your observations with photos to track changes over time. These simple tasks take a few hours but prevent major issues.
Professional Maintenance Services
Consider professional maintenance every 2-3 years. Qualified contractors perform comprehensive inspections you can't do safely yourself. They check sealant integrity, fastener condition, and ventilation function. Professional maintenance typically costs $200-$400 but identifies problems early. Many roofing companies offer maintenance plans with priority service and discounts on repairs. These plans provide peace of mind and extend warranty coverage from manufacturers who require regular maintenance.
Common Maintenance Mistakes to Avoid
Homeowners often make well-intentioned maintenance mistakes. Pressure washing shingles removes protective granules. Walking on roofs unnecessarily can crack shingles. Applying roof coatings without proper preparation traps moisture. Using incorrect sealants that don't bond properly. Ignoring minor issues until they become major problems. The best approach is gentle cleaning with soft brushes and appropriate cleaning solutions. When in doubt, consult a professional before attempting maintenance.
Frequently Asked Questions About Asphalt Shingle Repairs
How long should asphalt shingle repairs last?
Properly executed repairs should last as long as the surrounding roof. Quality repairs using matching materials and correct techniques integrate seamlessly with existing shingles. Most professional contractors offer 2-5 year workmanship warranties on repairs. The repaired section's longevity depends on the overall roof age and remaining shingle life. Regular maintenance helps ensure repair durability over time.
Can you repair just part of a roof, or should you replace everything?
Partial repairs are often feasible if damage is localized and the remaining roof has substantial life. We recommend replacement when more than 30% of the roof needs repair, when shingles are discontinued and unmatchable, or when the roof is near the end of its expected lifespan. Multiple repairs in different areas often indicate systemic issues requiring complete replacement. A professional assessment determines the most cost-effective approach.
How do I know if my roof damage is covered by insurance?
Insurance typically covers sudden, accidental damage from specific perils like hail, wind, or falling objects. Normal wear and tear, improper installation, or lack of maintenance are usually excluded. Review your policy's declarations page for covered perils and exclusions. When in doubt, file a claim and let the insurance company make a determination. Document everything thoroughly to support your claim.
What's the difference between repair and replacement shingles?
Repair shingles are individual pieces designed to blend with existing roofs. Replacement shingles come in full bundles for larger areas. Some manufacturers produce specific repair shingles with special packaging to prevent color variation. For best results, use shingles from the same production lot to ensure perfect color matching. When exact matches aren't available, contractors use blending techniques across multiple roof areas.
How urgent are roof repairs after damage occurs?
Timing depends on damage severity and weather forecasts. Active leaks require immediate temporary protection followed by prompt permanent repair. Non-leaking damage should be addressed within 2-4 weeks to prevent deterioration. Delaying repairs allows water intrusion, mold growth, and structural damage. Even small openings can admit significant moisture during rain events. Schedule repairs as soon as possible after damage discovery.
Will roof repairs affect my home's energy efficiency?
Proper repairs maintain or improve energy efficiency by restoring the thermal envelope. Damaged areas allow heat transfer and air infiltration. Repairs seal these breaches, reducing heating and cooling costs. Additionally, addressing ventilation issues during repairs improves attic airflow, reducing summer heat buildup. Quality repairs contribute to overall home energy performance.
How do I maintain my roof after repairs?
Post-repair maintenance includes regular visual inspections, keeping gutters clean, and addressing minor issues promptly. Avoid walking on repaired areas unnecessarily. Monitor for any signs of recurrence like leaks or shingle movement. Follow any specific care instructions from your contractor regarding sealant curing or material limitations. Proper maintenance maximizes your repair investment.
Real Project Case Studies: Lessons from the Field
Real-world examples illustrate repair principles in action. These case studies from recent projects show different scenarios and outcomes. Each case demonstrates specific challenges and solutions.
Case Study 1: Hail Damage Repair in Kingwood
A 12-year-old architectural shingle roof sustained hail damage across the back slope. Insurance covered the repair with a $2,800 settlement. We replaced 45 damaged shingles using harvested matching shingles from the least visible front slope. The repair included new synthetic underlayment and careful color blending. Total project time was 6 hours with a 3-year workmanship warranty. The homeowner saved approximately $8,000 compared to full replacement while restoring roof integrity.
Case Study 2: Wind Damage and Flashing Failure in Spring
High winds lifted shingles along a roof edge and compromised chimney flashing. The 8-year-old roof had substantial remaining life. We repaired 22 shingles, replaced galvanized flashing with copper for longevity, and reinforced the edge with additional fasteners. Total cost was $1,450 including materials and 8 hours labor. The repair addressed both visible and underlying issues, preventing future problems. This case shows the importance of comprehensive assessment beyond obvious damage.
Case Study 3: Multiple Repair History Leading to Replacement
A 22-year-old roof had undergone four separate repairs over 6 years. Each repair addressed isolated issues but couldn't stop overall deterioration. We recommended complete replacement rather than another repair. The homeowner invested $12,500 in a new architectural shingle roof with enhanced ventilation and ice/water shield. This case demonstrates when repair economics no longer make sense. Sometimes replacement is the wiser long-term investment.
Industry Statistics and Data Insights
Understanding broader industry trends helps contextualize your repair decisions. These statistics come from NRCA reports, manufacturer data, and our project tracking.
Asphalt shingles cover approximately 80% of U.S. residential roofs. The average asphalt shingle roof lasts 15-25 years depending on material quality and maintenance. Proper installation affects 75% of roof performance according to manufacturer studies. Wind resistance varies significantly by shingle type: 3-tab shingles typically withstand 60-70 mph winds, while architectural shingles often resist 110-130 mph winds. Repair costs have increased 18% over the past three years due to material and labor inflation. Insurance claims for roof damage have risen 32% in storm-prone regions. These statistics highlight the importance of quality materials, proper installation, and adequate insurance coverage.
Conclusion: Making Informed Decisions About Your Roof
Your roof is too important to trust to guesswork or incomplete information. Armed with this comprehensive guide, you can approach asphalt shingle repairs with confidence. Remember that early detection and prompt repair prevent minor issues from becoming major expenses. Choose materials wisely, understand the repair process, and select qualified professionals. Regular maintenance extends your roof's life and protects your home investment. Whether facing storm damage or normal wear, you now have the knowledge to make smart decisions. Your home deserves nothing less than informed, careful attention to its protective covering. Start with a thorough inspection, document everything, and proceed with the approach that makes the most sense for your specific situation and budget.
If you're facing roof repair decisions in the Texas area, our team offers complimentary inspections and detailed assessments. We provide honest recommendations whether repair or replacement makes the most sense. With proper care and attention, your asphalt shingle roof can protect your home for decades. Don't wait until small problems become emergencies. Take proactive steps today to ensure your roof's continued performance. Your home and family deserve that security and peace of mind.