
Affordable Roof Repair: Expert Tips & Cost-Saving Strategies from a 15-Year Roofing Contractor
I have been repairing and replacing roofs for over fifteen years. My team has completed more than two thousand roofing projects across Texas. We hold certifications from major manufacturers like GAF and Owens Corning. This experience gives me a unique perspective on roof repairs. I have seen homeowners spend too much money on unnecessary repairs. I have also seen them delay critical repairs until small problems become disasters. This article exists to solve that exact problem. It will help you understand when you need roof repairs. It will show you how to get quality work at fair prices. You will learn to spot warning signs early. You will understand material choices and contractor selection. My goal is to save you money and stress. This information comes from real customer projects and industry data. I reference manufacturer specifications and building codes. My recommendations are based on proven methods that work in the field.
Understanding Roof Damage: What Actually Needs Repair?
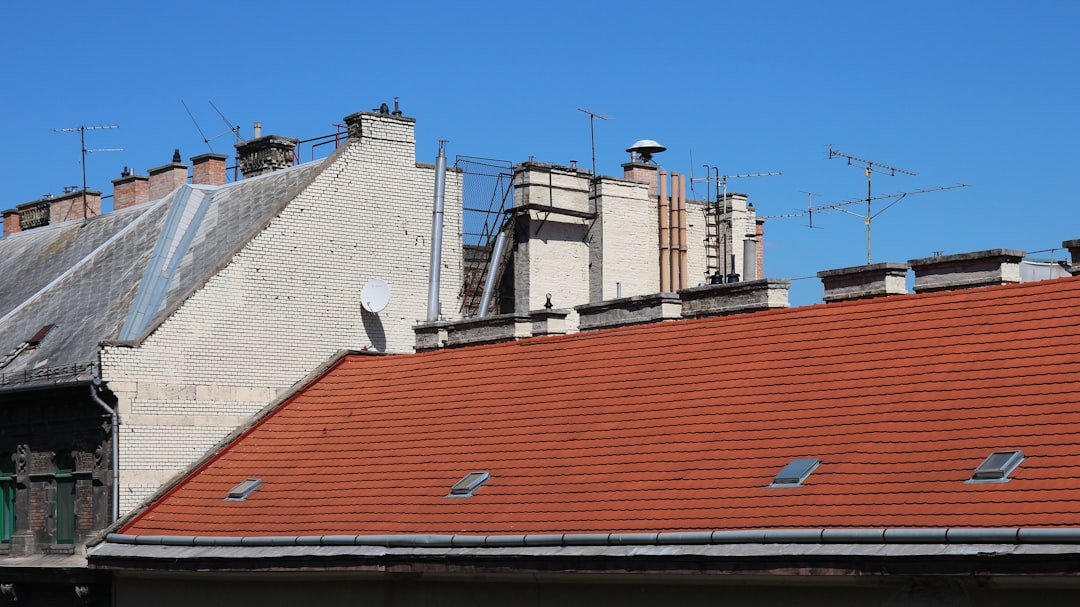
Not all roof problems require immediate expensive repairs. Some issues are cosmetic. Others are urgent. Learning the difference saves you thousands of dollars. Start with a visual inspection from the ground. Use binoculars for a closer look. Look for missing, cracked, or curling shingles. Check for dark streaks from algae growth. Look at the roof valleys where two slopes meet. Valleys channel water and are critical areas. Inspect the flashing around chimneys, vents, and skylights. Flashing is metal that seals roof penetrations. Damaged flashing is a common leak source. Go into your attic on a sunny day. Turn off the lights and look for pinpoints of light. Those are potential leak points. Check for water stains on the wood or insulation. Feel for damp spots. Musty odors also indicate moisture problems. Remember, a small leak can cause major structural damage over time.
Common Types of Roof Damage
Storm damage is a frequent repair cause. High winds can lift shingles and break seals. Hail creates dents and bruises on asphalt shingles. This damages the protective granules. Tree branches can puncture roofing materials. Debris impact can crack tiles or shingles. Normal wear and tear happens over twenty to thirty years. UV radiation from the sun breaks down asphalt. Thermal expansion and contraction stress materials. Granule loss exposes the asphalt layer to further damage. Poor installation leads to premature failure. This includes improper nailing and inadequate ventilation. Lack of maintenance allows small issues to grow. Clogged gutters cause water backup under shingles. Moss growth lifts shingles and traps moisture.
When to Repair vs. When to Replace
This is the most important cost decision. A full roof replacement costs significantly more than repairs. Repairs are suitable for localized damage. This means damage isolated to one section of the roof. If your roof is less than fifteen years old, repairs are often viable. The surrounding shingles should still be in good condition. The roof deck underneath must be solid and dry. Replacement becomes necessary with widespread damage. This means damage across multiple roof slopes. If your roof is near the end of its expected lifespan, replacement is smarter. Frequent repairs become a money pit. Consider the 30% rule used by many insurers. If repair costs exceed 30% of a replacement cost, replacement is recommended. Always get a professional assessment for this decision.
Real Costs of Roof Repairs: Breaking Down the Numbers
Homeowners often fear hidden costs. Transparency is key. Roof repair costs vary based on many factors. The national average for minor repairs is between $350 and $1,400. Major repairs can range from $1,500 to $7,000. Your location affects labor rates. Roof pitch or steepness changes the difficulty. Accessibility to the roof area matters. The type of roofing material is a major cost driver. Let's look at real project examples from my records. A Texas homeowner had wind damage on a 15-square asphalt shingle roof. The repair involved replacing shingles on one slope. The total cost was $1,200. This included materials, labor, and disposal. Another project involved repairing a leak around a chimney. The flashing was corroded. We replaced the step flashing and counterflashing. The cost was $850. A third example was repairing a valley on a tile roof. Several tiles were cracked. We replaced the tiles and resealed the valley. That repair cost $1,600.
Material Cost Comparison
Asphalt shingles are the most common and affordable material. Repair costs are typically $100 to $400 per square (100 sq ft). Architectural shingles cost more than 3-tab. Metal roofing repairs range from $300 to $1,500 per panel. The type of metal matters. Standing seam is more expensive than corrugated. Tile roof repairs cost $500 to $2,000 depending on tile type. Concrete tiles are heavier and more fragile. Clay tiles are more expensive. Slate roof repairs are the most costly. They range from $1,000 to $3,000 due to material cost and specialized labor. Synthetic slate offers a more affordable option. Always try to match the existing material for a seamless repair. Check your attic for leftover materials from the original installation.
Labor and Hidden Cost Factors
Labor typically constitutes 60% of the total repair cost. Complex roofs require more time. Steep roofs need special safety equipment. That adds to the cost. Multiple layers of old shingles increase disposal fees. Permits may be required by your local building department. Permit costs are usually $50 to $300. Emergency repairs after hours or on weekends cost more. Always ask for a detailed written estimate. It should break down material, labor, and other costs. Beware of estimates that seem too good to be true. They often cut corners or use inferior materials. Quality work has a fair price. Investing in proper repairs prevents more expensive problems later.
Choosing the Right Materials for Durable, Affordable Repairs
Material selection impacts both cost and longevity. You want repairs that last as long as the rest of your roof. For asphalt shingles, always use the same brand and style if possible. Color matching is easier. Shingle profiles must match for proper installation. If exact matches are unavailable, blend new shingles from different bundles. This helps them weather uniformly. Use high-quality roofing nails. They should be hot-dipped galvanized or stainless steel. This prevents rust stains. Underlayment is critical for water protection. Synthetic underlayment like GAF Tiger Paw offers better tear resistance than felt paper. Flashing should be corrosion-resistant. Aluminum and copper are excellent choices. Galvanized steel can rust over time. Sealants must be roofing-grade. Never use general-purpose caulk on a roof. It will fail quickly.
Asphalt Shingle Repair Materials
For minor shingle repairs, you need a few basic items. Roofing cement is essential for sealing edges. Use plastic roofing cement for flexibility. Roofing nails should be 1¼ inch long for standard repairs. A pry bar helps remove damaged shingles without harming neighbors. A utility knife cuts shingles cleanly. For granule loss, apply a roof coating. It refreshes the surface and adds UV protection. For curled shingles, apply roofing cement under the edges. Then nail them down securely. Replace any shingles with cracks longer than an inch. Small cracks can be sealed with cement. Always follow the manufacturer's installation instructions. Improper installation voids warranties. Refer to the GAF Installation Guidelines for best practices.
Flashing and Ventilation Materials
Flashing failures cause most leaks. Step flashing is used where the roof meets a wall. It is layered under each shingle. Counterflashing is embedded into the wall mortar. It covers the step flashing. Valley flashing channels water down the roof. Open valleys have metal lining. Closed valleys have shingles woven over them. Pipe flashing seals around plumbing vents. It has a rubber boot that seals to the pipe. Use butyl rubber tape for quick sealant repairs. It sticks well to clean, dry surfaces. Roof ventilation is often overlooked. Proper intake and exhaust vents prevent heat and moisture buildup. This extends roof life. Soffit vents and ridge vents work together. Blocked vents cause shingles to overheat and deteriorate faster.
The Professional Repair Process: What to Expect
A professional roof repair follows a systematic process. First, the contractor performs a thorough inspection. They identify all areas needing attention. They check the roof deck for soft spots. They examine the attic for signs of water intrusion. Next, they provide a detailed written estimate. This includes the scope of work and materials. Once approved, they schedule the work. On repair day, they protect your property. They use tarps to catch debris. They lay boards over landscaping. Ladders have protective pads. The crew uses proper safety harnesses on steep roofs. They remove damaged materials carefully. They inspect the underlying wood deck. Any rotten wood is replaced. This is called decking repair. New underlayment is installed if needed. Then new shingles or tiles are installed. Flashing is repaired or replaced. Finally, they clean the work area thoroughly. They remove all nails and debris. They perform a final inspection with you.
Critical Steps in Quality Repairs
Proper nail placement is crucial. Nails should be placed in the nail line. They should not be overdriven or underdriven. Overdriven nails break the shingle seal. Underdriven nails stick up and catch water. Shingles must be aligned properly. Staggered joints prevent leaks. Valleys must be cut straight and sealed well. Flashing must be integrated with the shingles. It should not rely solely on sealant. Sealant is a backup, not the primary barrier. Vent boots must fit the pipe snugly. The rubber should not be cracked. Ice and water shield is recommended in critical areas. This includes valleys, eaves, and around penetrations. It provides extra protection against water infiltration. The International Residential Code (IRC) provides minimum standards for roofing.
Post-Repair Inspection and Maintenance
After repairs, walk around your property with the contractor. Look for any missed debris. Check your gutters for nails. Inspect the repair work from the ground. Ask questions about the work performed. Request documentation. This includes before and after photos. Get details on the materials used, including brand and warranty. Understand the labor warranty offered by the contractor. Most reputable companies offer a warranty on their workmanship. Schedule a follow-up inspection after the first major rain. Check your attic for any new signs of moisture. Keep the repair documentation with your home records. It is valuable for future sales or insurance claims.
Practical Homeowner Tips from Real Projects
I have learned many lessons from thousands of projects. These tips can save you money and hassle. First, perform bi-annual roof inspections. Do this in spring and fall. Look for problems after major storms. Keep trees trimmed back from the roof. Falling branches cause damage. Leaves and debris trap moisture. Clean your gutters regularly. Clogged gutters cause water to back up under shingles. This leads to rot. Ensure your attic ventilation is adequate. Hot attics bake shingles from underneath. Check that soffit vents are not blocked by insulation. Do not pressure wash your roof. It blows off protective granules. Use a soft wash or moss removal treatment instead. Walk carefully on your roof if you must. Wear soft-soled shoes. Step on the nails, not between them. Better yet, hire a professional for inspections.
Working with Contractors and Insurance
Get at least three written estimates for any significant repair. Compare the scope of work, not just the price. Ensure contractors are licensed and insured. Ask for proof of liability insurance and workers' compensation. Check online reviews and ask for local references. Look for manufacturers' certifications. These indicate training on specific products. For storm damage, contact your insurance company first. Document the damage with photos and videos. Get a professional inspection before the insurance adjuster visits. The adjuster may miss hidden damage. Provide the contractor's estimate to your insurer. Understand your policy deductible. Know what types of damage are covered. Keep all communication in writing. Be wary of storm chasers who appear after bad weather. They often provide poor work and leave town. Choose a local, established company.
DIY vs. Professional Repair Decisions
Some minor repairs are suitable for capable DIYers. Replacing a few missing shingles is straightforward. Sealing a small pipe flashing leak is manageable. Cleaning moss off a roof can be done safely. However, know your limits. Working on a roof is dangerous. Falls cause serious injuries. Complex repairs require expertise. Fixing valleys, chimneys, or skylights is best left to professionals. Matching specialty materials like tile or slate is difficult. If the repair involves structural decking, hire a pro. Improper repairs can void your roof's manufacturer warranty. They can also lead to more extensive damage. When in doubt, get a professional opinion. Many contractors offer free inspections. The cost of a professional repair is often less than the cost of fixing a DIY mistake.
Frequently Asked Questions About Affordable Roof Repair
How much does it cost to fix a roof leak?
The cost to fix a roof leak varies widely. Simple leaks around a vent pipe may cost $200 to $500. Leaks in complex areas like valleys or chimneys can cost $800 to $1,500. The final price depends on leak location, roof material, and repair extent. Always fix leaks immediately to prevent interior damage.
Can I repair my roof myself to save money?
You can perform very minor repairs if you are comfortable on a roof. Safety is the primary concern. Use proper fall protection. Simple shingle replacement is a common DIY task. For anything beyond basic shingle work, hire a professional. Mistakes can lead to bigger, more expensive problems.
How long should a roof repair last?
A quality roof repair should last as long as the surrounding roof. If you repair a 5-year-old roof with matching materials, it should last the remaining roof life. Proper installation is key. Always ask your contractor for a workmanship warranty, typically 1 to 5 years.
Will my homeowners insurance cover roof repairs?
Insurance often covers sudden, accidental damage. This includes damage from storms, falling trees, or hail. It typically does not cover wear and tear or lack of maintenance. Review your policy and talk to your agent. File a claim promptly after a covered event.
How do I find a reliable roofing contractor?
Look for local companies with strong reputations. Check reviews on the Better Business Bureau website. Ask for references from past customers. Verify they are licensed and insured. Choose contractors with manufacturer certifications, which indicate specialized training.
What are signs I need a roof replacement instead of repairs?
Signs you need a replacement include widespread shingle curling or cracking. Many missing granules in your gutters is another sign. Multiple leaks in different areas indicate systemic failure. If your roof is over 20 years old, replacement is often more cost-effective than repeated repairs.
How can I finance a major roof repair?
Many roofing contractors offer financing options. Home equity loans or lines of credit are common. Some government programs assist with energy-efficient upgrades. Your insurance may cover storm-related repairs. Always compare loan terms and interest rates before committing.
Real Project Case Studies with Outcomes
Case Study 1: The Hail Damage Repair
A homeowner in Kingwood had hail damage after a spring storm. The insurance adjuster noted damage on two slopes. The homeowner got three estimates. We provided the middle estimate with a detailed scope. We replaced the damaged shingles and matched the existing architectural style. We also replaced the ridge vents which were dented. The total repair cost was $4,200, fully covered by insurance after the deductible. The repair blended perfectly and has held up through subsequent storms.
Case Study 2: The Preventative Maintenance Save
A property manager for a small apartment complex noticed minor flashing corrosion. They called for an inspection before the rainy season. We found early-stage corrosion on several pipe flashings. We replaced all pipe flashings with new, high-quality boots. The total cost was $1,800 for six buildings. This preventative repair prevented interior water damage that could have cost over $15,000 in drywall and flooring repairs. Regular inspections pay off.
Case Study 3: The DIY Gone Wrong
A homeowner attempted to fix a leak around their chimney. They used general-purpose caulk from a hardware store. The leak stopped for a few months but returned worse. When we inspected, we found water had rotted the roof deck around the chimney. The repair cost increased from a potential $600 flashing job to a $2,500 repair including deck replacement. This highlights the importance of using correct materials and methods.
Industry Statistics and Data
Understanding industry data helps set realistic expectations. According to National Roofing Contractors Association (NRCA) surveys, the average asphalt shingle roof lasts 20-25 years. Proper maintenance can extend this lifespan. The most common roof repair is leak repair, accounting for 40% of service calls. Hail damage claims average over $10,000 nationally, but repairs are often less. Approximately 25% of roof replacements could have been delayed with timely repairs. Energy Star reports that a cool roof can reduce peak cooling demand by 10-15%. Regular maintenance can prevent up to 80% of premature roof failures. These statistics show the value of proactive care.
Step-by-Step Guide to Getting a Quality Repair
- Identify the Problem: Look for visible damage or interior water stains. Document with photos.
- Get Professional Inspections: Contact 2-3 reputable local roofing contractors for free inspections.
- Review Detailed Estimates: Compare written estimates. Ensure they include materials, labor, cleanup, and warranty.
- Check Credentials: Verify licenses, insurance, and manufacturer certifications. Read online reviews.
- Contact Insurance (if applicable): For storm damage, file a claim and schedule the adjuster's inspection.
- Schedule the Work: Choose your contractor and agree on a timeline. Get everything in writing.
- Prepare Your Property: Move vehicles, cover landscaping, and secure pets for the workday.
- Supervise the Project: Be available for questions. Do a final walkthrough after cleanup.
- Complete Documentation: Get all warranty information, receipts, and before/after photos for your records.
- Follow-Up: Check the repair after the first rain. Contact the contractor with any concerns promptly.
Conclusion: Your Path to a Sound, Affordable Roof
Affordable roof repair is about smart decisions, not just low prices. It starts with understanding your roof's condition. Regular inspections catch small problems early. Choosing the right materials ensures repairs last. Selecting a qualified contractor guarantees quality workmanship. Balancing DIY with professional help saves money where appropriate. Dealing properly with insurance maximizes your coverage. The goal is to protect your home investment without overspending. Your roof is your first line of defense against the elements. Do not ignore warning signs. Do not panic and agree to unnecessary work. Use the information in this guide to have informed conversations with contractors. Take control of the process. A well-maintained roof provides peace of mind for years. Your next step is to schedule a professional inspection if you have concerns. Start with a local, trusted company. Show them this article if it helps explain what you need. Here's to a dry, secure home over your head.