
Roofing Contractors and Insurance Claims: Your Complete Guide from a 15-Year Industry Veteran
I have been a licensed roofing contractor for over fifteen years. I have completed more than 2,500 residential roofing projects. I hold certifications from major manufacturers like GAF and Owens Corning. I have helped hundreds of homeowners navigate insurance claims after storms. This article exists because I have seen too many good people get overwhelmed. A damaged roof is stressful enough. Dealing with insurance companies should not make it worse. My goal is to give you the knowledge I share with my own customers. I want you to feel confident and prepared. This information comes from real project files and countless meetings with adjusters. I reference manufacturer specifications and local building codes. My recommendations are based on what actually works to restore your home properly.
This guide will walk you through the entire process. You will learn how to spot damage, file a claim, and work with a contractor. I will explain what insurance companies look for and how to advocate for your home. You will get practical tips from the field. These are the same steps I use when helping my neighbors in Kingwood and across Texas recover from hail and wind. My methodology is simple: document everything, communicate clearly, and focus on quality repairs. Let's get started on protecting your biggest investment.
Understanding Roof Damage and Insurance Coverage
Not all roof damage is created equal. Insurance policies typically cover "sudden and accidental" events. This includes storms, falling trees, and hail. Normal wear and tear or lack of maintenance is not covered. The first step is knowing what to look for after a storm. From the ground, you might see missing shingles or granules in your gutters. Hail damage looks like small, dark divots on asphalt shingles. Wind can lift shingles and break seals. It is crucial to have a professional inspection. A certified roofer can safely assess the full extent of damage.
What Your Homeowners Insurance Actually Covers
Most standard policies cover the full replacement cost of a damaged roof. This is called Replacement Cost Value (RCV). The insurance company pays for the cost to replace your roof with materials of like kind and quality. They subtract your deductible. Some older policies may use Actual Cash Value (ACV). ACV factors in depreciation based on the roof's age. This means you get less money. You should review your policy's declarations page. Know your deductible and coverage limits before you need to file a claim.
Insurance also covers related damage. This includes interior water damage from a leak. It includes damage to siding, gutters, and vents from the same storm event. The key is linking all damage to the covered peril. A good contractor will document everything. They will take photos of hail hits on the roof, siding, and window screens. This creates a strong case for a comprehensive claim. Always report damage as soon as you safely can. Delays can complicate the process and lead to coverage questions.
The Step-by-Step Insurance Claim Process
Navigating a claim can feel like a maze. Following a clear process reduces stress and improves outcomes. I guide my customers through these seven steps every time. It creates a smooth path from damage discovery to a fully restored home.
- Safety First and Initial Documentation: After a storm, ensure your family is safe. Do not go on the roof yourself. From the ground, take wide-angle photos of your property. Photograph any visible damage you can see. This includes downed branches, dented gutters, or missing shingles. Place a bucket under any active leaks inside your home. This initial documentation establishes a timeline.
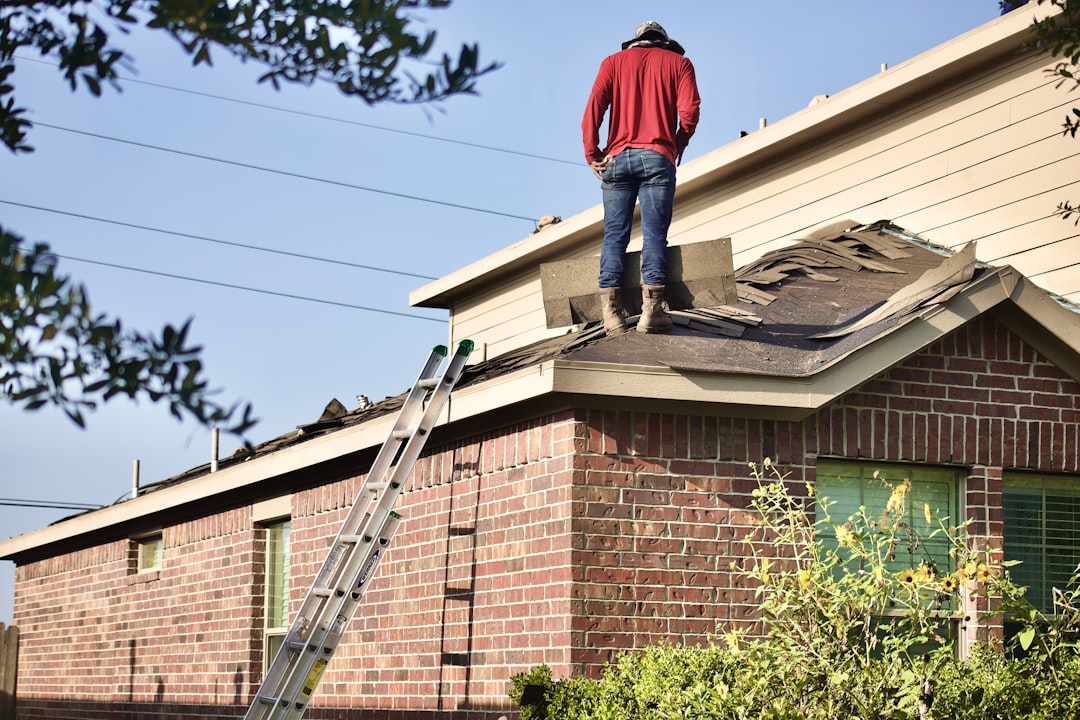
- Contact a Reputable Roofing Contractor for a Free Inspection: Call a local, licensed, and insured roofing company. Look for one with good reviews and manufacturer certifications. They will perform a thorough, no-obligation inspection. A professional roofer will use drones or safely walk the roof. They will identify all storm-related damage. They should provide a detailed report with photos and diagrams.
- File Your Claim with Your Insurance Company: Contact your insurance agent or company to start the claim. Provide your policy number and a brief description of the damage. They will assign a claim number and an adjuster. Share the date of the storm and your contractor's initial findings. Be polite but factual. You are not asking for a favor; you are using the coverage you pay for.
- The Insurance Adjuster's Inspection: The insurance adjuster will visit your property. Your roofing contractor should be present for this meeting. This is critical. The contractor can point out damage the adjuster might miss. They can explain why certain repairs are necessary to meet building codes. This collaboration often leads to a more accurate and complete scope of work.
- Reviewing the Insurance Estimate (Scope of Loss): The insurance company will send you an estimate. This document is called the scope of loss or claim summary. It lists the line items they agree to pay for. Review it carefully with your contractor. Compare it to the contractor's detailed estimate. Look for missing items like proper underlayment, ice and water shield, or specific code-required materials.
- Negotiating for a Fair Settlement (Supplementing): If items are missing, your contractor can help with a supplement. This is a formal request for additional funds. The contractor will provide documentation, like manufacturer requirements or code citations, to justify the need. Common supplements include waste removal, ventilation upgrades, and proper flashing details. This is a normal part of the process. Do not accept a settlement that does not cover a complete, code-compliant repair.
- Receiving Payment and Scheduling the Repair: Once the scope and price are agreed upon, the insurance company will issue payment. Often, they send an initial check for the Actual Cash Value (ACV). The final payment for the recoverable depreciation comes after the work is complete. Your contractor will schedule the project. They will order materials and pull the necessary permits from your local building department.
How to Choose the Right Roofing Contractor for an Insurance Job
Your choice of contractor is the most important decision in this process. The wrong contractor can turn a straightforward claim into a nightmare. The right partner becomes your advocate and ensures a quality repair. Beware of storm chasers who appear after bad weather. They often use high-pressure tactics and may not be locally licensed.
Essential Credentials and Red Flags
Always verify a contractor's credentials. Ask for their Texas license number and check it online with the Texas Department of Licensing and Regulation (TDLR). They must carry general liability insurance and workers' compensation. Request certificates of insurance directly from their provider. Look for manufacturer certifications, like GAF Master Elite or Owens Corning Platinum. These show training and a commitment to quality. A reputable contractor will have a physical office address in your area. They should provide a list of recent local references.
Major red flags include asking for the entire payment upfront. Be wary of a contractor who offers to pay or waive your insurance deductible. This is illegal in Texas and many other states. It is insurance fraud. Avoid anyone who pressures you to sign a contract immediately. Do not work with a contractor who wants to handle the insurance claim "for you" without your involvement. You must remain the primary contact with your own insurance company. A good contractor guides you; they do not take over your policy.
Material Selection and Code Compliance for Insurance Repairs
Your insurance company is obligated to pay for repairs that meet current building codes. Building codes are updated regularly to improve safety and performance. A common issue is matching existing materials. If your old shingles are discontinued, the insurance should pay for replacement of the entire roof plane to ensure a uniform appearance. This is often called the "matching" provision in your policy.
Understanding Manufacturer Specifications and Warranties
Roofing manufacturers have strict installation instructions for their warranties to be valid. For example, GAF requires specific underlayment and nail patterns. Your insurance estimate must include these items. If it does not, the installation may void the manufacturer's warranty. Your contractor should insist on this. Using cheaper materials or shortcuts can lead to premature failure. I always provide customers with the manufacturer's warranty paperwork. I register the warranty on their behalf. This protects their investment long after the insurance claim is closed.
Common code upgrades include proper attic ventilation. Modern codes require a balanced system of intake and exhaust. This prevents ice dams and extends shingle life. Another is the use of ice and water shield in critical areas. This self-adhering membrane is required by code in eaves and valleys in many climates. It provides superior protection against wind-driven rain. Your contractor should reference the International Residential Code (IRC) and your local amendments. They can use these codes to justify necessary supplements to the insurance estimate.
Real Project Case Studies and Outcomes
Let me share two real examples from my work. These show how the process works in practice. Names and specific addresses are changed for privacy.
Case Study 1: The Hail Storm in Kingwood. A family had significant hail damage after a spring storm. Their insurance adjuster's initial estimate was for a simple repair of a few shingles. I met the adjuster on site. I showed him hail damage on all roof slopes, the siding, the window screens, and the air conditioner fins. I used a hail damage identification guide from the National Roofing Contractors Association (NRCA). The adjuster agreed the damage was widespread. We submitted a supplement for a full roof replacement, new siding on two elevations, and paint. The final settlement was over $45,000. The home received a complete exterior restoration. The family paid only their deductible.
Case Study 2: The Wind Claim and Code Upgrades. An older home lost shingles in high winds. The original roof did not have proper drip edge flashing. Modern building codes require drip edge on all eaves and rakes. The insurance estimate did not include it. I explained to the homeowner that installing a new roof without drip edge would not meet code. It would also leave the roof deck vulnerable to water intrusion. We submitted the relevant code section from the International Residential Code to the insurance company. They approved the supplement. The home got a code-compliant roof that will perform better and last longer.
Frequently Asked Questions from Homeowners
Will filing a claim make my insurance rates go up?
Filing a claim for a covered weather event may not automatically raise your rates. Rate increases are often based on widespread catastrophic events in your area that affect many policyholders. However, filing multiple claims in a short period can flag you as high-risk. It is always wise to file a legitimate claim for significant storm damage. You have paid premiums for this protection. Discuss potential impacts with your insurance agent before filing if you are concerned.
What if my insurance claim is denied?
First, get the denial in writing with the specific reason. Common reasons are "wear and tear" or "lack of maintenance." If you disagree, you can appeal. Your roofing contractor can provide a second opinion and more detailed documentation. You can also hire a public adjuster. A public adjuster works for you, not the insurance company, to evaluate the loss. As a last resort, you can file a complaint with your state's department of insurance. In Texas, this is the Texas Department of Insurance.
Can I keep the leftover money from the insurance settlement?
No. The insurance settlement is not a cash payout for you. It is a reimbursement for the cost to repair your home to its pre-loss condition. The funds are intended to pay the contractor for the work. If the repair costs less than the settlement, the difference typically goes back to the insurance company or is used for any necessary change orders. Misusing insurance funds can be considered fraud.
How long does the entire insurance claim process take?
From inspection to completed repair, a typical process takes 4 to 8 weeks. The timeline depends on the insurance company's responsiveness, weather delays for the repair, and material availability. The initial inspection and claim filing should happen within days of the storm. The adjuster's inspection usually occurs within 1-2 weeks. Negotiations and supplements can add another week or two. The physical installation itself usually takes 1-3 days for a standard asphalt shingle roof.
What is "recoverable depreciation" and how do I get it?
If you have Replacement Cost Value (RCV) coverage, the insurance company often holds back a portion of the payment called depreciation. This is the estimated loss in value due to the age of your old roof. This amount is "recoverable." Once the work is complete and you have paid your contractor, you submit the final invoice to your insurance company. They then release the recoverable depreciation payment to you. This ensures the funds are used for the intended repair.
Practical Tips and Next Steps for Homeowners
Start by being proactive. Know your policy details before storm season. Take photos of your roof and exterior when it is in good condition. This gives you a "before" reference. After a storm, act quickly but do not panic. Get multiple inspections if you are unsure. Choose your contractor based on credentials, not the lowest price. Your relationship with your contractor will last through the warranty period. Communicate openly with both your contractor and your insurance adjuster. Keep a file with all documents: emails, estimates, claim numbers, and photos.
If you are in the Kingwood, Texas area and have recently experienced storm damage, your next step is to schedule a professional inspection. Look for a contractor who communicates clearly and makes you feel informed. Do not sign anything until you understand all the terms. Remember, you are in control of the process. Use this guide as a roadmap to navigate your claim with confidence. A damaged roof is a problem, but with the right knowledge and the right partner, it is a solvable one. Your home deserves a proper, lasting repair that protects your family for years to come.