
RoofClaim.com Owner: A Roofing Contractor's 25-Year Perspective on Insurance Claims & Storm Damage
My name is James Carter. I have been a licensed roofing contractor for over 25 years. I have personally managed more than 3,000 roofing projects across Texas. I hold certifications from major manufacturers like GAF, Owens Corning, and CertainTeed. I am also a certified insurance claims specialist. This experience gives me a unique view of the roofing industry. I understand both the contractor's side and the homeowner's needs. Today, I want to share honest insights about RoofClaim.com. I will explain how they operate from a contractor's perspective. My goal is to help you make informed decisions about your roof.
This article exists to solve a real problem. Many homeowners face storm damage and confusing insurance claims. They see ads from companies like RoofClaim.com. They wonder if these services are right for them. I have worked with homeowners who used similar services. I have seen the outcomes, both good and bad. This guide will answer your critical questions. Is using a national service better than a local contractor? How does the insurance claim process really work? What should you expect during a roof replacement? I will provide clear, actionable answers based on real projects.
The information here comes from my direct experience. I have reviewed hundreds of insurance claim documents. I have inspected roofs after major storms like Hurricane Harvey. I have worked alongside insurance adjusters. I stay updated on building codes from the International Code Council. I study manufacturer installation specifications. I also analyze industry data from sources like the Insurance Information Institute. My recommendations are based on proven methods. They are designed to protect your home and your investment. Let's begin with a clear understanding of the service model.
Understanding the RoofClaim.com Business Model
RoofClaim.com operates as a national roofing service provider. They connect homeowners with local roofing contractors. Their model focuses on handling insurance claims for storm damage. They market heavily after major weather events. Their promise is to manage the entire claim process for you. This can be appealing to stressed homeowners. The idea of a single point of contact is attractive. However, it is crucial to understand how this model works in practice.
How National Service Networks Operate
Companies like RoofClaim.com are often lead generators. They generate customer inquiries through advertising. They then sell those leads to local roofing companies. The local contractor pays a fee for each job. This fee can be a percentage of the total project cost. This business model is common in many home service industries. It is not unique to roofing. The key question is about value. Does the service provided justify the cost structure? Does it benefit the homeowner in the long run?
From a contractor's view, this model has pros and cons. The homeowner gets access to a branded service. They may feel more secure with a national name. The contractor gets pre-qualified leads. However, the contractor's profit margin is reduced by the referral fee. This can sometimes impact material choices or labor quality. It is a business reality. I have subcontracted for similar networks early in my career. The pressure to control costs is always present. Homeowners should be aware of these dynamics.
The Insurance Claims Management Promise
Their core service is managing the insurance claim. This includes documenting damage, meeting with adjusters, and negotiating settlements. For a homeowner, this is a valuable service. Insurance paperwork is complex and time-consuming. A professional can often secure a better settlement. They understand the language and requirements of insurance policies. According to the National Association of Insurance Commissioners, proper documentation is key. A skilled advocate can make a significant difference in your claim outcome.
However, not all claims management is equal. The quality depends on the specific representative assigned. It depends on their experience and dedication. I have seen cases where the service was excellent. The homeowner received a full, fair settlement without stress. I have also seen cases where communication broke down. The homeowner was left confused about the process. Always ask for details about who will handle your claim. Request their credentials and experience level.
The Homeowner's Guide to the Roof Replacement Process
Whether you use a service or a local contractor, the process follows similar steps. Understanding this process empowers you as a homeowner. You can ask better questions and spot potential issues. Here is a step-by-step guide based on thousands of projects.
Step 1: Initial Inspection and Damage Assessment
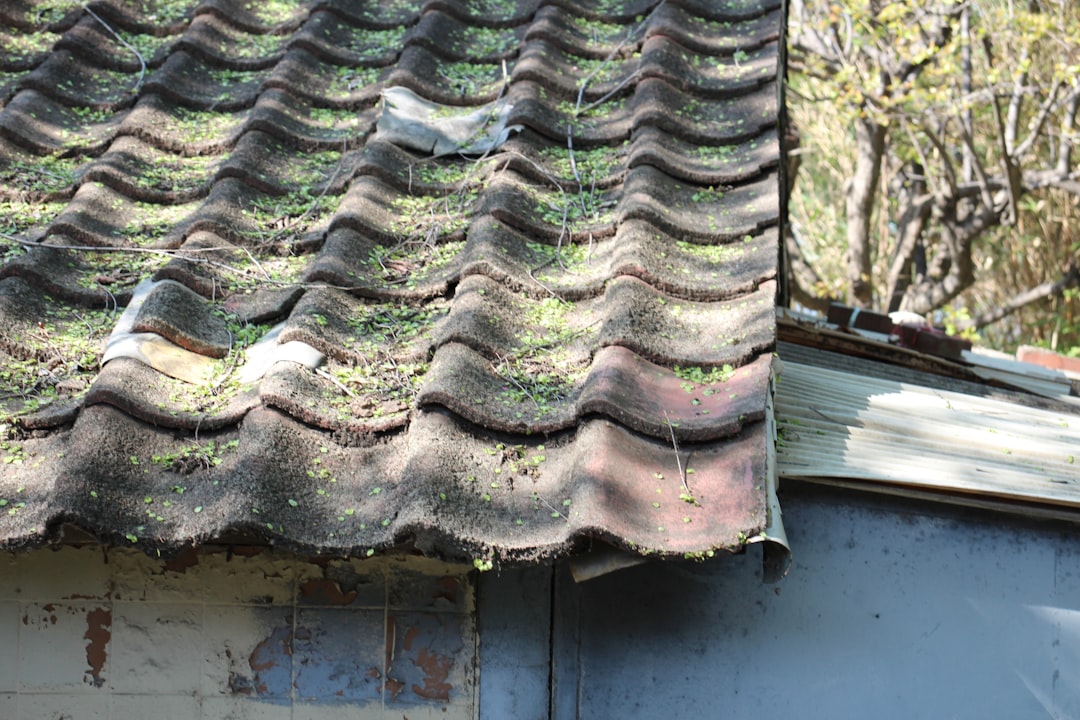
A qualified inspector should visit your home. They will examine your roof for storm damage. Look for hail hits, wind-lifted shingles, and broken seals. They should also check for interior water stains. A good inspector will use a drone or safely walk the roof. They will take detailed photographs of all damage. They should provide you with a written report. This report is the foundation of your insurance claim. It must be thorough and accurate.
I recommend you be present for this inspection. Ask questions. Have the inspector point out the damage to you. Understand what they are looking for. Hail damage, for example, looks like dark bruises on asphalt shingles. It knocks off the protective granules. Wind damage often shows as creased or missing shingles. Proper documentation here is critical. It directly impacts what your insurance company will approve for repair or replacement.
Step 2: Filing the Insurance Claim
Your roofing professional will help you file the claim. They will submit the inspection report and photos to your insurance company. The insurer will then assign an adjuster. The adjuster will schedule a time to inspect the property. It is vital that your roofing representative is present for this meeting. This ensures all damage is properly identified and recorded. The adjuster creates an estimate called a scope of loss.
This scope details what repairs are covered and the payment amounts. Negotiation often happens here. Your roofer should review the adjuster's scope line by line. They should compare it to real-world material and labor costs in your area. If the scope is too low, they should prepare a supplement. A supplement is a request for additional funds. It is based on missing items or underestimated costs. A knowledgeable contractor is essential for this step.
Step 3: Material Selection and Contract Signing
Once the insurance claim is approved, you choose materials. You will select shingle type, color, and brand. You will also choose components like underlayment, drip edge, and ventilation. Your contractor should explain the options. They should discuss warranties, lifespan, and performance. For example, architectural shingles last longer than 3-tab shingles. They also provide better wind resistance. Refer to manufacturer websites like GAF or Owens Corning for detailed specifications.
You will then sign a contract. Read it carefully. It should include the total project cost, payment schedule, and start/completion dates. It should list all materials by brand and product name. It must include details about waste removal and site cleanup. It should specify who obtains permits. A good contract protects both you and the contractor. Do not sign a contract with blank spaces. Ensure everything discussed is written down.
Step 4: The Installation Day
Preparation is key. The crew will arrive early. They will place a dumpster and use tarps to protect your landscaping. The tear-off process is loud and messy. They will remove old shingles and nails down to the roof deck. They will then inspect the wood decking for rot or damage. Any rotten wood must be replaced before new materials are installed. This is a common supplement item if not initially identified.
The crew will then install new underlayment, flashings, and shingles. Proper installation is more important than speed. The crew should follow the manufacturer's installation instructions exactly. This is required for the warranty to be valid. They should use the correct number of nails per shingle. They should seal all flashings properly. A project foreman should be on-site to oversee quality.
Step 5: Final Inspection and Cleanup
After installation, the site foreman should do a quality check. They should walk the roof and the perimeter of the house. They should use a magnetic nail roller to pick up any stray nails. The dumpster and all debris should be removed. Your property should be left clean. The contractor should then schedule a final walkthrough with you. They should explain the work done and provide warranty paperwork.
You should receive copies of the manufacturer's warranty and the contractor's workmanship warranty. Keep these documents in a safe place. You will need them if any issues arise later. The contractor should also provide before-and-after photos. They should give you a certificate of completion for your insurance company. This closes the loop on your claim.
Cost Analysis: Insurance Claims vs. Out-of-Pocket Payment
Understanding costs is confusing. Is it better to file a claim or pay yourself? The answer depends on your deductible and the extent of damage. Let's break down real numbers from recent Texas projects.
Typical Roof Replacement Costs in Texas
For a standard 2,000 square foot home, a roof replacement can cost between $12,000 and $25,000. The final price depends on materials, roof complexity, and local labor rates. Architectural shingles cost more than 3-tab shingles. A steep roof or many valleys increases labor time. In 2023, the average insurance claim payout for roof damage in storm-prone areas was around $15,000. This data comes from the Insurance Information Institute.
If your deductible is $1,000 and the repair cost is $2,500, filing a claim may not be wise. Your insurance payout would only be $1,500 after the deductible. You also risk a potential increase in your premiums. However, if you have significant storm damage costing $18,000, filing a claim makes financial sense. Your out-of-pocket cost would be just your deductible. Always get a detailed estimate from a contractor first. Then compare it to your deductible.
How Insurance Payments Work
Insurance companies typically issue two payments. The first check is for the Actual Cash Value (ACV). This is the depreciated value of your old roof. The second check is for the Recoverable Depreciation. You receive this after the work is complete and the insurer receives the final invoice. Your contractor should understand this process. They should not demand full payment upfront. The payment schedule in your contract should align with the insurance payout timeline.
Be wary of any contractor who asks you to sign over your insurance check directly to them. You are the policyholder. The check is made out to you. You should endorse it and pay the contractor according to your contract terms. This maintains your control over the project funds. It ensures the work is done to your satisfaction before final payment.
Material Comparisons: What Really Lasts on a Texas Roof
Choosing materials is a major decision. You want a roof that withstands Texas heat, hail, and high winds. Here is a hands-on comparison from installing all these types.
Asphalt Shingles: The Most Common Choice
Asphalt shingles are affordable and effective. Modern architectural shingles are much improved. They have a layered design for a dimensional look. They offer better impact resistance. Brands like GAF Timberline HDZ and Owens Corning Duration are top performers. They come with wind warranties of 130 mph or more. Their lifespan is typically 25 to 30 years. They are a solid, cost-effective choice for most homes.
Metal Roofing: Durability and Efficiency
Metal roofs are excellent for Texas. They reflect solar heat, reducing cooling costs. They can last 40-70 years. They are highly resistant to wind, fire, and hail. The initial cost is higher than asphalt. However, the long-term value can be greater. Standing seam metal roofs are the premium option. They have concealed fasteners for a clean look and superior weathertightness. They are also eligible for energy efficiency tax credits in some cases.
Synthetic Slate and Tile: The Premium Look
Synthetic materials like polymer slate offer the beauty of slate without the weight. They are durable, impact-resistant, and often carry 50-year warranties. Concrete tile is another heavy-duty option popular in some Texas styles. Both are more expensive. They require a roof structure strong enough to support the weight. A structural engineer may need to verify your home can handle it.
Your choice should balance budget, aesthetics, and performance. Your contractor should explain the pros and cons of each for your specific home. Always verify the product is rated for the wind zone in your area. Check the International Building Code maps for reference.
Practical Homeowner Tips From Real Projects
Here is wisdom gathered from helping thousands of homeowners. These tips can save you time, money, and stress.
- Get Multiple Estimates: Always get at least three detailed written estimates. Compare the scope of work, materials, and warranties. The lowest price is not always the best value.
- Verify Insurance and Licenses: Ask for the contractor's license number and proof of insurance. Verify them with the Texas Department of Licensing and Regulation. Ensure they have both liability and workers' compensation insurance.
- Check Local References: Ask for addresses of recent local projects. Drive by to see the quality of their work. Talk to past customers if possible.
- Understand Your Insurance Policy: Know your deductible and coverage limits. Review your policy's section on roof replacement. Some policies pay for replacement cost. Others pay only actual cash value for older roofs.
- Never Pay in Full Upfront: A reasonable deposit to schedule materials is normal. But the majority of payment should come after work is completed and you are satisfied.
- Inspect the Delivery: When materials are delivered, check the bundles. Ensure the brand and color match what's in your contract. Look for any water-damaged or torn packages.
Frequently Asked Questions (FAQ)
1. Is RoofClaim.com a contractor or a middleman?
RoofClaim.com operates as a service provider and network. They are not typically the direct contractor performing the work. They coordinate the process and partner with local roofing companies to complete the installation. It is important to ask who the actual installing contractor will be and to vet that company separately.
2. Will using a service like this void my manufacturer's warranty?
No, using a service does not automatically void a warranty. The manufacturer's warranty depends on proper installation using certified materials. The key is whether the installing contractor is certified by the shingle manufacturer. Always ask if the crew installing your roof is factory-certified for the specific brand being used.
3. How long does the entire insurance claim and replacement process take?
The timeline varies. From initial inspection to final payment, it can take 4 to 12 weeks. The insurance adjuster's schedule is often the biggest variable. The physical installation itself usually takes 2 to 5 days for a typical home, depending on size and weather.
4. What if my insurance claim is denied?
Denials happen. The first step is to understand why. Your roofing professional should help you review the denial letter. You have the right to request a re-inspection or appeal the decision. Sometimes providing additional documentation or a second opinion from an independent adjuster can change the outcome.
5. Can I choose my own shingle brand and color?
Absolutely. You are the homeowner and the customer. The insurance company pays to replace your roof with "like kind and quality." You can usually upgrade to better materials by paying the price difference. Your contract should specify the exact product name, color, and style you selected.
6. What happens if more damage is found during the tear-off?
This is common. Rotten decking is often hidden under old shingles. When found, the contractor should immediately document it with photos. They will pause work and contact the insurance adjuster to request a supplement for the additional repair cost. This may delay the project by a few days but is necessary for a proper repair.
7. How do I maintain my new roof?
Keep gutters clean to ensure proper drainage. Trim tree branches away from the roof surface. After major storms, do a visual ground-level inspection for missing shingles or debris. Have a professional inspection every 3-5 years. Avoid walking on your roof, as this can damage shingles.
Real Project Case Studies
Case Study 1: The Hail Damage Claim in Kingwood
A homeowner had significant hail damage after a spring storm. They contacted a national service. The service assigned a local contractor. The inspection was thorough. The insurance claim was approved for a full replacement. The homeowner chose GAF Timberline HDZ shingles. The installation went smoothly. The crew was certified by GAF. The homeowner was pleased with the communication and the final result. The key was the quality of the local contractor assigned.
Case Study 2: The Wind Damage Challenge in Spring
Another homeowner had wind damage. They used a similar service model. The initial inspection missed some damage in a valley. During the tear-off, the contractor found rotten decking. The service company was slow to request a supplement from the insurance company. This caused a week-long delay. The homeowner grew frustrated with the back-and-forth. The job was completed well, but the process was stressful. This highlights the importance of a responsive project coordinator.
Industry Statistics and Data
Understanding the bigger picture helps. According to the Insurance Information Institute, wind and hail claims account for a large portion of homeowners insurance losses. The National Oceanic and Atmospheric Administration (NOAA) reports that severe weather events are increasing in frequency and intensity. This makes having a sound roof more important than ever. Proper installation following building codes is not a suggestion; it is a requirement for safety and durability.
Conclusion: Making an Informed Decision for Your Home
Your roof is your home's first line of defense. The decision to repair or replace it is significant. Whether you consider a service like RoofClaim.com or a local contractor, due diligence is essential. Focus on the credentials of the actual people and company doing the work. Verify licenses, insurance, and manufacturer certifications. Get everything in writing. Understand your insurance policy.
From my 25 years on roofs, I know trust is earned. It is built through clear communication, quality workmanship, and standing behind the job. Look for a partner who demonstrates these values. Your goal is a secure, weathertight roof that protects your family for decades. Take your time, ask questions, and choose wisely. Your home deserves nothing less.
Ready for the next step? Start by getting a professional inspection from a licensed, local contractor. Review your insurance policy's declarations page. Document any existing damage with photos. Being proactive puts you in control of the process and ensures the best outcome for your most valuable investment—your home.