
Your Complete Guide to Roof Wind Damage Claims: A Contractor's 20-Year Perspective
For over twenty years, I have worked on thousands of roofing projects across Texas. I hold certifications from GAF, CertainTeed, and the National Roofing Contractors Association. I have personally helped hundreds of homeowners navigate the complex process of filing a successful wind damage claim. This article exists because I have seen too many good people get short-changed by their insurance company. They miss crucial damage, misunderstand policy language, or accept inadequate repair quotes. My purpose is to give you the knowledge I share with my own customers. I want you to get the full, fair settlement you deserve to restore your home's most important protection. The information here comes from two decades of hands-on inspections, detailed project documentation, and countless meetings with insurance adjusters. We will reference manufacturer installation guidelines, local building codes, and real claim data. My methodology is simple: show you exactly what contractors and adjusters look for, explain the rules of the game, and give you a clear path to victory.
Wind damage is often subtle but devastating. A storm passes, and your roof might look fine from the ground. Yet, hidden beneath the surface, lifted shingles can lead to leaks, rot, and structural issues months later. The insurance claim process feels designed to confuse. This guide will demystify it. We will cover how to identify wind damage, document it properly, work with your insurance company, and choose the right contractor for repairs. I will share real examples from projects in Kingwood, The Woodlands, and across Houston. You will learn the common pitfalls and the proven strategies for a smooth, successful claim. Let's begin by understanding what wind actually does to your roof.
Understanding Wind Damage: What Insurance Companies Look For
Wind doesn't just blow shingles off. It creates specific, identifiable patterns of damage. Insurance policies typically cover "sudden and accidental" damage from windstorms. The key is proving the damage was caused by a specific weather event, not by age or poor maintenance. From the contractor's side, we look for clear evidence. We follow the National Roofing Contractors Association (NRCA) guidelines for inspection. We also reference manufacturer specifications, like those from GAF or CertainTeed, to determine if installation met code.
Common Types of Wind Damage to Roofs
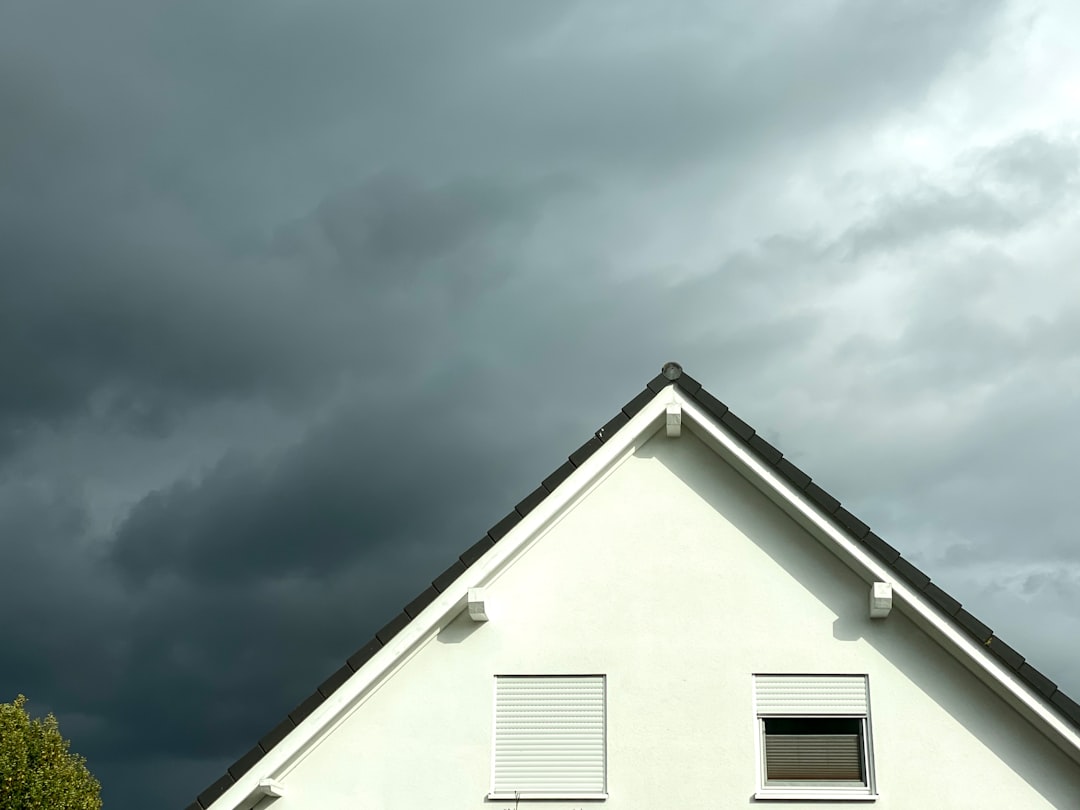
Wind damage manifests in several ways. Creased or fractured shingles are a primary sign. The wind gets under the shingle tab, lifts it, and then it slams down. This creates a permanent crease that breaks the sealant strip and compromises the mat. Once creased, the shingle will eventually crack and leak. Another clear sign is missing shingles. High winds can completely tear shingles from the roof deck, especially at the edges and ridges. Look for granule loss in specific patterns. A storm will blow granules off in distinct trails, not the uniform wear of aging. Check your gutters after a storm for a pile of granules; this is a red flag.
Flashing damage is critical. The metal flashing around chimneys, vents, and walls is vulnerable to wind uplift. If it bends or pulls away, it creates an immediate water entry point. Soffit and fascia damage often accompanies roof wind damage. The wind can rip soffit panels loose or detach fascia boards, exposing the roof deck's edge to the elements. Finally, check for lifted or damaged ridge caps. The ridge is the highest point and takes the full force of the wind. If those shingles are compromised, wind-driven rain can enter along the entire peak of your roof.
How to Perform a Preliminary Roof Inspection (Safely)
Your safety is paramount. Do not climb onto your roof. Use binoculars from the ground or from a second-story window if you have one. Start with a perimeter walk. Look for any visible missing shingles or obvious debris on the roof. Check the ground around your home for shingle pieces or large amounts of granules. Inspect your gutters and downspouts for granule accumulation. Look at the roof lines from different angles; sometimes damage is visible only from one side. Take clear, high-resolution photographs of anything you see. Date-stamp the photos if your camera allows. After the inspection, go into your attic with a powerful flashlight. Look for any signs of daylight coming through the roof deck. Check for moisture, water stains, or damp insulation. These are signs of a leak that may have started from wind-damaged shingles.
The Step-by-Step Insurance Claim Process for Wind Damage
Filing a claim is a procedure. Following the steps in order protects your rights and maximizes your settlement. First, review your homeowner's insurance policy. Understand your deductible, which is your out-of-pocket cost. Know your coverage limits and any specific exclusions. Most policies cover wind damage, but some in coastal areas may have a separate hurricane deductible. Document the date of the storm. You can use local news reports or the National Weather Service storm database for official confirmation.
Step 1: Immediate Action After the Storm
Prevent further damage safely. If you have a leak, place buckets to catch water. You can use a tarp to cover exposed areas, but only if you can do so safely. Insurance companies expect you to take reasonable steps to mitigate damage. Keep all receipts for materials like tarps or for temporary repairs by a professional. These costs are often reimbursable. Contact a reputable, local roofing contractor for a professional inspection. A good contractor will provide a detailed, written report with photos. This report is your evidence. Do not sign any contract that assigns your insurance benefits to the contractor without fully understanding the implications.
Step 2: Filing the Claim and Working with the Adjuster
Call your insurance company to file the claim. Be prepared with the date of loss and a brief description. They will assign a claim number and an adjuster. The adjuster's job is to assess the damage and determine the insurance company's liability. It is beneficial to have your roofing contractor present during the adjuster's inspection. The contractor can point out damage the adjuster might miss and discuss repair methods and costs. Provide the adjuster with the contractor's inspection report and your own photos. Be polite but firm. The goal is a collaborative assessment to determine the full scope of damage.
Step 3: Understanding the Estimate and Scope of Work
The adjuster will write an estimate, often using software like Xactimate. This estimate includes line items for materials, labor, and overhead. Review it carefully with your contractor. Compare it to the contractor's detailed estimate. Look for missing items. A common issue is that the insurance estimate may not include code upgrades required by your local building department. For example, if your roof decking is damaged and needs replacement, current International Building Code (IBC) may require different fastening. Your insurance policy likely covers these "law and ordinance" upgrades. Also, check if the estimate includes a full roof replacement. Many policies have a "matching" clause. If your existing shingles are discontinued and cannot be matched, the policy may cover replacement of the entire roof for aesthetic uniformity.
Real Project Examples: Cost Breakdowns and Outcomes
Let's look at real examples from our project files. Names and specific addresses are omitted for privacy, but the details are accurate. These show how the process works on the ground.
Project A: Kingwood Home, 2023 Hail and Wind Storm. The homeowner noticed a few missing shingles after a spring storm. Our inspection found creased shingles on the north and west slopes, consistent with the storm's wind direction. The insurance adjuster's initial estimate was for a repair of 12 squares (a square is 100 sq. ft.). We pointed out widespread granule loss and failing sealant strips on adjacent shingles. We argued the entire slope was compromised. The adjuster agreed after a re-inspection. The final settlement covered a full roof replacement of 28 squares, including synthetic underlayment and upgraded ridge vent. The homeowner paid their deductible, and we handled the rest. Total project value: $18,500.
Project B: The Woodlands Home, 2022 Straight-Line Winds. The damage here was severe flashing failure around two chimneys. Water intrusion caused ceiling damage in two rooms. The initial insurance estimate covered only the flashing and interior drywall repair. Our contractor's estimate included the cost to replace the water-damaged roof decking around the chimneys and to treat for potential mold in the attic. We provided documentation from the IBC on proper decking standards. The insurance company supplemented the claim to include the decking replacement and mold mitigation. Final settlement increased by $4,200. Total project value: $9,800.
Choosing the Right Roofing Contractor for Your Insurance Job
This is the most critical decision you will make. The wrong contractor can turn a smooth claim into a nightmare. Look for a local, established company with a physical address. Verify they are licensed and insured in Texas. Ask for proof of both general liability and worker's compensation insurance. Check their standing with the Better Business Bureau and read online reviews. Ask for references from recent insurance claim jobs. A reputable contractor will not ask for full payment upfront. They should work with your insurance company directly on the scope and price, with you paying only your deductible upon completion.
Red Flags and Warning Signs
Be wary of door-to-door storm chasers. These contractors follow storms and often leave town when the work is done, leaving you with no warranty support. Avoid anyone who pressures you to sign a contract immediately. Do not work with a contractor who offers to pay or waive your insurance deductible. This is insurance fraud in Texas and can void your entire claim. Steer clear of contractors who only accept cash payments. A legitimate business will have multiple payment options. Finally, if a quote seems drastically lower than others, it is likely too good to be true. They may be cutting corners on materials or planning to use unskilled labor.
Practical Homeowner Tips from 20 Years of Claims
- Maintain Your Records: Keep a file with your roof's age, the original installer's information, and any past repair invoices. This history is valuable during a claim.
- Photograph Everything: Take "before" photos of your roof when it is in good condition. After a storm, take comprehensive photos from all angles before any repairs are made.
- Get Everything in Writing: All communication with your insurance company and contractor should be documented. Follow up phone calls with an email summarizing the discussion.
- Understand Depreciation: If you have an Actual Cash Value (ACV) policy, you receive payment minus depreciation for age. Replacement Cost Value (RCV) pays the full cost to replace with new materials, often after you complete the repairs.
- You Have the Right to Reopen a Claim: If you discover additional damage later, you can request a supplemental claim. This is common when interior leaks appear weeks after the storm.
Frequently Asked Questions (FAQ)
How long do I have to file a wind damage claim in Texas?
Texas law generally gives you two years from the date of the storm to file a property damage claim. However, you should file as soon as possible. Delaying can make it harder to prove the damage was caused by that specific storm and not by normal wear and tear. Your insurance policy may also have its own notification requirements, so check your documents.
Will filing a claim make my insurance rates go up?
It might, but not always. A single wind damage claim from a widespread storm event may not affect your premium as much as other types of claims. Insurance companies often view storm damage as an "act of God" rather than homeowner negligence. However, multiple claims in a short period will likely lead to a rate increase or non-renewal. Discuss the potential impact with your insurance agent before filing.
What if my insurance company denies my claim?
First, request a detailed explanation in writing. They must provide the specific policy language or reason for the denial. Review this with your roofing contractor. If you believe the denial is wrong, you can appeal. You can also hire a public adjuster, who works for you (not the insurance company) to re-evaluate the claim. As a last resort, you can file a complaint with the Texas Department of Insurance.
Can I repair only the damaged section of my roof?
Technically, yes. But it is often not advisable. New shingles will not match the faded color of old shingles, creating a patchwork look. More importantly, shingles are installed in overlapping courses. A proper repair requires weaving in new shingles, which can be difficult and may not provide the same water-shedding integrity as a continuous field. Most reputable contractors will recommend replacing entire slopes for a seamless, watertight result.
What is the difference between wind damage and hail damage?
They are different perils with distinct damage patterns. Wind causes lifting, creasing, tearing, and missing materials. Hail causes bruising or fracturing of the shingle mat, which looks like dark spots or random cracks, and knocks off granules in a more circular, splatter pattern. A single storm can cause both. It is important to identify each type, as some policies have separate deductibles for wind and hail.
Industry Statistics and Data
According to the Insurance Information Institute, wind and hail damage account for the largest share of homeowners insurance losses year after year. In 2022 alone, such losses exceeded $20 billion nationwide. The NRCA reports that proper installation following manufacturer specifications can significantly increase a roof's wind resistance. For example, using six nails per shingle instead of four, as specified by many manufacturers for high-wind zones, can increase wind uplift resistance by over 30%. Data from our own company shows that for wind damage claims in the Houston area, the average supplement (additional payment negotiated after the initial estimate) is approximately $2,800, highlighting the importance of a thorough initial assessment.
Conclusion: Your Path to a Successful Resolution
Navigating a roof wind damage claim is challenging but manageable with the right knowledge. Start by understanding the signs of damage and documenting them thoroughly. Partner with a trustworthy, local roofing contractor who can be your advocate. Understand your insurance policy and the adjuster's estimate. Do not be afraid to ask questions and negotiate for what is fair. Remember, the goal is to restore your home to its pre-storm condition with quality materials and workmanship. Your roof is your first line of defense. Ensuring it is properly repaired protects your biggest investment. Take your time, follow the steps, and you will get through this process successfully. If you are in the Kingwood area and have questions after reading this guide, feel free to reach out for a professional, no-obligation inspection. Let's make sure your home is safe, secure, and properly covered.