
Roof Leaks and Insurance Claims: Your Complete Guide from a Texas Roofer with 15 Years of Experience
My name is Michael, and I have been a licensed roofing contractor in Texas for over fifteen years. I have personally managed more than two thousand roofing projects, from small repairs to complete storm damage replacements. I hold certifications from major manufacturers like GAF and Owens Corning. This experience has given me deep insight into how homeowners can successfully navigate roof leaks and insurance claims. This article exists because I have seen too many homeowners struggle with this complex process. They face unexpected roof damage, confusing insurance paperwork, and the stress of protecting their biggest investment. My goal is to give you the clear, practical knowledge I share with my own customers. The information here comes directly from my work on hundreds of insurance-related projects. It is based on real interactions with adjusters, building codes like the International Residential Code (IRC), and manufacturer installation guidelines. I will explain not just what to do, but why it matters, so you can approach your claim with confidence.
Dealing with a roof leak is stressful enough without the added burden of an insurance claim. Many homeowners feel overwhelmed. They do not know where to start or what their policy actually covers. This guide will walk you through every step. You will learn how to identify different types of damage, document it properly, communicate with your insurance company, and work with a contractor. My methodology is simple: provide transparent, step-by-step advice based on proven results. I will share real project examples and common pitfalls to avoid. This is not generic information. It is the exact process I use to help families in Kingwood and across Texas secure fair settlements and quality repairs. Let's get started.
Understanding Your Roof and Common Causes of Leaks
Before you can file a claim, you need to understand what caused your leak. Not all damage is covered by insurance. Insurance typically covers sudden, accidental events. These are often called "perils" in your policy. Common covered perils include wind, hail, and falling objects like tree limbs. Damage from normal wear and tear or lack of maintenance is usually not covered. Knowing the difference is crucial. As a contractor, I see these issues every day. A wind storm might lift and crack shingles, creating a path for water. Hail can bruise asphalt shingles, damaging the protective granules. This damage might not cause an immediate leak, but it weakens the roof over time.
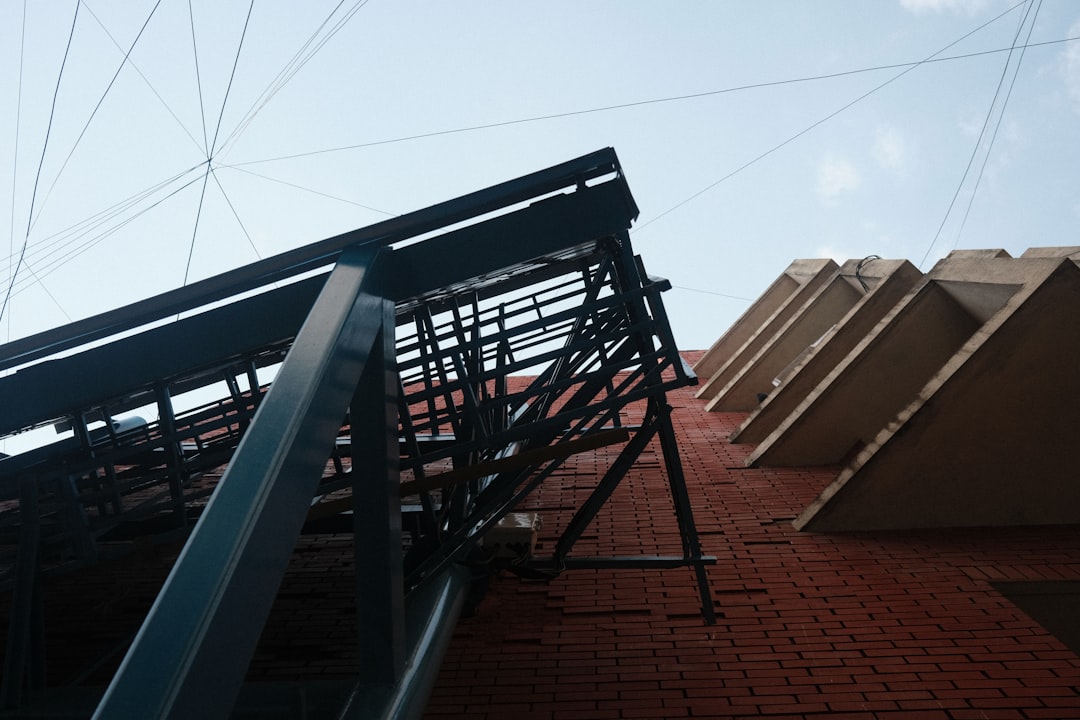
Wind Damage vs. Hail Damage
Wind damage often has a distinct pattern. Look for creased or missing shingles. Check for lifted flashing around chimneys and vents. Wind can also tear the sealing strips between shingles. Hail damage looks different. It creates small, circular dents or bruises on shingles. You might see black spots where the granules have been knocked off. Metal components like vents or gutters may show dimples. The National Roofing Contractors Association (NRCA) provides excellent resources on identifying storm damage. Always prioritize safety. Do not climb onto a wet or steep roof. Use binoculars to inspect from the ground or a ladder safely secured away from power lines.
Other Common Leak Sources
Leaks often start at roof penetrations, not in the middle of a shingle field. Check areas where different materials meet. These are called flashings. Common trouble spots include plumbing vents, skylights, and where the roof meets a wall. Ice dam damage in colder climates is another complex issue. It involves water backup under shingles. Poor installation or aging materials can also lead to leaks. A qualified roofer can help you determine the true cause. This assessment is the first critical step before contacting your insurance company.
The Homeowner's Insurance Policy Decoded
Your insurance policy is a contract. Understanding its key parts is essential for a successful claim. The most important sections are the Declarations Page, the Insuring Agreement, and the Exclusions. The Declarations Page lists your basic info: your name, address, policy number, and coverage limits. Your coverage limit is the maximum amount the company will pay for a covered loss. Most policies have a separate deductible for wind and hail. This is often a percentage of your home's insured value, not a flat dollar amount. A 1% deductible on a $400,000 home is $4,000. You pay this amount before insurance pays anything.
Replacement Cost Value (RCV) vs. Actual Cash Value (ACV)
This is a vital distinction. Replacement Cost Value (RCV) means the insurer will pay to replace your roof with materials of like kind and quality, minus your deductible. They often pay in two parts: the initial payment for the depreciated value, and a recoverable depreciation payment after the work is complete. Actual Cash Value (ACV) pays only for the current value of your old roof, considering its age and wear. An ACV policy on a 15-year-old roof will result in a much smaller settlement. Check your policy documents carefully to know which type you have. The Insurance Information Institute offers clear explanations of these terms.
What is Typically Covered and Excluded?
Most standard homeowners policies (HO-3) cover damage from sudden, direct physical forces. This includes windstorms, hail, weight of ice and snow, and falling objects. They usually do not cover damage from lack of maintenance, wear and tear, or manufacturer defects. Flood damage requires a separate flood insurance policy. Some policies in coastal areas may have specific windstorm exclusions or much higher deductibles. Review your policy annually with your agent. Do not wait for a storm to find out what your coverage includes.
Step-by-Step: What to Do When You Discover a Leak
Discovering a leak can be alarming. A calm, methodical approach will protect your home and your claim. First, mitigate further damage. This is often a requirement in your policy. Place buckets under active drips. Move furniture and valuables out of the way. If safe, you can tarp the affected area on the roof. Take photos and videos of the water intrusion inside your home. Document damaged ceilings, walls, and personal property. Do not make permanent repairs yet. The insurance adjuster needs to see the original damage. Next, contact a reputable, local roofing contractor for a professional inspection. A good roofer can help you identify the source and extent of the damage. They can provide a detailed report with photos. This report will be invaluable when you file your claim.
Documenting the Damage Like a Pro
Thorough documentation is your strongest tool. Use your smartphone to take clear, well-lit photos and videos. Start with wide shots that show the entire roof and the context of your property. Then take medium and close-up shots of specific damage. Photograph damaged shingles, lifted flashing, and stained interior ceilings. Note the date and time on your media. Write down a brief description of what each photo shows. If there was a storm, keep a record of the date it occurred. Local news reports or weather service data can serve as proof. This evidence creates a clear timeline and story for the insurance adjuster.
Contacting Your Insurance Company
Once you have initial documentation, contact your insurance company to start a claim. Have your policy number ready. Be prepared to give the date of loss and a brief description. The company will assign you a claim number and an adjuster. The adjuster is the insurance company's representative who assesses the damage. Write down the name and contact information of everyone you speak with. Ask about the next steps and the expected timeline. Be polite but persistent. Keep a dedicated folder or notebook for all claim-related information. This includes emails, claim numbers, and phone logs.
Working with the Insurance Adjuster: A Contractor's Perspective
The adjuster's inspection is a key moment. As a contractor, I attend these inspections with my customers whenever possible. Your role is to be present and informed. Point out all the areas of concern you and your roofer identified. Share the photos and report from your roofing contractor. Do not assume the adjuster will see everything. Adjusters are generalists; roofers are specialists. A common point of contention is the scope of damage. The adjuster may note only obviously damaged shingles. A roofer knows that if one section is damaged, the surrounding area may be compromised due to how shingles are sealed together. Refer to manufacturer installation requirements, like those from GAF or Owens Corning, which often require matching existing shingles for color and replacing full sections for proper installation.
Understanding the Adjuster's Estimate
After the inspection, you will receive an estimate from the insurance company, often called a scope of loss or claim summary. This document lists the line items they agree to pay for. It will include quantities of materials (squares of shingles, linear feet of flashing) and labor costs. Insurance companies use software like Xactimate to generate these estimates based on local pricing. Review this document carefully with your contractor. Compare it to the contractor's detailed estimate. Look for missing items: Is proper underlayment included? What about ice and water shield in critical areas? Are all necessary permits and waste disposal fees listed? The adjuster's estimate is a starting point for negotiation, not a final decree.
Negotiating for a Fair Settlement
If items are missing or the scope seems insufficient, you have the right to negotiate. This is where your contractor's expertise is invaluable. We prepare a detailed supplement package. This includes photos, diagrams, and written explanations citing building codes and manufacturer specifications. For example, the International Residential Code (IRC) has specific requirements for roof covering installation. We submit this package to the adjuster for review. The goal is to reach an agreement on a scope of work that fully repairs the home to pre-loss condition. Always communicate in writing to maintain a clear record. Be professional and rely on facts, not emotions.
Choosing the Right Roofing Contractor for Your Insurance Job
Your choice of contractor can make or break your insurance repair experience. After a major storm, "storm chasers" often come to town. These are out-of-town contractors who follow weather events. They may offer quick, cheap fixes or pressure you into signing a contract. I strongly recommend choosing a local, established roofing company. A local company has a physical address in your community. They will be there for warranty work or future issues. Check for proper licensing. In Texas, roofing contractors must be licensed with the Texas Department of Licensing and Regulation (TDLR). Ask for proof of insurance, including general liability and workers' compensation.
Red Flags and Green Flags
Be wary of contractors who ask for full payment upfront, only accept cash, or offer to pay your deductible. The latter is illegal in Texas and many other states, as it constitutes insurance fraud. A reputable contractor will provide a detailed, written estimate. They will explain the materials they plan to use, including shingle brand and type. They should be willing to provide references from past customers. Look for manufacturers' certifications, like GAF Master Elite or Owens Corning Platinum. These certifications require proper training, insurance, and a proven track record. A good contractor works for you, not the insurance company. They should advocate for your best interest throughout the claim process.
The Contract and Payment Schedule
Never start work without a signed contract. The contract should include the complete scope of work, materials to be used (including brand, color, and style), start and completion dates, total price, and payment schedule. A typical payment schedule for an insurance job might be: a small initial deposit, a progress payment when materials are delivered, and the final payment upon completion and your satisfaction. The contract should also outline warranty details for both materials and workmanship. Do not sign any document that gives the contractor the right to your insurance settlement directly; you should always control the funds.
The Roof Replacement Process: What to Expect
Once the claim is settled and you've chosen a contractor, the repair or replacement begins. A full roof replacement typically takes 1-3 days for an average home, depending on size and complexity. The crew will start by laying tarps to protect your landscaping and setting up safety equipment. They will remove the old shingles and underlayment down to the roof deck. This is a critical inspection point. The contractor should invite you to see the exposed deck. Look for any soft spots, rot, or damaged wood. Insurance should cover repairing the deck if it is damaged by the covered peril. This is a common supplemental item.
Quality Installation Steps
A quality installation follows a specific sequence. First, any damaged decking is replaced. Then, drip edge metal is installed along the eaves. Next, an ice and water shield membrane is applied in vulnerable areas (eaves, valleys, around penetrations). This is a self-adhering waterproof layer that provides extra protection. A synthetic underlayment is then rolled out over the rest of the deck. This acts as a secondary water barrier. Flashing is installed around all penetrations (chimneys, vents, walls) using step flashing and counter-flashing techniques. Finally, the shingles are installed according to the manufacturer's precise nailing pattern. Proper attic ventilation is also crucial and is often included in a full replacement.
Final Inspection and Paperwork
When the job is complete, the contractor should perform a final clean-up, using magnets to pick up nails. You should do a walk-through inspection with the project manager. Look for clean lines, properly installed flashing, and overall neatness. Once you are satisfied, you will make the final payment. The contractor should provide you with several important documents: the manufacturer's warranty paperwork (which you may need to register), the contractor's workmanship warranty, and documentation for your insurance company to release any recoverable depreciation. Keep all these documents in a safe place with your home records.
Frequently Asked Questions from Real Homeowners
1. Will filing a claim make my insurance rates go up?
Filing a claim can affect your rates, but it is not automatic. Insurance companies consider the type of claim, your claim history, and regional weather patterns. A single hail claim in an area with widespread hail may have less impact than an isolated wind claim. It is always best to discuss potential impacts with your insurance agent before filing, especially for smaller repairs you might pay for yourself.
2. What if my insurance claim is denied?
First, get the denial in writing with the specific reason. Common reasons are "wear and tear" or "lack of maintenance." You have the right to appeal. This is where a detailed report from a qualified, independent roofer is essential. You can request a re-inspection with your contractor present. If that fails, you can file a complaint with your state's department of insurance or hire a public adjuster to represent your interests.
3. Can I keep the leftover money from my insurance settlement?
This depends on your mortgage company and policy. If you have a mortgage, the insurance check is often made out to both you and the lender. The lender may hold the funds in an escrow account and release them as work is completed. The settlement is intended to return your home to its pre-loss condition. You cannot typically profit from it, but you can choose a less expensive contractor or materials and keep the difference, provided the repairs meet code and your lender's approval.
4. How long do I have to file a claim after a storm?
This is defined by your policy and state law. Most policies require you to report damage "promptly" or "as soon as practicable." In Texas, you generally have one year from the date of loss to file a claim under the policy terms. However, waiting makes documentation harder and can lead to claims of neglect. Always report suspected damage as soon as you safely can.
5. Should I get multiple estimates before the adjuster comes?
I recommend getting one thorough, professional inspection from a trusted local contractor. Their detailed report will prepare you for the adjuster's visit. Getting multiple estimates at this early stage can be confusing and time-consuming. The insurance company will determine the value of the loss based on their own estimating software, not your contractor's price. Focus on finding one quality contractor to be your advocate.
6. What is a "public adjuster" and should I hire one?
A public adjuster is a licensed professional who works for you, the policyholder, not the insurance company. They handle the entire claim process for a percentage of the final settlement (typically 10-20%). They can be helpful for very large, complex losses or if you feel overwhelmed. For most standard hail or wind claims, a reputable roofing contractor can provide sufficient advocacy without the additional fee.
Real Project Case Studies and Outcomes
Case Study 1: The Hail Damage Supplement. A Kingwood homeowner filed a claim after a hailstorm. The initial insurance estimate was for a repair of only the most visibly damaged slopes. Our inspection revealed widespread granule loss and bruising across the entire roof. We documented this with close-up photos and a granule loss test. We submitted a supplement citing GAF's requirement for consistent appearance and the impracticality of blending new shingles with the aged, damaged ones. The outcome was a full approval for a complete roof replacement, adding over $8,000 to the initial settlement.
Case Study 2: The Wind-Driven Rain Leak. A homeowner had water stains on an interior wall after a severe windstorm. The insurance adjuster initially denied the claim, stating the leak was from a failed sealant around a window (maintenance). We performed a water test and traced the leak path back to wind-lifted step flashing on the roof, which allowed water behind the wall. We provided a video of the test and diagrams showing the failure. The claim was reopened and approved, covering the roof repair and interior drywall restoration.
Industry Statistics and Proactive Maintenance
According to the Insurance Information Institute, wind and hail losses account for a significant portion of all homeowners insurance claims. Proactive maintenance is your best defense against claim denials for wear and tear. Have your roof inspected by a professional every 2-3 years, and after any major storm. Keep gutters clean, trim overhanging tree branches, and ensure your attic is properly ventilated. A well-maintained roof is more likely to withstand storms and gives you a stronger position if you need to file a claim.
Conclusion: Your Path Forward
Navigating roof leaks and insurance claims is challenging, but you are not alone. Arm yourself with knowledge from credible sources and partner with a local expert. Remember the key steps: safely document damage, understand your policy, get a professional inspection, communicate clearly with your insurer, and choose your contractor wisely. Your home is worth protecting with quality materials and craftsmanship. This process exists to restore your safety and peace of mind. If you are facing a roof leak in the Kingwood area or have questions about a potential claim, do not hesitate to seek a consultation from a licensed, reputable roofer. Taking informed action today can save you significant stress and expense tomorrow.