
Making a Claim for Roof Damage: A Contractor's Guide to Insurance Success
For over fifteen years, I have worked on thousands of roofing projects across Texas. I hold certifications from GAF, CertainTeed, and the National Roofing Contractors Association. I have seen countless homeowners struggle with insurance claims after storms. This article exists to solve that exact problem. It answers the question: How do I successfully navigate a roof damage insurance claim? Many homeowners feel overwhelmed by the process. They worry about being denied or underpaid. This guide provides clear, step-by-step instructions based on real experience. The information comes from helping hundreds of customers with their claims. It references manufacturer specifications and building codes. The methodology is proven through successful project outcomes. My goal is to save you time, stress, and money. Let's get started.
Understanding Roof Damage and Insurance Coverage
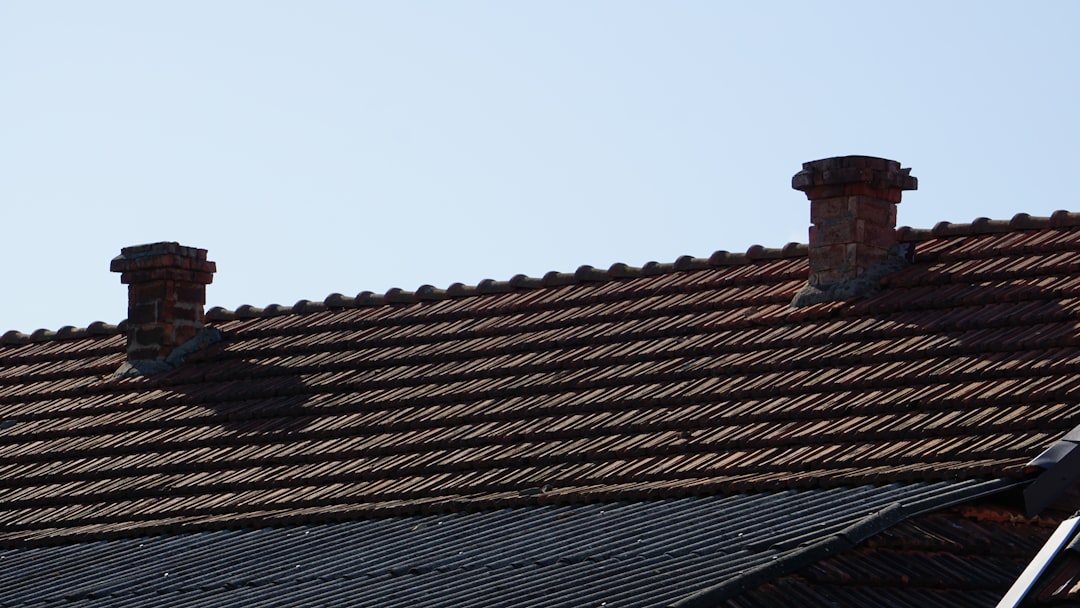
Not all roof damage is covered by insurance. Policies typically cover "sudden and accidental" events. This includes hail, wind, and fallen trees. Normal wear and tear is not covered. Insurance companies follow specific guidelines for damage assessment. Understanding your policy is the first critical step. Review your declarations page and coverage details. Look for terms like "replacement cost value" (RCV) versus "actual cash value" (ACV). RCV pays for a new roof at today's prices. ACV deducts for depreciation based on your roof's age. This difference can be thousands of dollars. Always know your deductible amount before filing a claim.
Types of Damage Covered by Standard Policies
Wind damage is a common covered peril. High winds can lift and tear shingles. This creates vulnerable areas for water intrusion. Hail damage is another major claim driver. Hailstones create circular bruises on asphalt shingles. They can crack the protective granule layer. Impact from falling objects like tree limbs is also covered. This damage is usually obvious and severe. Fire and lightning strikes are less common but covered. Always document the cause of damage with photos. This evidence is crucial for your claim.
What Insurance Typically Excludes
Insurance does not cover lack of maintenance. Missing shingles from poor upkeep are your responsibility. Gradual deterioration from sun exposure is excluded. This is considered a normal lifecycle issue. Damage from mold, rot, or pests is often denied. These problems develop slowly over time. Earth movement like earthquakes or sinkholes requires separate policies. Flood damage requires specific flood insurance. Review your policy's exclusions section carefully. Understanding these limits prevents disappointment later.
The Step-by-Step Claim Process: From Discovery to Payment
Follow this proven process for the best results. Do not rush to call your insurance company first. Start with a thorough inspection and documentation. This puts you in a stronger position. I have guided hundreds of homeowners through these exact steps. The order of operations matters greatly.
Step 1: Initial Safety and Documentation
Ensure your family is safe first. Do not go on a wet or damaged roof. It is extremely dangerous. Document the damage from the ground. Use your smartphone or camera. Take wide shots showing the entire roof. Take close-up shots of specific damaged areas. Include photos of any debris like fallen branches. Take pictures of damaged gutters or siding. Document the date and time of the storm if possible. Check local weather reports for official records. This creates a timeline for your claim.
Step 2: The Professional Roof Inspection
Hire a licensed, reputable roofing contractor for an inspection. Choose someone with insurance claim experience. Look for certifications from major manufacturers. A good contractor will provide a detailed written report. They should document all damage with photos and measurements. They can identify both obvious and hidden problems. Ask for a copy of their liability insurance certificate. Verify they are licensed in your state. In Texas, check the Texas Department of Licensing and Regulation website. This inspection report is your key evidence.
Step 3: Contacting Your Insurance Company
Now call your insurance company to file the claim. Have your policy number ready. Provide basic information about the damage. Be factual and avoid speculation about causes. Request the name and contact information of your adjuster. Ask about the timeline for their inspection. Take detailed notes during the call. Record the claim number they provide. Follow up with an email summarizing the conversation. This creates a paper trail for your records.
Step 4: The Insurance Adjuster's Visit
The insurance adjuster will inspect your property. Be present for this inspection if possible. Have your contractor present as well. This allows for professional discussion of the damage. Show the adjuster your contractor's inspection report. Point out the specific areas of concern. Do not pressure the adjuster or argue. Simply present the facts and evidence. Take notes on what the adjuster says and examines. Ask when you can expect their report. A professional contractor can often advocate for proper coverage.
Step 5: Reviewing the Insurance Estimate
You will receive an estimate from the insurance company. Review it carefully line by line. Compare it with your contractor's detailed estimate. Look for missing items or underestimated quantities. Common discrepancies include insufficient shingle squares. They may underestimate underlayment or flashing needs. Labor costs are often underestimated in insurance estimates. Check the waste factor for material removal. Ensure all necessary permits are included. Your contractor can help you identify these gaps.
Step 6: Negotiating and Supplementing the Claim
If the insurance estimate is too low, you can negotiate. This process is called supplementing the claim. Your contractor submits additional documentation. This includes photos, measurements, and manufacturer requirements. For example, building codes may require specific ice and water shield. The International Residential Code (IRC) sets these standards. Manufacturer installation instructions are also important. Companies like GAF and CertainTeed have specific requirements. Supplemental claims are normal and expected. Do not accept an inadequate estimate.
Working with Your Roofing Contractor
Choosing the right contractor is critical. They will be your partner throughout this process. Look for local companies with strong reputations. Check online reviews and ask for references. Verify their physical business address. Avoid storm chasers who appear after bad weather. These contractors often leave town after completing work. A local company will be there for future warranty needs.
Understanding the Contractor's Role
A good contractor does more than just replace shingles. They help navigate the entire insurance process. They provide detailed documentation for your claim. They meet with the insurance adjuster on your behalf. They prepare accurate estimates for repair or replacement. They handle the supplement process if needed. They obtain necessary permits from your local municipality. They manage the entire project from start to finish. They provide warranty protection for materials and labor. This comprehensive support is invaluable.
The Importance of Detailed Contracts
Always get a written contract before work begins. The contract should specify all materials by brand and type. It should include the exact shingle color and style. It should detail all components: underlayment, flashing, vents, and drip edge. It should specify the work scope and cleanup procedures. It should include start and completion dates. It should state payment terms tied to project milestones. It should include warranty information for materials and workmanship. Review this contract carefully with your contractor. Do not sign vague or incomplete agreements.
Common Pitfalls and How to Avoid Them
Many homeowners make avoidable mistakes during claims. Awareness of these pitfalls protects your interests. I have seen these issues delay projects and reduce payouts. Learning from others' experiences saves you trouble.
Pitfall 1: Accepting the First Estimate
The insurance company's first estimate is often a starting point. It may not reflect the full scope of necessary work. Do not feel pressured to accept it immediately. Have your contractor review it thoroughly. Compare it with current market rates for materials and labor. Remember that insurance should restore your home to pre-loss condition. This may require more than the initial estimate covers. Supplemental claims are a normal part of the process.
Pitfall 2: Not Understanding Depreciation
Many policies pay actual cash value initially. They withhold recoverable depreciation until work is complete. You receive this withheld amount after providing proof of completion. This is often called a "recoverable depreciation" payment. Understand how much depreciation is being withheld. Ensure your contractor's estimate accounts for this payment structure. Some contractors offer to work with the initial payment. They wait for the depreciation check to complete final payment. Discuss this timing with your contractor upfront.
Pitfall 3: Choosing the Cheapest Contractor
The lowest bid is not always the best choice. Extremely low bids may indicate corner-cutting. The contractor may use inferior materials or unskilled labor. They may not carry proper insurance or licensing. Quality roofing requires proper materials and skilled installation. According to the National Roofing Contractors Association, proper installation is crucial for longevity. Choose value and quality over the lowest price. Your roof protects your entire home and everything in it.
Real Project Case Studies and Outcomes
These real examples from my work show the claim process in action. Names and specific addresses are changed for privacy. The situations and outcomes are accurate and educational.
Case Study 1: Hail Damage in Kingwood
A family in Kingwood experienced severe hail damage. The hailstones were golf ball sized. The insurance adjuster initially approved only repairs. Our inspection showed damage across the entire roof surface. We documented over 30 hits per square on all slopes. Manufacturer specifications consider this level of damage as requiring replacement. We submitted photos and hail measurement data. We referenced GAF's requirements for impact resistance. The insurance company revised their estimate to full replacement. The homeowners received a complete new GAF Timberline HDZ roof. The project was completed in three days with proper permits.
Case Study 2: Wind Damage in Atascocita
High winds tore shingles from a 15-year-old roof. The insurance estimate was based on actual cash value. The depreciation deduction was substantial due to the roof's age. The homeowners were concerned about the out-of-pocket cost. We reviewed the policy and found an endorsement. The policy included matching coverage for undamaged sections. The undamaged shingles were discontinued and unavailable. This triggered a full roof replacement at replacement cost value. We helped the homeowners submit the proper documentation. The insurance company honored the matching endorsement. The homeowners received a full roof replacement with only their deductible.
Industry Statistics and Data
Understanding industry data helps set realistic expectations. The Insurance Information Institute reports interesting facts. About 1 in 35 insured homes has a property damage claim each year. Wind and hail account for the majority of these claims. The average roof claim payment exceeds $11,000. Texas consistently ranks among the top states for hail claims. The frequency of severe weather events is increasing. Proper documentation improves claim approval rates significantly. Homeowners who work with experienced contractors receive higher settlements. These statistics highlight the importance of being prepared.
Frequently Asked Questions (FAQ)
How long do I have to file a roof damage claim?
Most policies require prompt notification of damage. Check your specific policy for time limits. Generally, you should file within one year of the incident. Some states have specific statutes of limitation. Texas generally allows two years for property damage claims. However, delaying can complicate evidence collection. File as soon as you discover damage for best results.
Will filing a claim increase my insurance premiums?
Filing a claim may affect your rates. Multiple claims in a short period can increase premiums significantly. A single claim for a legitimate weather event may have less impact. Insurance companies consider your claim history over several years. They also consider the frequency of claims in your area. Discuss potential impacts with your insurance agent before filing.
Can I choose my own roofing contractor?
Yes, you have the right to choose your contractor. Insurance companies may recommend preferred vendors. You are not required to use their recommendations. Select a licensed, insured contractor with good references. Ensure they have experience with insurance claims. A good contractor will work directly with your insurance company.
What if my claim is denied?
Request a detailed explanation for the denial in writing. Review your policy to understand the exclusion cited. You can appeal the decision with additional evidence. Consider hiring a public adjuster for complex cases. As a last resort, consult with an attorney specializing in insurance law. Many denials can be overturned with proper documentation.
Should I get multiple estimates from contractors?
Yes, getting two or three estimates is wise. This helps you understand fair market pricing. However, the lowest bid is not always the best choice. Compare the scope of work, materials, and warranties offered. Ensure each contractor is bidding on the same specifications. Price differences often reflect quality and experience variations.
What documentation should I keep?
Keep copies of all correspondence with your insurance company. Save all estimates and inspection reports. Take dated photographs before, during, and after repairs. Keep receipts for any temporary repairs you make. Maintain records of all payments and depreciation recoveries. Store these documents for at least five years after claim closure.
How long does the entire process take?
The timeline varies based on several factors. Simple claims can complete in two to four weeks. Complex claims with supplements may take two to three months. Contractor availability affects scheduling after approval. Weather conditions can delay both inspections and repairs. The average claim from filing to completion takes four to eight weeks.
Practical Homeowner Tips from Real Projects
These tips come from hundreds of successful claim experiences. They address common concerns and simplify the process.
- Create a home inventory with photos before damage occurs. This documents your home's pre-loss condition.
- Review your insurance policy annually. Understand your coverage limits and deductibles.
- Maintain your roof with regular inspections. Address minor issues before they become major problems.
- Keep trees trimmed away from your roof. This prevents damage from falling branches.
- Document storm dates with weather service reports. The National Weather Service provides official records.
- Communicate in writing whenever possible. Email creates a searchable record of conversations.
- Be patient but persistent. Insurance claims require attention to detail and follow-up.
- Consider impact-resistant shingles for your replacement. Many insurance companies offer discounts for these materials.
Conclusion: Your Path to a Successful Claim
Navigating a roof damage insurance claim can be challenging. However, with proper knowledge and preparation, you can succeed. Start with a professional inspection and thorough documentation. Understand your insurance policy and coverage details. Work with a reputable, experienced roofing contractor. Review all estimates carefully and advocate for proper coverage. Keep detailed records throughout the process. Remember that supplemental claims are normal and often necessary. Your goal is restoration to pre-loss condition. This protects your largest investment—your home. Take action today by reviewing your insurance policy. Schedule a professional roof inspection if you suspect damage. Being prepared is your best defense against storm damage. You now have the knowledge to navigate this process confidently.