
Insurance Claim on Roof Leak: Your Complete Guide from a 15-Year Roofing Contractor
I have been a licensed roofing contractor in Texas for over fifteen years. My team has completed more than 2,500 roofing projects. We hold certifications from major manufacturers like GAF and Owens Corning. This experience gives me a unique view of the insurance claim process. I have seen what works and what causes frustration for homeowners. This article exists to solve a real problem. That problem is the confusion and stress of filing a roof leak insurance claim. Many homeowners feel lost when water drips from their ceiling. They do not know where to start or who to trust. This guide answers your most pressing questions. It provides a clear path forward based on real-world experience, not just theory.
The information here comes from hundreds of customer projects. It is built on direct work with insurance adjusters. It references manufacturer installation instructions and local building codes. My goal is to be completely transparent. I will explain the methodology behind every recommendation. This is not generic advice. This is a field-tested guide from the roof down. You will learn how to protect your home and your wallet. Let's begin by understanding the most critical first step you must take.
Understanding Your Roof Leak and Insurance Coverage
A roof leak is more than just water inside your house. It is a symptom of damage to your roofing system. Insurance companies classify damage in specific ways. Knowing these categories is your first tool. Sudden, accidental damage is usually covered. This includes damage from a severe storm, hail, or a fallen tree branch. Gradual wear and tear or lack of maintenance is typically not covered. This distinction is crucial for your claim's success.
What Damage is Typically Covered?
Most homeowner insurance policies cover "perils." These are specific events that cause damage. Windstorms and hail are the most common covered perils for roofs. High winds can lift and tear shingles. Hail creates impact marks that compromise the shingle's surface. The resulting leaks are covered. Damage from the weight of ice or snow is also often covered. A sudden event like a tree limb piercing the roof is clearly covered. The key word is "sudden." The damage must happen from a single identifiable event.
What is Usually Excluded?
Insurance is not a maintenance policy. Damage from long-term wear is your responsibility. If shingles are old and brittle, leaks from general aging are not covered. Leaks from missing maintenance, like clogged gutters, are excluded. Mold or rot that develops slowly over time may be denied. Manufacturers design shingles to last 20-30 years. Failure near the end of that lifespan is not an insurable event. Always review your specific policy declarations page. It lists your exact coverages and exclusions.
The Step-by-Step Insurance Claim Process for a Roof Leak
Following a proven process reduces stress and improves outcomes. Do not panic when you see a leak. Take methodical steps to document everything. This creates a strong foundation for your claim.
Step 1: Immediate Safety and Mitigation
Your safety comes first. If water is leaking near electrical fixtures, be extremely cautious. Move furniture and belongings out of the way. Place buckets to catch water. If safe, you can place a tarp over the leak area from inside the attic. Do not attempt to get on a wet or damaged roof. That is dangerous. Your priority is to prevent further interior damage. Take photos and videos of the leak, the water path, and any damaged belongings. This is your initial evidence.
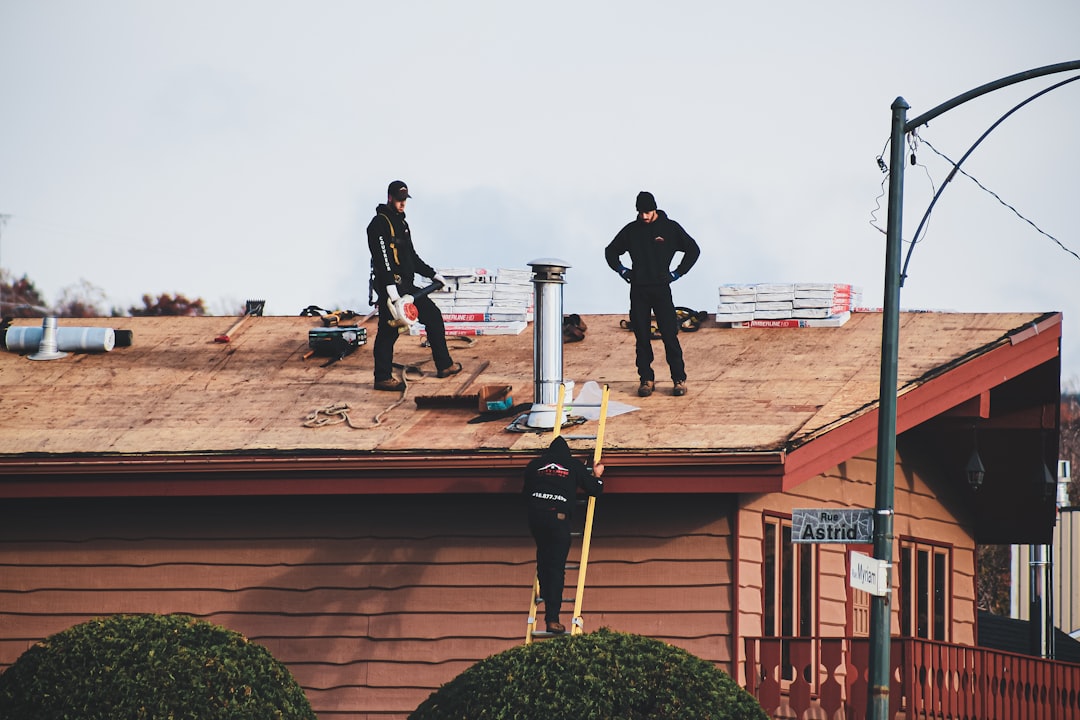
Step 2: Contact a Reputable Roofing Contractor for Inspection
Before you call your insurance company, call a trusted local roofer. A professional inspection is vital. A good contractor will perform a thorough, free inspection. They will document all storm-related damage with photos and measurements. They can identify hail hits, wind-lifted shingles, and damaged flashing. Ask them to provide a detailed report. This report will be your guide when speaking with the insurance adjuster. The roofer is your expert advocate. They understand damage patterns and building codes.
Step 3: Filing the Claim with Your Insurance Company
Now, contact your insurance provider. You can usually file a claim online or by phone. Be prepared with your policy number. Clearly state that you have storm damage and a leak. Provide the date of the storm event if known. Do not guess at the cause. Simply report the leak and that a professional roofer has identified storm damage. The insurance company will assign a claim number and an adjuster. The adjuster will contact you to schedule an inspection.
Step 4: The Critical Adjuster Meeting
This meeting is the heart of your claim. Be present when the insurance adjuster inspects your roof. Have your roofing contractor present as well. This is non-negotiable. The contractor can point out damage the adjuster might miss. They can explain why certain damage requires full replacement per manufacturer requirements. For example, GAF's installation instructions often require replacement if a certain percentage of shingles are damaged. The contractor and adjuster will discuss scope and pricing. Your role is to facilitate this professional dialogue.
Step 5: Reviewing and Understanding the Insurance Estimate
The adjuster will send you a detailed estimate called a "scope of loss." This document lists every item to be repaired or replaced. It includes line items for materials, labor, and waste removal. It will use pricing from software like Xactimate. Review this carefully with your contractor. Compare it to the contractor's own detailed estimate. Look for missing items. Common omissions include proper ice and water shield, upgraded underlayment, or full code-compliant flashing details. The contractor will help you submit a "supplement" request for missing necessary items.
Working with Your Roofing Contractor Through the Claim
Your relationship with your roofer is a partnership. Choose a contractor who is experienced with insurance claims. They should communicate clearly and manage the supplement process.
Choosing the Right Contractor
Not all roofers are equal in insurance work. Look for a local, established company with strong reviews. They should be licensed and insured in your state. Ask if they have specific experience working with insurance adjusters. A good sign is if they offer to meet the adjuster with you. Avoid contractors who ask you to sign over your insurance check before work begins. This is often a red flag. Your contractor should provide a detailed, line-item estimate that mirrors the insurance scope.
The Repair vs. Replacement Decision
The insurance company will pay to restore your roof to its pre-loss condition. Sometimes, this means repair. Often, with widespread storm damage, it means full replacement. The decision is based on the extent of damage. Most shingle manufacturers have "matching" clauses. If the undamaged shingles are discontinued and cannot be matched in color, a full replacement may be required for aesthetic uniformity. Your contractor and adjuster will determine this based on the policy language and damage.
Roofing Materials, Codes, and Quality Installation
An insurance-funded roof replacement is a major investment in your home. Ensure it is done correctly with quality materials installed to code.
Meeting Building Code Requirements
All roof work must comply with local building codes. In Texas, this often means following the International Residential Code (IRC). Codes dictate requirements for underlayment, flashing, attic ventilation, and nail placement. Your insurance estimate should include all code-required items. For example, code may require ice and water shield in valleys and at eaves. Your contractor must pull a permit from your city or county. This ensures a third-party inspector verifies the work meets code.
Selecting Quality Materials
You have choices within your insurance settlement. The estimate is based on a "like kind and quality" replacement. You can often use the settlement to upgrade materials. Discuss options with your contractor. You might upgrade from a 3-tab shingle to an architectural shingle. You might choose a shingle with a longer warranty, like Owens Corning Duration or GAF Timberline HDZ. You may pay the price difference, but it adds value and longevity. Ensure all materials are included in the contract.
Real Project Case Studies and Outcomes
Let me share two real examples from our project history. These show how the process works in practice.
Case Study 1: Hail Damage in Kingwood. A homeowner noticed a leak after a spring hailstorm. We inspected and found widespread hail hits on all roof slopes. The granules were knocked off, exposing the asphalt mat. We documented this with close-up photos. The homeowner filed a claim. We met the adjuster. The adjuster agreed it was a covered hail event. The initial estimate was for a full replacement but missed critical flashing details. We submitted a supplement with photos and code references. The supplement was approved. The homeowner chose an upgraded GAF shingle with a 50-year warranty. The project was completed with a permit and passed final inspection.
Case Study 2: Wind Damage Repair. A client had wind lift a section of shingles on one slope, causing a leak. The rest of the roof was in good condition. The insurance adjuster initially proposed a repair of only that slope. However, the shingle style was discontinued. We provided the manufacturer's information showing an exact match was impossible. Per the policy's matching clause, the insurance company approved a full roof replacement to maintain uniform appearance and curb appeal. This saved the homeowner from a mismatched roof.
Frequently Asked Questions (FAQ)
Will filing a claim increase my insurance rates?
It might, but not always. A claim for a major weather event affecting many homes in your area may have less impact. An isolated claim could affect your rates. You should discuss this with your insurance agent. Remember, the purpose of insurance is to protect you from significant loss. A major roof repair is exactly that.
What if my claim is denied?
Do not accept the first "no" as final. Ask for a detailed denial letter explaining the reason. Often, it is due to insufficient evidence of a covered peril. You can request a re-inspection with your contractor present. You can also hire an independent, licensed public adjuster to represent you. They work for you, not the insurance company, to evaluate the damage.
Can I keep the leftover money from the insurance check?
This depends on your mortgage company and policy. If you have a mortgage, the check may be made out to you and your lender. The lender often holds the funds in an escrow account. They release payments as work is completed. The insurance money is to restore your home. It is not intended as profit. Any leftover funds after completing all work in the estimate should be discussed with your adjuster.
How long does the entire process take?
From leak discovery to completed roof, plan for 4 to 12 weeks. The timeline depends on insurance company responsiveness, weather, and contractor scheduling. The inspection and estimate phase may take 2-3 weeks. Supplement negotiations can add another week or two. Once approved, material ordering and scheduling the crew may take 2-4 weeks. Patience is key, but a good contractor will keep you updated.
Should I get multiple estimates from roofers?
Yes, you should get 2-3 inspections. However, focus on the inspection quality, not just the price. The insurance company determines the price based on their software. Your choice should be based on the contractor's expertise, communication, and warranty. Compare their proposed scope of work and material recommendations.
Practical Homeowner Tips from Real Projects
- Document Everything: Take photos before, during, and after any storm. Keep a file of your roof's maintenance history.
- Know Your Policy: Read your declarations page. Understand your deductible and coverage limits.
- Act Quickly: Most policies require you to mitigate further damage. Do not let a leak go unrepaired for weeks.
- Communicate in Writing: Follow up phone calls with emails summarizing the conversation. This creates a clear record.
- Trust but Verify: Trust your contractor's expertise, but also understand what they are proposing. Ask questions until you are comfortable.
Conclusion and Your Next Steps
Navigating a roof leak insurance claim is a process. It requires knowledge, patience, and the right partners. You now have a comprehensive guide based on real roofing experience. Start by finding a reputable local contractor for an inspection. Let them help you document the damage. Then, file your claim with confidence. Remember to be present for the adjuster's inspection with your contractor. Review all estimates carefully. Ensure the work meets building codes and uses quality materials.
Your home is your most valuable asset. A properly handled insurance claim restores its protection and value. Do not feel overwhelmed. Use this information as your roadmap. Take it one step at a time. If you are in the Texas area and have questions, many local roofing companies, including ours, offer free consultations. Your next step is simple: pick up the phone and schedule that professional inspection. Protect your home starting today.