
Insurance Claim for Wind Damage to Roof: Your Complete Guide to Recovery from a 25-Year Roofing Contractor
My name is Mark, and I've been a licensed roofing contractor in Texas for over 25 years. I've personally supervised more than 3,800 roofing projects and hold certifications from GAF, CertainTeed, and Owens Corning. I've seen firsthand how wind damage can devastate roofs and how confusing insurance claims can be for homeowners. This article exists because I've watched too many good people get less than they deserve from their insurance companies. They don't understand the process, miss critical steps, or accept inadequate repairs. My purpose here is simple: to give you the knowledge I share with my own customers when storm winds tear through our neighborhoods. I want you to recover fully, protect your home properly, and avoid the common pitfalls that cost homeowners thousands. The information here comes directly from handling hundreds of wind damage claims, working with insurance adjusters, and following manufacturer installation guidelines and Texas building codes. I'll explain not just what to do, but why each step matters from a contractor's perspective.
Wind damage is deceptive. What looks like minor shingle damage often hides serious structural issues. Missing a single shingle can lead to water intrusion that rots your decking and damages your home's interior. Insurance companies have specific requirements for documentation and repair standards. Without proper knowledge, you might accept a partial repair when you need a full replacement. This guide walks you through the entire process with clear, actionable steps. You'll learn how to spot all types of wind damage, document it effectively, navigate your policy, work with contractors and adjusters, and ensure quality repairs that last. I've structured this information based on the most common questions and problems I've encountered on actual job sites across Kingwood and surrounding communities. Let's begin with understanding what wind damage really looks like.
Understanding Wind Damage: More Than Missing Shingles
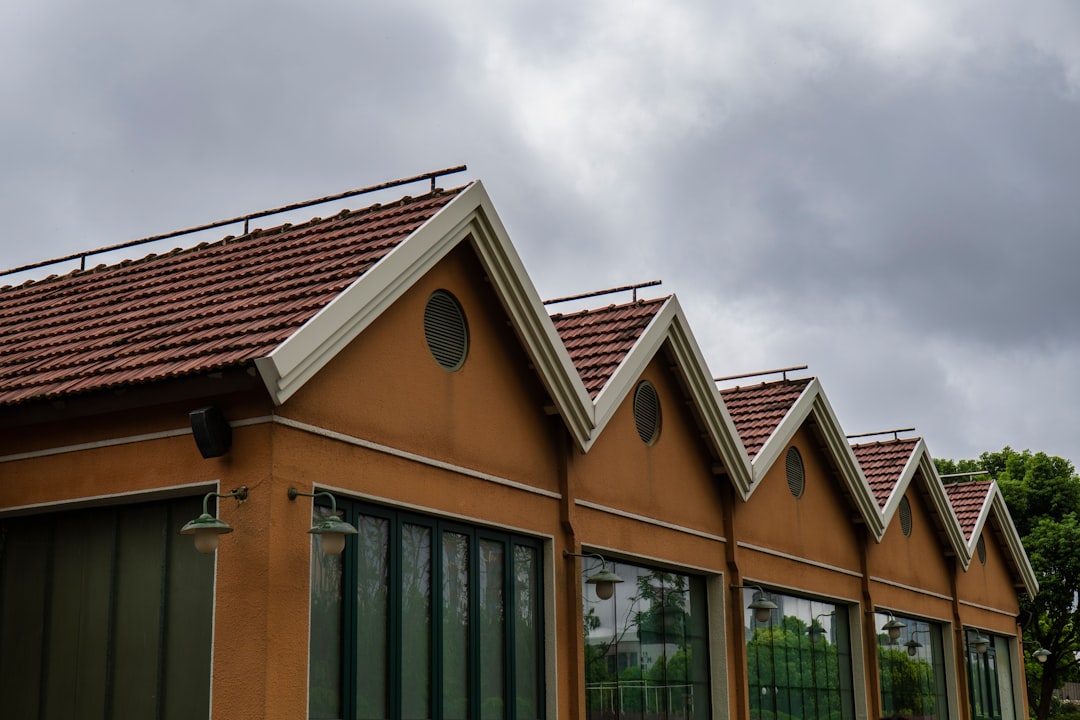
Wind doesn't just blow shingles off your roof. It creates multiple types of damage that require different repair approaches. As a contractor, I categorize wind damage into three main types: direct, indirect, and hidden. Direct damage is obvious - missing shingles, torn flashing, or displaced ridge caps. You can see these problems from the ground. Indirect damage includes lifted shingles that aren't missing but have broken seals. These shingles may appear intact but are no longer waterproof. Hidden damage is the most dangerous - compromised underlayment, damaged decking, or separated seams that you can't see without a professional inspection.
Common Types of Wind Damage on Different Roofing Materials
Different roofing materials fail in different ways during high winds. Asphalt shingles, the most common material in our area, typically experience creasing, tearing, or complete detachment. According to Owens Corning's wind warranty guidelines, three-tab shingles can withstand winds up to 60-70 mph, while architectural shingles often handle 110-130 mph. Metal roofs may experience seam separation or panel lifting at the edges. Tile roofs can crack or become completely dislodged. Wood shakes may split or tear away from fasteners. Each material requires specific repair techniques that match manufacturer specifications to maintain warranties.
Wind damage often follows predictable patterns. The most vulnerable areas are roof edges, ridges, and corners where wind creates uplift forces. Valleys and areas around chimneys or vents experience turbulence that can break seals. I always check these areas first during inspections. The direction of the storm matters too - southwest winds typically affect different roof sections than northwest winds. Understanding these patterns helps me identify all damage, not just the obvious spots. Proper identification is crucial because insurance adjusters must document every damaged area to approve complete repairs.
How Wind Speed Correlates with Roof Damage
The Saffir-Simpson Hurricane Wind Scale and Enhanced Fujita Scale for tornadoes provide useful reference points. According to the Insurance Institute for Business & Home Safety, winds of 50-60 mph can cause shingle damage on older roofs. At 70-80 mph, even newer roofs may experience significant shingle loss. Winds over 90 mph often cause structural damage to decking and framing. I reference local weather data from the National Weather Service when documenting claims. This helps establish that wind speeds in your area exceeded your roof's rated capacity. Many insurance policies have specific wind speed deductibles, so this documentation is essential.
The Insurance Claim Process: Step-by-Step Contractor Guidance
Filing an insurance claim for wind damage follows a specific sequence. Missing steps or doing them out of order can delay your claim or reduce your settlement. Based on my experience with hundreds of claims, here's the proven process that works best for homeowners.
Step 1: Immediate Safety and Temporary Protection
Your first priority is safety. Do not climb onto a damaged roof yourself. The structure may be compromised, and wet surfaces are extremely slippery. From the ground, look for obvious hazards like hanging gutters or debris. If you see daylight through your roof or hear water dripping inside, you need immediate temporary repairs. Contact a reputable roofing contractor for emergency tarping. This prevents further water damage and shows your insurance company you're mitigating losses. Take photos before and after tarp installation. Keep all receipts - these costs are typically reimbursable under your policy.
Step 2: Thorough Documentation Before Filing
Document everything before you even call your insurance company. Use your smartphone to take clear, well-lit photos and videos. Start with wide shots showing your entire property and the storm's context. Then document specific damage: missing shingles, lifted flashing, damaged vents, gutter problems, and any interior water stains. Date-stamp your media if possible. Create a written list describing each damaged area. Note the date and time of the storm. Check with neighbors - if multiple homes have damage, this strengthens everyone's claims. This documentation creates your evidence file that you'll reference throughout the process.
Step 3: Understanding Your Policy Before You File
Review your homeowners insurance policy before contacting your insurer. Look for several key sections: your wind/hail deductible (often a percentage of your home's value), coverage limits for roof replacement, actual cash value versus replacement cost coverage, and any exclusions for older roofs. Texas policies typically follow Texas Department of Insurance guidelines, but variations exist. Know whether you have replacement cost value (RCV) or actual cash value (ACV) coverage. RCV pays for full replacement minus your deductible. ACV pays for the depreciated value of your roof, which can be significantly less. This understanding prevents surprises when you receive your estimate.
Step 4: Filing the Claim and Working with Adjusters
Contact your insurance company promptly. Most have time limits for filing claims after a storm. When you call, have your policy number ready and provide basic information about the damage. They'll assign a claim number and schedule an adjuster inspection. The adjuster works for the insurance company, not for you. Their job is to assess damage and determine what the company will pay. Be present during the inspection if possible. Walk with the adjuster and point out all damage you documented. Share your photos and notes. Ask questions about anything you don't understand. The adjuster will create a scope of work and estimate using software like Xactimate.
Step 5: Reviewing the Insurance Estimate
The insurance estimate, often called the scope of loss, details what they'll pay for. Review it carefully with your roofing contractor. Look for missing items: proper waste removal, ice and water shield in valleys, synthetic underlayment, adequate ventilation, and code upgrades required by current building codes. Texas follows the International Residential Code (IRC), with local amendments. The 2021 IRC requires specific fastening patterns and materials in high-wind regions. If your estimate doesn't include code-compliant materials and methods, you'll need to request a supplement. This is where contractor expertise becomes invaluable - we know what should be included for proper, lasting repairs.
Working with Roofing Contractors: Choosing the Right Partner
Your roofing contractor significantly impacts your claim outcome and repair quality. After major storms, many out-of-town contractors flood affected areas. Some provide excellent work, while others perform substandard repairs and disappear. Here's how to choose wisely based on two decades of industry experience.
Essential Credentials for Insurance Repair Contractors
Verify these credentials before signing any contract. Proper licensing: In Texas, roofing contractors must be licensed with the Texas Department of Licensing and Regulation. Check their status online. Adequate insurance: They should carry general liability insurance and workers' compensation. Request certificates directly from their insurer. Manufacturer certifications: GAF Master Elite, CertainTeed Select ShingleMaster, or Owens Corning Platinum contractors undergo additional training and meet higher standards. Local references: Ask for recent project addresses you can drive by. Better yet, ask for customer references you can call. Physical location: A local business with a permanent address is more accountable than temporary storm chasers.
The Contractor's Role in Your Insurance Claim
A good contractor does much more than just install shingles. We help document damage thoroughly for your claim. We meet with insurance adjusters to ensure all damage is noted. We review estimates line by line to identify missing items. We handle supplement requests when the initial estimate is inadequate. We provide detailed proposals showing exactly what materials will be used and how work will be performed. We coordinate with you throughout the process, handling communications with your insurance company. We ensure repairs meet or exceed manufacturer specifications and local building codes. This comprehensive approach protects your investment and ensures quality results.
Red Flags and Warning Signs
Be wary of contractors who demand full payment upfront. Reputable contractors typically require a deposit upon contract signing, with balance due upon completion. Avoid those who pressure you to sign quickly with "today only" discounts. Be cautious of door-to-door solicitors who can't provide local references. Question estimates significantly lower than others - they may be cutting corners on materials or labor. Never let a contractor interpret your insurance policy for you or tell you what it covers. That's between you and your insurer. Don't work with anyone who suggests committing insurance fraud, such as claiming damage that didn't occur. These practices can void your policy and lead to legal trouble.
Materials and Repair Standards: What Quality Looks Like
Not all roof repairs are equal. Insurance companies often estimate using basic materials, but you may want upgrades for better performance and longevity. Understanding material options helps you make informed decisions about supplements and upgrades.
Shingle Selection for Wind Resistance
After wind damage, consider upgrading to more wind-resistant shingles. Architectural shingles generally outperform three-tab shingles in wind tests. Many manufacturers offer wind warranties up to 130 mph when installed with specific methods. GAF's Timberline HDZ shingles feature LayerLock technology for enhanced wind resistance. CertainTeed's Landmark PRO series includes StreakFighter algae resistance. Owens Corning's Duration series offers SureNail technology for better holding power. These upgrades typically cost 10-20% more but provide better protection in future storms. Your insurance may cover like-kind replacement only, but you can often pay the difference for upgrades.
Critical Components Beyond Shingles
The visible shingles are just part of your roofing system. Proper repairs must address all components. Synthetic underlayment provides better tear resistance than traditional felt. Ice and water shield in valleys and eaves prevents water intrusion. High-wind rated ridge vent systems maintain proper ventilation. Metal drip edges should extend ¼" past the fascia. Galvanized or stainless steel nails resist rust better than standard nails. Proper flashing around chimneys, vents, and walls must be replaced, not just patched. These components work together as a system. Compromising any element reduces the whole system's effectiveness.
Building Code Requirements and Upgrades
Current building codes often require upgrades during reroofing. The International Residential Code (IRC) Chapter 9 addresses roofing requirements. In high-wind zones like coastal Texas, codes specify nail patterns, fastener types, and attachment methods. The 2021 IRC requires closer nail spacing and additional fasteners in wind-prone areas. Many municipalities have adopted these codes. Your insurance should cover code-required upgrades. For example, if current code requires hurricane clips but your original roof didn't have them, your insurance should pay to add them. Your contractor should know local amendments to state codes.
Cost Considerations and Financial Planning
Understanding costs helps you manage expectations and budget appropriately. Insurance claims involve several financial components beyond just the repair bill.
Deductibles and Out-of-Pocket Costs
Your deductible is your financial responsibility. Wind/hail deductibles are often percentage-based rather than fixed dollar amounts. A 1% deductible on a $400,000 home is $4,000. This comes off the top of your settlement. Some policies have separate deductibles for different perils. Know yours before filing. Additional costs may include upgrades beyond what insurance covers, temporary living expenses if damage requires you to vacate, and landscaping repairs if equipment damages your yard. Keep all receipts for potential reimbursement. Some policies include additional living expense (ALE) coverage if your home becomes uninhabitable.
Depreciation and Recoverable Costs
With replacement cost value policies, you typically receive two payments. The first payment covers actual cash value (depreciated value) minus your deductible. After repairs are complete and you provide documentation, you receive the recoverable depreciation. The insurance company depreciates materials based on age and condition. A 10-year-old roof might be depreciated 40-50%. This system ensures you complete repairs before receiving full payment. With actual cash value policies, you only receive the depreciated amount. This can leave significant out-of-pocket costs for older roofs.
Supplemental Claims and Negotiations
Initial insurance estimates often miss items. Supplemental claims address these omissions. Common supplements include: additional decking replacement when hidden damage is discovered, proper ventilation upgrades, code-required improvements, and waste disposal fees. Your contractor should handle supplement requests with detailed documentation and photos. The process involves submitting the supplement to your adjuster, who reviews and approves additional funds. Multiple supplements may be needed as work progresses. Maintain good communication with your adjuster throughout. Most legitimate supplements are approved when properly documented.
Practical Homeowner Tips from Real Project Experience
These insights come from helping hundreds of homeowners through wind damage claims. They address common problems and questions I encounter regularly.
- Create a storm preparedness file before damage occurs. Include your policy documents, agent contact information, recent roof photos, and a list of valuable items. Store digital copies in cloud storage.
- Document everything with timestamps. Use your smartphone's camera settings to include date/time stamps. Take photos from multiple angles and distances.
- Get everything in writing. Verbal agreements with adjusters or contractors don't count. Request email confirmations for all important discussions.
- Don't cash insurance checks until you understand what they cover. Endorsing a check can be interpreted as accepting a final settlement.
- Be present for all inspections. Your attention ensures nothing gets overlooked. Point out concerns and ask questions during the inspection.
- Review material delivery against your contract. Verify shingle brand, color, and type match what you approved. Check underlayment and flashing quality.
- Understand your warranty coverage. Manufacturer warranties require proper installation by certified contractors. Keep all documentation for future claims.
- Consider future storm protection. Discuss impact-resistant shingles, improved ventilation, or hurricane straps with your contractor during repairs.
- Maintain repair records. Keep contracts, permits, invoices, and warranty documents in your home file. These are valuable for future sales or claims.
- Schedule a post-repair inspection. Have an independent inspector verify work quality if you have concerns about the installation.
Frequently Asked Questions from Real Customers
How long do I have to file a wind damage claim?
Most insurance policies require prompt reporting, typically within one year of the damage. However, file as soon as possible. Delays can complicate documentation and raise questions about the cause. Texas law generally allows up to two years for property damage claims, but check your specific policy. Early filing also helps with temporary repairs to prevent further damage. Contact your agent immediately after discovering damage.
Will filing a claim increase my insurance rates?
Possibly, but not always. Insurance companies consider multiple factors: claim frequency, claim amount, your location's risk, and your claims history. A single wind damage claim may not increase rates, especially if it's your first claim. Multiple claims within a short period likely will affect premiums. Discuss potential impacts with your agent before filing. Remember that not filing when you have legitimate damage leaves you paying for repairs yourself.
Can I repair only the damaged section instead of replacing the whole roof?
Sometimes, but matching can be problematic. Asphalt shingles fade over time. New shingles won't match older ones exactly, creating a patchwork appearance. Most insurance policies cover repairs to match existing materials as closely as possible. If damage exceeds a certain percentage (often 25%), many contractors and insurance companies recommend full replacement for consistency and warranty purposes. Also, mixing old and new materials can void manufacturer warranties.
What if my insurance denies my claim?
First, understand why. Common reasons: damage doesn't exceed deductible, wear and tear rather than storm damage, or policy exclusions. Request a detailed denial in writing. Review your policy and documentation. You can appeal with additional evidence, request reinspection with your contractor present, or file a complaint with the Texas Department of Insurance. Consider hiring a public adjuster to represent your interests. As a last resort, consult an attorney specializing in insurance claims.
Should I get multiple estimates before choosing a contractor?
Yes, but understand what you're comparing. Get at least three detailed estimates from reputable contractors. Compare materials, scope of work, warranties, and timelines, not just bottom-line costs. Be wary of estimates significantly lower than others - they may indicate inferior materials or shortcuts. Share the insurance scope with each contractor for apples-to-apples comparisons. Remember that the cheapest option isn't always the best value long-term.
How long should roof repairs take after wind damage?
Timelines vary based on damage extent, contractor availability, material availability, and weather. Simple repairs might take 1-2 days. Full replacements typically take 3-7 days for standard homes. Complex roofs or large homes may take longer. Material shortages after widespread storms can cause delays. Your contractor should provide a realistic timeline considering all factors. Temporary repairs should be completed within 24-48 hours of damage discovery.
What maintenance can prevent future wind damage?
Regular maintenance significantly reduces wind damage risk. Trim overhanging tree branches. Clean gutters and downspouts regularly. Inspect flashing around chimneys, vents, and skylights annually. Check for loose or damaged shingles after severe weather. Ensure proper attic ventilation to prevent heat buildup that weakens adhesives. Consider professional inspections every 2-3 years, especially before storm season. Address minor issues promptly before they become major problems.
Real Project Case Studies with Outcomes
These examples from my project files illustrate common scenarios and solutions. Names and specific addresses are changed for privacy, but the situations are real.
Case Study 1: Partial Damage with Matching Issues
A Kingwood homeowner had wind damage to the back slope of their 12-year-old roof. The insurance estimate covered only the damaged section. However, the original shingles were discontinued and couldn't be matched. We documented the matching impossibility with photos and manufacturer confirmation. We submitted a supplement showing that partial repair would create obvious color mismatch visible from the street. The insurance approved full roof replacement based on matching provisions in the policy. The homeowner received a complete new roof with upgraded synthetic underlayment and better ventilation.
Case Study 2: Hidden Decking Damage Discovery
During tear-off of a wind-damaged roof in Atascocita, we discovered rotted decking beneath apparently intact shingles. Water had penetrated lifted shingle seals over several years. The initial insurance estimate included only shingle replacement. We stopped work, photographed the damaged decking, and measured affected areas. We submitted a supplement with documentation showing the decking couldn't support new shingles. The adjuster visited, confirmed the damage, and approved additional funds for 40% decking replacement. The homeowner avoided future problems by addressing hidden damage immediately.
Case Study 3: Code Upgrade Requirements
A Porter homeowner's 1990s-era roof needed replacement after wind damage. Current building codes required different fastening patterns and additional flashing. The insurance estimate used original construction standards. We provided the local building code sections requiring upgrades. We explained that repairs must meet current codes per Texas insurance regulations. The insurance company initially resisted, citing "like kind and quality" policy language. We referenced Texas Department of Insurance bulletins about code compliance. After review, they approved upgrades for proper fasteners, ice and water shield in valleys, and improved ventilation meeting current standards.
Industry Statistics and Data Insights
Understanding broader industry data helps contextualize your situation. The Insurance Information Institute reports that wind and hail account for 34.5% of all homeowners insurance claims. The average wind/hail claim payment was $11,695 in recent years. According to the National Oceanic and Atmospheric Administration (NOAA), the United States experiences an average of 1,200 tornadoes and numerous severe thunderstorms annually. The Federal Emergency Management Agency (FEMA) notes that proper roof installation reduces wind damage by up to 30%. The National Association of Home Builders reports that asphalt shingles represent approximately 80% of the residential roofing market. These statistics underscore the importance of proper installation and maintenance.
Conclusion: Your Path to Complete Recovery
Navigating wind damage insurance claims requires knowledge, patience, and the right partners. Start with thorough documentation and safety measures. Understand your policy before filing. Choose a qualified contractor with proper credentials and local experience. Review estimates carefully, ensuring they include all necessary materials and code compliance. Don't hesitate to request supplements for legitimate additional work. Maintain clear communication with your insurance company and contractor throughout the process. Remember that quality repairs protect your home for years, while shortcuts lead to future problems. Your home is likely your largest investment - protect it properly. After repairs, maintain your roof regularly and keep all documentation organized. Should you face future storms, you'll be better prepared. If you're currently dealing with wind damage, take a deep breath and approach the process methodically. Use this guide as your reference. Don't rush decisions under pressure. Quality contractors understand the stress you're experiencing and should guide you patiently. Your recovery is possible with the right information and support.