
Insurance Claim for Wind Damage to Roof: A 25-Year Roofer's Complete Guide
My name is Mark, and I've been installing and repairing roofs across Texas for twenty-five years. I've personally supervised over 3,500 roofing projects and hold certifications from GAF, CertainTeed, and the National Roofing Contractors Association (NRCA). This article exists because I've seen too many homeowners struggle with insurance claims after storms. They feel confused, overwhelmed, and often get less than they deserve for repairs. My goal is simple: to give you the exact knowledge a professional roofer would share with a family member. I've gathered this information from thousands of customer interactions, direct work with insurance adjusters, manufacturer installation guidelines, and the International Residential Code (IRC). I'll explain the process, share real examples from our projects, and give you actionable steps to protect your home and your wallet.
Wind damage is one of the most common yet misunderstood insurance claims. A storm blows through, and you might see a few shingles in the yard. The real damage, however, is often hidden. Wind can lift shingles, break seals, and create vulnerable spots that lead to leaks months later. This guide will walk you through everything from the first sign of damage to the final inspection of your new roof. I'll explain what insurance companies look for, what contractors see that homeowners miss, and how to ensure your claim is handled fairly. You'll learn the technical language, the cost factors, and the material choices that matter most. My methodology is based on proven field experience, not theory. Let's get started.
Understanding Wind Damage: What Insurance Companies and Roofers Actually Look For
Not all wind damage is obvious. From the ground, a roof might look fine. From a ladder, the story changes. Insurance policies typically cover "sudden and accidental" damage from windstorms. This means the wind force must be strong enough to cause immediate physical damage. The threshold varies, but most asphalt shingle manufacturers design their products to withstand winds up to 60-70 mph when properly installed, as per ASTM D7158 testing standards. Winds exceeding that can cause failure.
Visible vs. Hidden Damage
Visible damage is easy to spot. You might see missing shingles, torn flashing, or damaged vents. Hidden damage is the real challenge. High winds create suction forces that lift shingles. Once lifted, the adhesive seal strip can break. A shingle may settle back down but is no longer sealed. This creates a wind tunnel effect where subsequent gusts can more easily lift neighboring shingles. We call this "creeping damage." During inspections, we use binoculars and drones to look for these tell-tale signs: lifted shingle tabs, granule loss in specific patterns, and cracked or creased shingles.
Another hidden issue is damage to the roof decking (the plywood or OSB beneath the shingles). If wind has been lifting shingles for a while, water may have seeped in, softening the wood. We always check for this during our inspections by walking the roof and feeling for soft spots. Insurance adjusters may miss this if they only do a ground assessment. According to the Insurance Institute for Business & Home Safety (IBHS), proper attachment of the roof deck is critical for wind resistance.
Common Areas of Failure
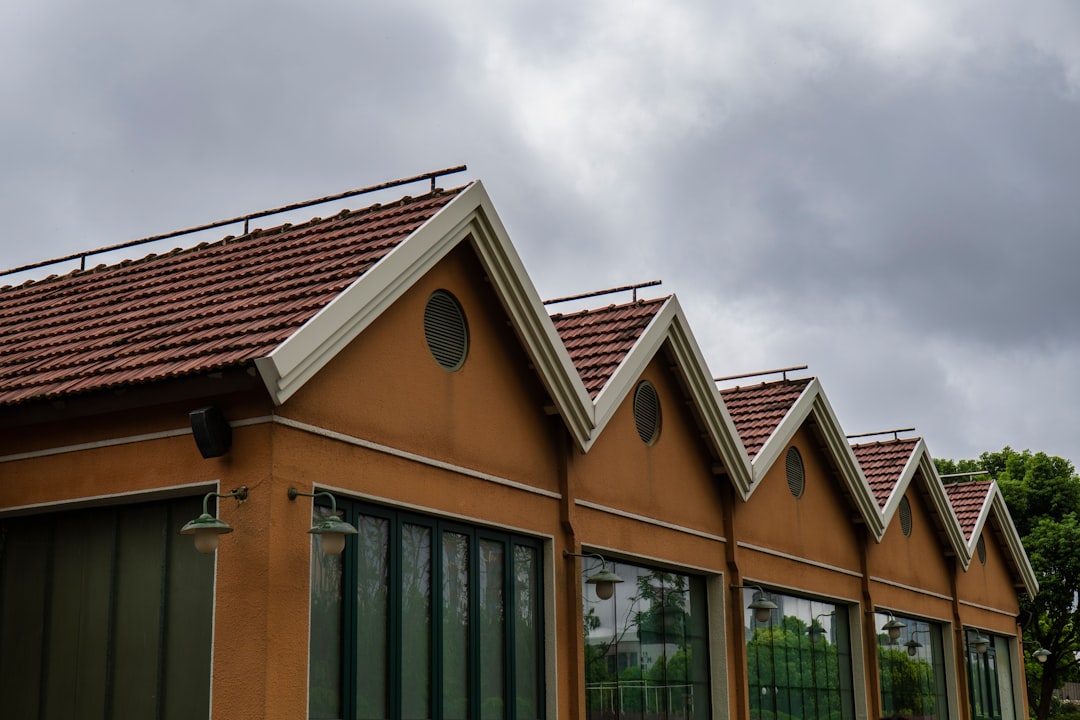
Wind damage rarely happens evenly. Certain areas fail first. Roof edges and corners experience the highest wind pressures. This is why building codes, like the IRC Section R905, require special fastening at these perimeter zones. Ridge vents and hip ridges are also vulnerable because wind flows over them at high speed. Dormers, valleys, and areas around chimneys create wind turbulence that can tear materials. We always pay extra attention to these zones. Flashing—the metal pieces that seal joints—is often bent or pulled away by wind. Even a small gap can lead to major water intrusion.
The Homeowner's Immediate Action Plan: Step-by-Step After the Storm
What you do in the first 72 hours after a storm is crucial. This plan protects your safety, your property, and your claim. First, ensure everyone is safe. Do not climb onto a damaged roof. The structure may be compromised. From the ground, use binoculars to document what you can see. Take wide shots of your property and close-ups of any visible damage. If safe, take pictures of shingles in your yard. This creates a timeline for your insurance company.
Next, take temporary measures to prevent further damage. This is called "mitigation" and is often required by your policy. If you have a leak, place buckets inside. If you have tarps, you can cover visible holes, but only if you can do so safely from a ladder. Better yet, call a reputable roofing contractor for emergency tarping. Many companies, including ours, offer this service. Keep all receipts for any mitigation expenses; they are usually reimbursable under your claim. Contact your insurance company to report the damage and start a claim. Be factual, not emotional. Simply state that a wind event occurred on [date] and you have visible damage.
Choosing the Right Roofing Contractor for Your Claim
This is the most important decision you'll make. Avoid "storm chasers" who appear after bad weather. They often use high-pressure tactics and may not be locally licensed or insured. Instead, look for an established local contractor. Verify their license, insurance (both liability and workers' compensation), and physical address. Check their reviews on Google and the Better Business Bureau. Ask for references from recent insurance claim jobs. A good contractor will offer a free, detailed inspection and explain their findings clearly. They should be willing to meet with your insurance adjuster to point out damage. This partnership is key to a successful claim.
Be wary of anyone who offers to pay your deductible or says they can get you a "free roof." This is insurance fraud. A reputable contractor will work within the scope and price set by your insurance company's estimate. Their role is to provide documentation and expert assessment to ensure that estimate is accurate and complete. I always provide homeowners with a detailed report including photos, diagrams, and references to manufacturer installation requirements that may have been violated by the wind.
Navigating the Insurance Process: From Inspection to Payment
Understanding the insurance workflow reduces stress. After you file a claim, your insurer will assign an adjuster. The adjuster's job is to assess the damage and determine what your policy covers. They will write an estimate using software like Xactimate. This estimate includes line items for removal, materials, and labor. It is not a final bill; it's the insurance company's initial offer for the cost of repairs.
The Critical Adjuster Meeting
Having your contractor present for the adjuster's inspection is invaluable. We can point out hidden damage the adjuster might miss. We speak the technical language of roofing and can reference specific code requirements. For example, if 25% of the roof is damaged, many building codes require a full roof replacement. We can help document this. We also look for matching issues. If your shingles are 15 years old, the manufacturer may no longer produce that exact color. Most policies have a "matching" provision that may cover replacement of undamaged sections to maintain a uniform appearance. This is a common point of negotiation.
The adjuster will provide a claim summary and a scope of work. Review this carefully with your contractor. Compare the insurance estimate to your contractor's detailed quote. Look for missing items: proper starter shingles, ice and water shield in valleys, upgraded underlayment, or correct venting. These are often omitted in initial estimates. Your contractor can help you submit a "supplement" request for these necessary items. This is a normal part of the process, not a fight. It's about ensuring the repair meets current building codes and manufacturer specifications for a proper installation.
Understanding Depreciation and Recoverable Cash Value (RCV) vs. Actual Cash Value (ACV)
This is where many homeowners get confused. If you have a Replacement Cost Value (RCV) policy, you will likely receive two payments. The first payment is for the Actual Cash Value (ACV). This is the replacement cost minus depreciation for the age and wear of your old roof. The second payment, often called the "recoverable depreciation," is released after the work is complete and the insurance company receives a final invoice and proof of completion. If you have an ACV-only policy, you only receive the depreciated value, which may not cover the full cost of a new roof. Know your policy type before a storm hits.
Material Selection and Repair Considerations
Once your claim is approved, you'll work with your contractor to choose materials. This is not just about color. Wind resistance should be a top priority. Look for shingles with a high wind warranty. Many modern architectural shingles from manufacturers like GAF and CertainTeed are rated for 130 mph winds when installed with six nails per shingle (instead of the standard four). This is a worthwhile upgrade. Consider the underlayment. A synthetic underlayment provides a better secondary water barrier than traditional felt paper, especially if shingles are blown off in a future storm.
Pay attention to the installation details specified in your claim. The insurance estimate should include items like:
- Drip edge flashing on all eaves and rakes.
- Ice and water shield in valleys and at eaves (critical in Texas for driving rain).
- Proper attic ventilation as per code (IRC R806).
- High-wind rated roof deck attachment (often 8" spacing at edges).
These components form a complete roofing system. Skipping them to save money creates a weaker roof. Your contractor should follow the manufacturer's specified installation instructions to keep the product warranties valid. For example, GAF requires their specific starter shingles for their wind warranty to be in effect.
Real Project Case Studies and Cost Examples
Let me share two real examples from our recent work to illustrate the process and costs. These are from the Kingwood area after a spring storm with 80 mph gusts.
Case Study 1: The Partial Repair That Became a Full Replacement. A homeowner had several missing shingles on the back slope. The insurance adjuster's initial estimate was for a partial repair of two roof slopes. During our joint inspection, we noted the shingles were 18 years old. The color was discontinued. We also used a moisture meter on the decking and found widespread moisture under seemingly intact shingles on adjacent slopes. We documented this with photos and a report. The insurance company approved a supplement for a full roof replacement. The initial ACV payment was $8,500. The total RCV settlement was $18,200. The homeowner paid their $1,500 deductible, and we handled the supplement process. The final roof included upgraded synthetic underlayment and wind-rated shingles.
Case Study 2: The Denied Claim That Was Overturned. A client's claim was initially denied. The adjuster said the shingle damage was from "normal wear and tear." The homeowner called us. We performed a detailed inspection and found clear evidence of wind creasing and characteristic granule loss patterns consistent with uplift, not aging. We also gathered weather data from the National Oceanic and Atmospheric Administration (NOAA) confirming high winds in the area on the date of loss. We compiled a new report with annotated photos and the weather data. The homeowner submitted this to their insurance company's review department. The claim was reopened and approved for a full replacement, resulting in a $16,750 settlement.
Frequently Asked Questions from Homeowners
1. How long do I have to file a wind damage claim?
Most policies require you to file a claim "promptly" or within a year of the damage occurring. However, do not wait. File as soon as you discover damage. Delays can complicate the investigation and give the insurer reason to question whether the damage was from a specific covered event.
2. Will filing a claim make my insurance rates go up?
It might, but not always. A single wind/storm claim is often considered a "no-fault" claim and may have less impact than a water damage or liability claim. However, insurance is regulated by state, and companies use complex models. It's best to discuss this with your insurance agent. Remember, the purpose of insurance is to use it when you have a covered loss.
3. Can I repair just the damaged area instead of replacing the whole roof?
Sometimes, if the damage is truly isolated and the existing shingles are relatively new and still available. However, matching can be impossible on older roofs. Most reputable contractors will advise against patching a roof over 10 years old, as the new shingles will age differently and the repair may be visible. It can also create weak points.
4. What if my insurance estimate is too low to hire a good contractor?
This is common. The initial estimate is a starting point. A qualified contractor will review the scope line-by-line and submit a detailed supplement for missing items (like proper ventilation, code upgrades, or material matching). Do not hire a contractor who says they will do the work for the exact insurance amount without reviewing the scope; they are likely cutting corners.
5. Who chooses the contractor, me or the insurance company?
You have the right to choose your own contractor. The insurance company may provide a list of "preferred vendors," but you are not obligated to use them. Your relationship is with your contractor, so choose someone you trust who will advocate for your home's best interest.
6. What happens if my roof is leaking while I wait for the claim?
Mitigate the damage immediately. Call a contractor for emergency tarping. Keep all receipts. This cost is almost always covered under the "loss avoidance" or "additional living expense" part of your policy. Document the leak with photos and videos to show the urgency.
7. How long does the entire process take?
From claim to completion, a typical wind damage roof replacement takes 3 to 8 weeks. The inspection and estimate phase takes 1-2 weeks. Supplement negotiations can add 1-2 weeks. Scheduling materials and crew takes 1-2 weeks. The actual installation takes 2-5 days. Weather and material availability can cause delays.
Conclusion: Your Path to a Secure Roof
Dealing with wind damage and insurance is challenging. My goal was to demystify the process and give you the confidence to navigate it successfully. Remember the key steps: ensure safety, document everything, hire a reputable local contractor, be present for the adjuster meeting, and understand your policy's details. A fair insurance claim results in a proper roof repair that protects your home for years to come. Don't settle for a quick patch job. Use this opportunity to upgrade to more wind-resistant materials and proper installation techniques. Your roof is your home's first line of defense. Make sure it's rebuilt to be stronger than before.
If you're in the Kingwood area and have questions after a storm, our team is here to provide honest advice, even if you just need a second opinion on an estimate. Check your roof after high winds, and don't ignore small problems. They are often signs of larger issues. With the right knowledge and the right team, you can turn a stressful storm event into a positive outcome for your biggest investment—your home.