
Hail Damage Home Insurance Claim Guide: A Roofer's 15-Year Perspective on Protecting Your Home
I have been a licensed roofing contractor in Texas for over fifteen years. During that time, I have personally managed or inspected more than two thousand roofs. I hold certifications from major manufacturers like GAF and Owens Corning. I have seen firsthand how hail storms can devastate a home's most important protection. This article exists because I have watched too many homeowners struggle with the insurance claim process. They feel confused and overwhelmed after a storm. My goal is to give you the clear, practical knowledge that I share with my own customers. I want to help you navigate this stressful situation with confidence. You will learn how to protect your investment and your family.
The information here comes from my direct experience on job sites. It is based on hundreds of customer projects and conversations with insurance adjusters. I have studied manufacturer specifications and local building codes extensively. My recommendations follow proven methods that work in the real world. This is not theoretical advice. This is a field-tested guide from someone who has been on your roof. I will explain the entire process from start to finish. You will learn what to look for, who to call, and what questions to ask. Let's begin with understanding the damage itself.
Understanding Hail Damage: What You're Really Looking At
Hail damage is not always obvious from the ground. Small dents can hide serious problems. The impact compromises your roof's ability to shed water. It weakens the protective granules on asphalt shingles. This leads to accelerated aging and potential leaks. The damage severity depends on hail size, wind speed, and roof material. I always tell homeowners that a professional inspection is crucial. Do not rely on a quick glance from your driveway.
The Science of Hail Impact on Roofing Materials
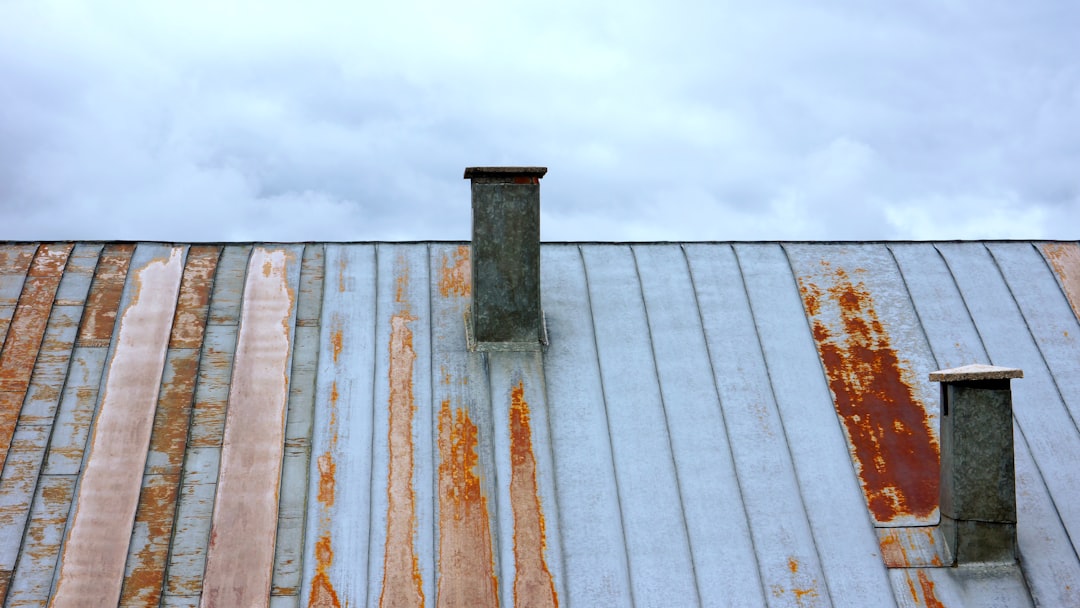
Hailstones are balls of ice falling at high speed. They hit your roof with significant force. This force creates bruises or fractures in the shingle mat. Asphalt shingles lose their protective mineral granules at the point of impact. This exposes the underlying asphalt to UV rays. The sun then bakes and cracks the damaged spot. Metal roofs can show dents that may affect panel seams. Wood shakes can split or crack. Even synthetic materials can be compromised. The National Roofing Contractors Association (NRCA) provides excellent technical resources on material performance.
Common Signs of Hail Damage You Can Spot
You can perform a preliminary check safely from the ground. Look for these signs after a storm. Check your gutters and downspouts for an accumulation of roof granules. They will look like coarse, black sand. Examine your siding, window screens, and air conditioner fins for dings. Look at your car's hood if it was parked outside. On the roof itself, look for dark spots or bruises on shingles. These are places where granules have been knocked away. Check for cracks in shingle tabs. Look for exposed fiberglass mat. Remember, safety first. Do not climb onto a wet or steep roof.
- Granule Loss: Check gutters, downspouts, and ground around home.
- Bruising: Soft, dark spots on shingles when pressed gently.
- Cracking: Visible splits in the shingle surface.
- Exposed Mat: Shiny black asphalt visible where granules are gone.
- Damaged Flashing: Dents or bends in metal pieces around vents and chimneys.
The Critical First Steps After a Hail Storm
Time is important after a hail event. You need to act methodically to protect your claim. First, ensure your family is safe and address any immediate dangers. If you see signs of a leak inside, place buckets to catch water. Move furniture away from wet areas. Take photos of any interior water stains immediately. Then, document the exterior damage from the ground. Use your smartphone to take clear, date-stamped pictures. Capture wide shots of the roof and close-ups of damaged areas. Include photos of damaged siding, gutters, and window screens. This visual evidence is vital for your insurance company.
Documenting Damage for Your Insurance Company
Thorough documentation strengthens your insurance claim. Create a dedicated folder on your phone or computer for all storm-related files. Take videos panning slowly across each side of your home. Get shots of the roof from multiple angles if possible. Photograph any hail that collected on the ground. Use a ruler or coin in the photo to show hailstone size. Write down the date and time of the storm. Note the direction the storm came from. Keep a simple log of all your actions. This organized approach impresses adjusters. It shows you are serious and prepared.
Choosing a Reputable Roofing Contractor for Inspection
This is one of the most important decisions you will make. Do not hire the first person who knocks on your door after a storm. These are often "storm chasers" with no local reputation. Search for established, local roofing companies with physical addresses. Check their reviews on Google and the Better Business Bureau. Verify they are licensed and insured in your state. Ask for proof of insurance. Look for manufacturers' certifications like GAF Master Elite or Owens Corning Platinum. A reputable contractor will offer a free, thorough inspection. They should provide a detailed written report with photos. This report will be your key tool when filing the claim.
Navigating the Insurance Claim Process: A Step-by-Step Guide
Filing a hail damage claim can feel complex. Breaking it down into clear steps makes it manageable. Your goal is to work with your insurance company, not against them. Understand that they have a process to follow. Your preparedness makes that process smoother for everyone. Start by reviewing your homeowner's insurance policy. Know your deductible amount and coverage limits. Most policies cover "sudden and accidental" damage like hail. Wear and tear or lack of maintenance is usually not covered. Call your insurance agent to start the claim. Have your policy number ready.
Filing the Claim: What to Say and What to Expect
When you call, be calm and factual. State that you had a hail storm on [specific date]. Explain that you have visible damage to your roof and possibly other exterior items. The insurance company will open a claim and assign you a claim number. Write this number down. They will also assign an insurance adjuster to inspect your property. The adjuster's job is to assess the damage and determine the insurance company's liability. Ask for the adjuster's name and contact information. Ask for an estimated timeline for the inspection. Schedule your roofing contractor to be present during the adjuster's inspection. This is a critical best practice.
The Insurance Adjuster Meeting: How to Prepare
The meeting with the insurance adjuster is the cornerstone of your claim. Your roofing contractor should be there as your advocate. They speak the technical language of roofs and repairs. Before the meeting, walk around your property with your contractor. Point out all the damage you have documented. Give your contractor a copy of your photos and notes. During the inspection, let your contractor do most of the talking. They can point out hail hits, granule loss, and functional damage. The adjuster will take their own measurements and photos. They will write an estimate for the repair or replacement cost. This is called the "scope of loss" or "claim estimate."
Understanding Your Insurance Estimate and Roofing Quotes
You will receive a detailed estimate from your insurance company. This document is very important. It lists all the items the insurance company agrees to pay for. It includes line items for materials, labor, and waste removal. It will use pricing from a software program like Xactimate. This software calculates regional costs for construction. Your roofing contractor will also provide you with a quote. You should compare the two documents carefully. They should be very similar in scope and price. If there are discrepancies, your contractor can help you address them with the insurance company.
Decoding Line Items: Depreciation and Recoverable Cash Value
Insurance estimates often include two key concepts: Actual Cash Value (ACV) and Replacement Cost Value (RCV). ACV is the value of your old roof, considering its age and wear. RCV is the full cost to replace it with a new, similar roof. Many policies pay the ACV first, minus your deductible. After the work is complete, they pay the "recoverable depreciation." This is the difference between ACV and RCV. You must complete the repairs to receive the full RCV payment. Your contractor and adjuster can explain how this works for your specific policy. Do not sign a contract with a roofer until you understand the payment schedule.
Supplementing the Claim: When Additional Damage is Found
Sometimes, hidden damage is discovered once work begins. Rotten decking (the wood under the shingles) is a common example. The adjuster's initial inspection cannot see beneath the surface. When your contractor removes the old shingles, they may find damaged plywood or OSB. This is a normal part of the process. Your contractor will document this new damage with photos. They will then submit a "supplement" to the insurance company. The supplement requests additional funds for the unforeseen repairs. Most insurance companies have a process for this. It should not delay your project significantly if handled properly.
Selecting Materials and Executing the Roof Replacement
Once your claim is approved, you choose materials. This is your opportunity to potentially upgrade your roof. You can use the insurance settlement to install better products. Consider impact-resistant shingles rated for hail. Class 4 shingles offer the highest impact resistance. They can lead to insurance premium discounts in many areas. Discuss options with your contractor. Look at samples and review warranty details. Manufacturers like GAF and Owens Corning have excellent product lines. Ensure all materials meet local building codes. Your contractor should pull the necessary permits for the job.
The Installation Process: What a Quality Job Looks Like
A proper roof installation follows specific steps. The old shingles and underlayment are completely removed. The roof deck is inspected and repaired. New drip edge metal is installed along the eaves. A waterproof underlayment, like ice and water shield, is applied in critical areas. Synthetic felt underlayment covers the rest of the deck. Starter shingles are installed along the eaves. The field shingles are then nailed in place with proper alignment. Flashing is installed around chimneys, vents, and walls. Ridge vents are installed for proper attic ventilation. The crew cleans the property thoroughly, using magnets to collect nails. A final inspection by the foreman ensures quality.
Final Inspections and Closing Out Your Claim
When the job is done, do a final walk-around with the project manager. Check the workmanship from the ground. Look for straight, even shingle lines. Ensure all old materials have been removed from your property. The contractor should provide you with documentation. This includes manufacturer warranties and proof of installation for any upgraded products. You will also need a final invoice from the roofer. Send this invoice to your insurance company to request your final depreciation payment. Keep all paperwork in a safe place. You may need it for future insurance inquiries or if you sell your home.
Frequently Asked Questions from Homeowners
How long do I have to file a hail damage claim?
Most insurance policies require you to file a claim within one year of the storm date. However, do not wait. File as soon as you suspect damage. Evidence deteriorates over time. Wind and rain can worsen initial damage. An immediate inspection gives you the clearest picture of what happened.
Will filing a claim make my insurance rates go up?
This depends on your insurance company and state regulations. A hail claim is typically considered an "act of God" or natural disaster. It is not the same as filing multiple claims for water leaks. One hail claim may not affect your premium. However, multiple claims in a short period might. Discuss this directly with your insurance agent for clarity.
Can I keep the insurance money and not repair the roof?
This is not advisable. The insurance money is intended to make your home whole again. If you do not repair the damage, you have a compromised roof. Future leaks could cause interior damage. Your insurance company may deny future claims related to the unrepaired roof. They could also choose not to renew your policy.
What if my insurance claim is denied?
First, ask for a detailed explanation in writing. You have the right to appeal the decision. You can request a re-inspection with your contractor present. You can also hire an independent, licensed public adjuster to review the case. As a last resort, you can file a complaint with your state's department of insurance.
Should I get multiple roofing estimates?
Yes, it is wise to get at least two or three estimates. This helps you understand the market rate for the work. However, compare the scope of work and materials, not just the bottom-line price. The cheapest quote may cut corners on materials or labor. Choose the contractor you trust most, not just the lowest bidder.
How long does a roof replacement take?
For an average single-family home, the tear-off and replacement typically takes 1 to 3 days. The timeline depends on the roof's size, complexity, and weather. Your contractor should give you a clear schedule. They will also coordinate any needed inspections with the city.
What is the best time of year to replace a roof?
Spring and fall often have the most stable, mild weather for roofing. However, a damaged roof needs immediate attention. Do not delay necessary repairs because of the season. Professional roofing crews work year-round and know how to handle various weather conditions safely.
Real Project Case Study: A Texas Homeowner's Experience
Last spring, a hailstorm hit a neighborhood in Kingwood, Texas. The hail was golf-ball sized. Mr. and Mrs. Johnson noticed granules in their gutters and dents on their siding. They called our company for an inspection. We found significant bruising on their 12-year-old asphalt roof. We helped them document the damage and file their claim. The insurance adjuster met us at the home. We walked the roof together and pointed out the functional damage. The initial estimate was for a full roof replacement. During the tear-off, we discovered three sheets of rotten decking from a previous, hidden leak. We immediately photographed it and submitted a supplement. The insurance company approved the extra $1,200 for decking repair within two days. The Johnsons chose to upgrade to Class 4 impact-resistant shingles. Their new roof was completed in two days. They provided the final invoice to their insurer and received their full replacement cost value. They now have a stronger roof and peace of mind.
Conclusion: Your Path Forward After Hail Damage
Dealing with hail damage is stressful. But with the right knowledge, you can manage the process effectively. Remember to act quickly, document everything, and partner with a reputable local contractor. Use your insurance claim as an opportunity to restore and even improve your home's protection. A new roof is a major investment in your property's value and safety. Do not settle for quick fixes or unqualified contractors. Take your time to make informed decisions. Your home deserves quality workmanship and durable materials. If you are in the Kingwood area and have questions after a storm, reach out to a trusted professional. We are here to help you navigate this challenge and secure your home for years to come.